Advanced Features of Mini Mouse Macro
Mini Mouse Macro isn’t just about recording and replaying macros, it’s a versatile automation tool with advanced features for creating dynamic and powerful workflows. This page provides an overview of advanced features and plugin integrations to help you unlock the full potential of Mini Mouse Macro.
Table of Contents
- Conditional Logic and Flow Control
- Advanced Examples with Mini Mouse Macro
- Example 1: Controlled Iteration Using Variables
- Example 2: Dynamic Pixel Color Detection
- Example 3: Mouse Interaction Using Variables
- Example 4: File Processing in a
FOR EACHLoop - Example 5: OCR
- Example 6: Nested Loops
- Example 7: Using Comments to Structure Code
- Example 8: Using Labels and GOTO for Error Handling
- Example 9: Working with Arrays and Indentation
- Example 10: Array Sorting and Clearing
- Example 11: Combining Labels, Comments, and Iteration
- Plugins
- Scripting Capabilities
- Advanced Playback Settings
- Remote Actions
- Future Advanced Features (Planned)
- Additional Resources
Conditional Logic and Flow Control
Mini Mouse Macro supports advanced conditional logic, allowing you to create dynamic macros that adapt based on runtime conditions.
For detailed information on flow control, see the Flow Guide.
- IF-ELSE Statements: Introduce decision-making into your macros.
- Example: Perform different actions based on the color of a pixel or the value of a variable.
- Loops: Repeat a set of instructions until a condition is met.
- Variables: Store data during execution and manipulate it for advanced logic flows.
Advanced Examples with Mini Mouse Macro
Below are advanced examples of Mini Mouse Macro syntax, derived from the internal documentation.
Example 1: Controlled Iteration Using Variables
Overview
This macro demonstrates using a FOR loop to iterate through a range of numbers. On each iteration, a message prompt displays the current value.
1 | FOR | I | = | 0 TO 5 | NEXT
   2 | RUN ACTION | MESSAGE PROMPT | Current Iteration: %I%::FOR Loop::1
3 | FOR | NEXT
Detailed Explanation
- Line 1: Starts a
FORloop, iterating from 0 to 5. - Line 2: Displays the current iteration number using the
%I%variable in a message prompt. - Line 3: Ends the
FORloop, moving back to the start for the next iteration if applicable.
Links
Example 2: Dynamic Pixel Color Detection
Overview
This macro evaluates the color of a specific pixel on the screen. If the pixel matches the defined RGB values, it displays a “matched” message; otherwise, it shows a “not matched” message.
1 | IF | PIXEL COLOR | Color [R=145, G=228, B=247]::At Location [X:942 Y:536] | IS THE SAME | THEN
   2 | RUN ACTION | MESSAGE PROMPT | Pixel Color Matched!::Matched::0
3 | IF | ELSE
   4 | RUN ACTION | MESSAGE PROMPT | Pixel Color Did Not Match
5 | IF | END IF
Detailed Explanation
- Line 1: Checks if the pixel at coordinates (942, 536) matches the specified RGB values (R=145, G=228, B=247).
- Line 2: Displays a success message if the colors match.
- Lines 3–4: Displays a failure message if the colors do not match.
- Line 5: Ends the conditional block.
Links
Example 3: Mouse Interaction Using Variables
Overview
This macro demonstrates the use of variables to dynamically control mouse movements and clicks. It defines position, delay, and click count variables, constructs a command string for mouse movement, and performs multiple clicks at a specified location with the defined delay between each click.
* | Define variables
1 | RUN ACTION | DEFINE INTEGER VARIABLE | XPosition::400
2 | RUN ACTION | DEFINE INTEGER VARIABLE | YPosition::300
* |  - variables can also be defined by their type without the 'DEFINE TYPE VARIABLE' keywords
3 | RUN ACTION | DELAY::50
4 | RUN ACTION | DEFINE INTEGER VARIABLE | CLICKS:100
* |  - the command at line 5 defines 'COMMAND' of type string
5 | RUN ACTION | COMMAND::%XPosition%-%YPosition%:%DELAY%
6 | RUN ACTION | MOUSE MOVEMENT | %COMMAND%
7 | RUN ACTION | MOUSE CLICK | Left Click at %XPosition% %YPosition% %CLICKS% times with %DELAY% ms delay
8 | RUN ACTION | MESSAGE PROMPT | Mouse Clicked at (%XPosition%, %YPosition%) %CLICKS% times and a dely of %DELAY% between each click::Action Complete::0
Detailed Explanation
- Line 1: Defines an integer variable
XPositionwith a value of400to represent the horizontal mouse position. - Line 2: Defines an integer variable
YPositionwith a value of300to represent the vertical mouse position. - Line 3: Introduces a delay variable
DELAYwith a value of50milliseconds. - Line 4: Defines another integer variable
CLICKSwith a value of100, representing the number of mouse clicks to perform. - Line 5: Constructs a string command
COMMANDusing the definedXPosition,YPosition, andDELAYvalues to facilitate mouse movement actions. - Line 6: Executes a mouse movement action based on the constructed
COMMAND. - Line 7: Executes a left mouse click action at the specified
XPositionandYPositioncoordinates, repeating the actionCLICKStimes with a delay ofDELAYmilliseconds between each click. - Line 8: Displays a message prompt summarizing the mouse click actions, including the position, number of clicks, and delay between each click.
Links
Example 4: File Processing in a FOR EACH Loop
Overview
This macro iterates through all files in the specified directory (C:\Macro\TX) and displays the name and path of each file in a message prompt. It is useful for performing actions on multiple files within a directory.
1 | FOR | EACH | FILE IN | C:\Macro\TX | DO
   2 | RUN ACTION | MESSAGE PROMPT | File Name: %FILE.NAME% at Path: %FILE.PATH%::File Details::0
3 | FOR | NEXT
Detailed Explanation
- Line 1: Starts a
FOR EACHloop that iterates through all files in the directoryC:\Macro\TX. The loop processes each file one by one. - Line 2: For each file, it executes a
RUN ACTIONcommand to display a message prompt. The message includes the file’s name (%FILE.NAME%) and its path (%FILE.PATH%) in the format “File Name: [File Name] at Path: [File Path].” - Line 3: Ends the
FOR EACHloop and moves to the next file in the directory until all files have been processed.
Links
Example 5: OCR
Overview
This macro demonstrates the use of the OCR (Optical Character Recognition) feature to detect text within an image file, evaluate the captured text, and perform actions based on the evaluation results. The macro first reads text from an image, evaluates whether it contains a specific phrase, and then outputs the captured text to a file.
* | *******
* | OCR Example
* | *******
1 | IF NOT | OCR | From image D:\File\pics\ocr\example.png::Lang eng - English::To string OCR | TEXT CONTAINS | Welcome | THEN
   2 | RUN ACTION | MESSAGE PROMPT | Welcome Text Found in Image::Success::0
3 | IF | ELSE
   4 | RUN ACTION | MESSAGE PROMPT | Welcome Text IF Not Found::Failure::0
5 | IF | END IF
6 | RUN ACTION | OUTPUT TO FILE | D:\File\ocr_output.txt::APPEND_NEWLINE::%OCR%
Detailed Explanation
Lines 1–5: - Line 1 uses the
IFcondition to read text from the image fileexample.pnglocated atD:\File\pics\ocr. It specifies the language as English (Lang eng - English) and stores the text in the variable%OCR%. The condition checks if the captured text contains the word “Welcome”. - Line 2 displays a success message prompt if the condition is true. - Lines 3–4 handle theELSEbranch, displaying a failure message if the text does not contain “Welcome”. - Line 5 ends theIFblock.Line 6: Outputs the captured text stored in
%OCR%to the fileocr_output.txtatD:\File, appending the text with a new line if additional entries are made.
This macro illustrates how OCR can be used to process text from images and evaluate it dynamically to trigger appropriate actions.
Links
Example 6: Nested Loops
Overview
This macro demonstrates the use of nested FOR loops to iterate through two ranges of numbers. It displays the current iteration values of both loops in a message prompt, making it useful for tasks that require multi-level iteration or comparisons.
* | *******
* | Nested Loops Example
* | *******
* |
1 | RUN ACTION | DEFINE INTEGER VARIABLE | OuterCounter::0
2 | RUN ACTION | DEFINE INTEGER VARIABLE | InnerCounter::0
* |
3 | FOR | I | = | 0 TO 5 | NEXT
   4 | FOR | J | = | 0 TO 3 | NEXT
      5 | RUN ACTION | MESSAGE PROMPT | Outer Loop: %I%, Inner Loop: %J%::Loop Details::0
   6 | FOR | NEXT
7 | FOR | NEXT
* | *******
Detailed Explanation
Lines 1–2: - Line 1 defines
OuterCounter, an integer variable for the outer loop counter. - Line 2 definesInnerCounter, an integer variable for the inner loop counter.Lines 3–7: - Line 3 starts the outer
FORloop, iterating from 0 to 5. - Line 4 starts the innerFORloop, iterating from 0 to 3 for each iteration of the outer loop. - Line 5 displays a message prompt showing the current iteration values of bothI(outer loop) andJ(inner loop). - Line 6 ends the innerFORloop, moving back to the start of the inner loop for the next iteration if applicable. - Line 7 ends the outerFORloop, moving back to the start of the outer loop for the next iteration.
This macro is a powerful example of how nested loops can be used to handle complex iteration scenarios, such as processing multi-dimensional data or generating combinations.
Links
Example 7: Using Comments to Structure Code
Overview
This macro demonstrates how to use comments to structure and label different sections of your macro. Comments improve readability and make your code easier to maintain.
* | DEFINE VARIABLES
1 | RUN ACTION | DEFINE INTEGER VARIABLE | %COUNTER%::0
2 | RUN ACTION | DEFINE ARRAY VARIABLE | %ARRAY%::one
3 | RUN ACTION | DEFINE ARRAY VARIABLE | %ARRAY%::two
4 | RUN ACTION | DEFINE ARRAY VARIABLE | %ARRAY%::three

* | ITERATE THROUGH ARRAY
5 | FOR | EACH | I IN | %ARRAY% | NEXT
   6 | RUN ACTION | MESSAGE PROMPT | Array Element: %I%'\n'Array Value:      %ARRAY%I%%::Element %COUNTER%::1::OK
   7 | RUN ACTION | DEFINE INTEGER VARIABLE | COUNTER::+1
8 | FOR | NEXT

* | END MACRO
9 | RUN ACTION | MESSAGE PROMPT | Macro Complete::Done::1
Detailed Explanation
- Lines 1–4: Defines an integer variable
COUNTERand populates an array%ARRAY%with three elements: “one,” “two,” and “three.” - Lines 5–8: Iterates through each element in
%ARRAY%, displaying a message prompt for each element and incrementingCOUNTERafter each iteration. - Line 9: Displays a final message indicating the macro is complete.
Links
- DEFINE INTEGER VARIABLE Action
- DEFINE ARRAY VARIABLE Action
- FOR EACH Loop condition
- MESSAGE PROMPT Action
- Variables Guide - Arrays
- Variables Guide - Integer
Example 8: Using Labels and GOTO for Error Handling
Overview
This macro demonstrates how to use labels and the GOTO action to implement error handling. It ensures the user enters a valid value greater than zero.
* | START
1 | RUN ACTION | DEFINE INTEGER VARIABLE | %VALUE%::0
2 | RUN ACTION | INPUT BOX | Enter a value greater than zero::::VALUE
3 | IF | INTEGER VARIABLE | %VALUE% | <= | 0 | THEN
   4 | RUN ACTION | MESSAGE PROMPT | Value must be greater than zero. Try again!::::1
   5 | RUN ACTION | GOTO MACRO LINE | START
6 | IF | END IF

* | SUCCESS
7 | RUN ACTION | MESSAGE PROMPT | Valid value entered: %VALUE%::::1
Detailed Explanation
- Lines 1–2: Prompts the user to enter a value and stores it in
%VALUE%. - Lines 3–6: Checks if the entered value is less than or equal to zero. If so, displays an error message and uses
GOTOto loop back to theSTARTlabel. - Line 7: If the value is valid, displays a success message with the entered value.
Links
- DEFINE INTEGER VARIABLE Action
- INPUT BOX Action
- IF-ELSE Statements
- MESSAGE PROMPT Action
- Variables Guide - Integer
Example 9: Working with Arrays and Indentation
Overview
This macro demonstrates defining an array, reversing its order, and iterating through its elements with comments and proper indentation.
* | *******
* | DEFINE ARRAY
* | *******
   1 | RUN ACTION | DEFINE ARRAY VARIABLE | %COLORS%::red
   2 | RUN ACTION | DEFINE ARRAY VARIABLE | %COLORS%::green
   3 | RUN ACTION | DEFINE ARRAY VARIABLE | %COLORS%::blue

* | *******
* | REVERSE ARRAY
* | *******
   4 | RUN ACTION | DEFINE ARRAY VARIABLE | %COLORS%.reverse
   5 | RUN ACTION | MESSAGE PROMPT | Reversed Array::%COLORS%::1

* | *******
* | ITERATE ARRAY
* | *******
   6 | FOR | EACH | COLOR IN | %COLORS% | NEXT
      7 | RUN ACTION | MESSAGE PROMPT | Color: %COLOR%::::1
   8 | FOR | NEXT
Detailed Explanation
- Lines 1–3: Defines an array
%COLORS%with three elements: “red,” “green,” and “blue.” - Lines 4–5: Reverses the order of the array and displays the reversed contents in a message prompt.
- Lines 6–8: Iterates over each element in
%COLORS%and displays each color using a message prompt.
Links
Example 10: Array Sorting and Clearing
Overview
This macro demonstrates sorting an array alphabetically and clearing its contents afterward.
* | *******
* | DEFINE AND SORT ARRAY
* | *******
   1 | RUN ACTION | DEFINE ARRAY VARIABLE | %NAMES%::Zebra
   2 | RUN ACTION | DEFINE ARRAY VARIABLE | %NAMES%::Apple
   3 | RUN ACTION | DEFINE ARRAY VARIABLE | %NAMES%::Monkey
   4 | RUN ACTION | DEFINE ARRAY VARIABLE | %NAMES%.sort
   5 | RUN ACTION | MESSAGE PROMPT | Sorted Names::%NAMES%::1

* | *******
* | CLEAR ARRAY
* | *******
   6 | RUN ACTION | DEFINE ARRAY VARIABLE | %NAMES%.clear
   7 | RUN ACTION | MESSAGE PROMPT | Array Cleared!::Done::1
Detailed Explanation
- Lines 1–3: Defines an array
%NAMES%with three elements: “Zebra,” “Apple,” and “Monkey.” - Line 4: Sorts the array in alphabetical order.
- Line 5: Displays the sorted array in a message prompt.
- Lines 6–7: Clears all elements from the array and displays a confirmation message.
Links
Example 11: Combining Labels, Comments, and Iteration
Overview
This macro defines an array of numbers, iterates through them, and doubles each value while displaying the result.
* | *******
* | DEFINE NUMBERS ARRAY
* | *******
   1 | RUN ACTION | DEFINE ARRAY VARIABLE | %NUMBERS%::1
   2 | RUN ACTION | DEFINE ARRAY VARIABLE | %NUMBERS%::2
   3 | RUN ACTION | DEFINE ARRAY VARIABLE | %NUMBERS%::3

* | *******
* | DOUBLE EACH NUMBER
* | *******
   4 | FOR | EACH | NUMBER IN | %NUMBERS% | NEXT
      5 | RUN ACTION | DEFINE INTEGER VARIABLE | %NUMBER%::*2
      6 | RUN ACTION | MESSAGE PROMPT | Doubled Value: %NUMBER%
   7 | FOR | NEXT

* | *******
* | END
* | *******
   8 | RUN ACTION | MESSAGE PROMPT | All Values Doubled::Done::1
Detailed Explanation
- Lines 1–3: Defines an array
%NUMBERS%with three numbers: 1, 2, and 3. - Lines 4–7: Iterates over each number in the array, doubles its value, and displays the result in a message prompt.
- Line 8: Displays a final message indicating all values have been doubled.
For more details, see the Conditions Guide.
Links
- DEFINE ARRAY VARIABLE Action
- DEFINE INTEGER VARIABLE Action
- FOR EACH Loop condition
- MESSAGE PROMPT Action
- Variables Guide - Arrays
- Variables Guide - Integer
Plugins
Extend the functionality of Mini Mouse Macro with plugins! Plugins provide specialized capabilities to enhance your macros.
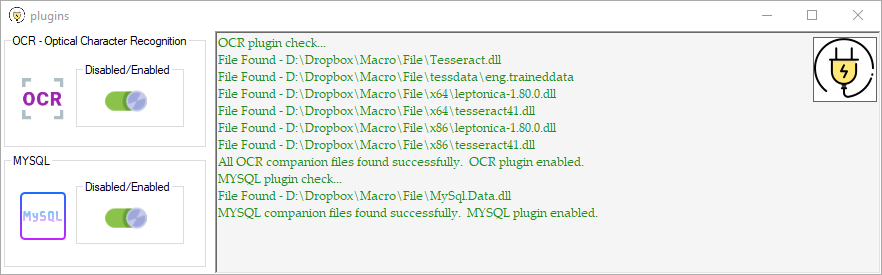
Plugins tool.
Available Plugins
- OCR Plugin Extract text from images and use it in your macros. Perfect for automation tasks involving text recognition.
- Example: Automate data extraction from screenshots.
- MySQL Plugin Connect to a MySQL database to query, insert, or update data dynamically during macro execution. - Example: Populate forms with real-time data from a database.
How to Install Plugins
- Download the desired plugin from the Plugins Page.
- Copy the plugin file to the
pluginsdirectory where Mini Mouse Macro is located. - Restart Mini Mouse Macro to enable the plugin.
For a step-by-step guide on installation, see the Plugins Installation page.
Scripting Capabilities
For advanced users, Mini Mouse Macro supports scripting and integration with other programming tools:
- Custom Scripts: Write custom commands in supported scripting languages to perform advanced tasks.
- External Tools: Integrate with external tools and scripts to extend the functionality of Mini Mouse Macro.
- Web Automation: Automate interactions with web browsers, including form filling and data scraping.
- API Integrations: Connect Mini Mouse Macro with external applications and APIs for real-time data interaction.
Advanced Playback Settings
Enhance macro performance with customizable playback settings:
- Custom Delays: Introduce delays between actions to better mimic human input or handle system latency.
- Error Handling: Define what happens when an action fails during playback (e.g., retry, skip, or log errors).
- Multiple Macro Execution: Run multiple macros simultaneously for complex workflows.
Remote Actions
The REMOTE action in Mini Mouse Macro enables communication and control between different instances of Mini Mouse Macro running on separate machines across a network. This allows you to create distributed automation workflows, where one instance of MMM can trigger actions, load macros, or send commands to other MMM instances.
See the Actions - Remote page for detailed information on using the REMOTE action.
How It Works
- Client-Server Model: The
REMOTEaction operates on a client-server model. One instance of MMM acts as a client, sending commands, while another instance acts as a server, receiving and executing those commands. - Network Communication: Communication between MMM instances occurs over the network using TCP/IP sockets.
- Listening Port: The server instance must be configured to listen on a specific IP address and port for incoming commands. The default port is 41414.
- Remote Address: The client instance needs to know the IP address (or hostname) and port of the server instance to send commands.
- Command Types: The
REMOTEaction supports three primary commands:SEND: Sends a specific command to a remote MMM instance.SET: Configures local remote settings on the client instance, such as the remote IP and port.CLOSE: Closes the listening socket on the server instance, preventing it from receiving further commands.
- Security: The communication between MMM instances is not encrypted. It’s crucial to use this feature only on trusted networks and avoid exposing it to the wider internet.
- Firewall Configuration: The server instance must be allowed through the local firewall to accept incoming connections.
Parameters
The parameters for the REMOTE action depend on the specific command being used (SEND, SET, or CLOSE).
SEND Parameters:
- Remote Address: The IP address (or hostname) and port of the remote MMM instance, separated by a colon (e.g.,
192.168.1.53:41414,WIN10_host2.local:41414). - Command: The command to send to the remote instance. Common commands include:
Macro Load [File Path]: Loads a macro file on the remote instance.Macro play start: Starts the currently loaded macro on the remote instance.Macro play stop: Stops the currently running macro on the remote instance.Macro play pause: Pauses the currently running macro on the remote instance.Macro play resume: Resumes a paused macro on the remote instance.- Any other valid MMM command that you want to execute remotely.
- SET Parameters:
- RemoteIP: Sets the IP address of a remote peer to connect to.
- Example:
SET RemoteIP 192.168.1.50orSET RemoteIP WIN10_host2.local
- Example:
- RemotePort: Sets the port to connect to on the remote peer.
- Example:
SET RemotePort 41414
- Example:
- RemoteIP: Sets the IP address of a remote peer to connect to.
- CLOSE Parameters:
- The
CLOSEcommand does not take any parameters.
- The
Links
Examples
Sending Commands to a Remote Instance
1 | RUN ACTION | REMOTE | Send 192.168.1.53:41414 Macro Load D:\mmm\MyMacro.mmmacro
2 | RUN ACTION | REMOTE | Send 192.168.1.53:41414 Macro play start
3 | RUN ACTION | WAIT SECONDS | 60
4 | RUN ACTION | REMOTE | Send 192.168.1.53:41414 Macro play stop
Explanation
- This macro sends commands to a remote MMM instance running at IP address
192.168.1.53and listening on port41414. - Line 1:
REMOTE | Send 192.168.1.53:41414 Macro Load D:\mmm\MyMacro.mmmacrosends a command to load the macro fileD:\mmm\MyMacro.mmmacroon the remote instance. - Line 2:
REMOTE | Send 192.168.1.53:41414 Macro play startsends a command to start the loaded macro on the remote instance. - Line 3:
WAIT SECONDS | 60pauses the local macro for 60 seconds, allowing the remote macro to run. - Line 4:
REMOTE | Send 192.168.1.53:41414 Macro play stopsends a command to stop the running macro on the remote instance.
Using SET to Configure Remote Address and Port
1 | RUN ACTION | REMOTE | SET RemoteIP WIN10_host2.local
2 | RUN ACTION | REMOTE | SET RemotePort 41414
3 | RUN ACTION | REMOTE | SEND Macro play start
Explanation
- This macro configures the remote address and port using the
SETcommand and then sends a command to the remote instance. - Line 1:
REMOTE | SET RemoteIP WIN10_host2.localsets the remote IP address toWIN10_host2.local(a hostname). - Line 2:
REMOTE | SET RemotePort 41414sets the remote port to41414. - Line 3:
REMOTE | SEND Macro play startsends the command “Macro play start” to the remote instance specified by the previously setRemoteIPandRemotePort.
Closing the Remote Listener
1 | RUN ACTION | REMOTE | CLOSE
Explanation
- This line closes the local listening socket, preventing the MMM instance from receiving any further remote commands until the listener is manually restarted from the “Settings - Remote” page.
Important Notes
- Enable Remote Connections: To send and receive remote commands, you must enable “Enable Remote Connections” in the “Remote Connections” settings of Mini Mouse Macro.
- Listening IP:PORT: Configure the server instance to listen on a specific IP address and port.
0.0.0.0listens on all available interfaces. - Security Risks: Remote communication is not encrypted. Use this feature only on trusted networks and never expose it to the public internet.
- Connection Whitelist: The connection whitelist can provide a limited level of security by restricting connections to specific IP addresses or hostnames. However, it does not protect against IP spoofing.
- Firewall: Ensure that the server instance is allowed through the firewall to receive incoming connections on the specified port.
- Remote Tool: The Remote Tool within Mini Mouse Macro provides a graphical interface for sending commands and managing remote connections.
Future Advanced Features (Planned)
This section is a work in progress. Here are some ideas under consideration:
- Web Interface: Control macros remotely through a web interface for cross-device automation.
- AI Integration: Utilize machine learning models for smarter automation, such as recognizing patterns or predicting actions.
- Image Recognition: Incorporate advanced image matching techniques to trigger actions based on screen content.
Have ideas for new features? Contribute your suggestions on the Community Forum!
Additional Resources
- Flow Guide: Learn how to structure your macros for optimal performance.
- Objects Guide: Explore the use of objects for advanced automation tasks.
- Operators Guide: Master the operators used in conditions and expressions.
- Variables Guide: Understand how to work with variables in Mini Mouse Macro.
- Actions Guide: Discover the full range of actions available in Mini Mouse Macro.
- Plugins Overview: Explore the full list of available plugins.
- Forum Threads: Discover community-shared advanced use cases.
- Image Archive : Browse screenshots and images related to Mini Mouse Macro.
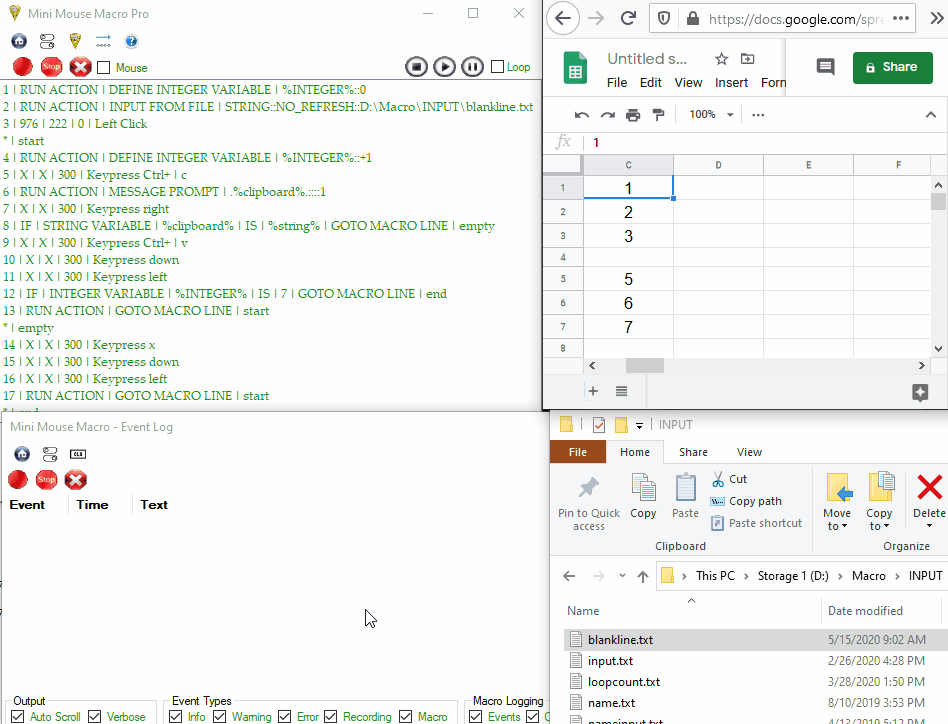
A demo macro with several advanced features.
This page will continue to evolve as we introduce new features and expand on current capabilities. Stay tuned for updates!