Actions in Mini Mouse Macro
Actions define the tasks or operations performed in your macros. These are the building blocks that enable Mini Mouse Macro to interact with the system, manipulate data, and control flow.
Table of Contents
- ADD MACRO FROM FILE
- ADD MACRO FROM URL
- CLEAR
- COMPRESS
- CONTINUE
- COPY TO CLIPBOARD
- DEBUG
- DECRYPT FILE (AES)
- DECRYPT FOLDER (AES)
- DEFINE ARRAY VARIABLE
- DEFINE BOOLEAN VARIABLE
- DEFINE DECIMAL VARIABLE
- DEFINE INTEGER VARIABLE
- DEFINE PIXEL RANGE VARIABLE
- DEFINE STRING VARIABLE
- DRAW
- DOWNLOAD FROM URI
- ENCRYPT FILE (AES)
- ENCRYPT FOLDER (AES)
- EXIT
- FILE COPY
- FILE CREATE
- FILE DELETE
- FILE HASH
- FILE MOVE
- GOTO MACRO LINE
- INPUT BOX
- INPUT FROM FILE
- KEYPRESS
- KEYPRESS FROM FILE
- KILL PROCESS ID
- KILL PROCESS NAME
- LOAD MACRO
- LOAD MACRO FROM URL
- LOG OFF COMPUTER
- MESSAGE PROMPT
- MOUSE CLICK
- MOUSE MOVEMENT
- MOUSE TO IMAGE
- MYSQL
- OCR
- OUTPUT TO FILE
- PASTE FROM CLIPBOARD
- PAUSE
- PIXEL CAPTURE
- PIXEL RANGE SAVE
- PLAY SYSTEM SOUND
- REMOTE
- RESTART COMPUTER
- RUN MACRO INLINE
- RUN PROGRAM
- RUN VIA CMD /C
- RUN VIA CMD /K
- SELECT WINDOW BY NAME
- SELECT WINDOW BY PROCESS ID
- SEND EMAIL
- SEND UDP PACKET STRING
- SET TITLE
- SHUTDOWN COMPUTER
- STOP
- TEXT TO SPEECH
- WAIT MILLISECONDS
- WAIT SECONDS
- WAIT MINUTES
- WAIT HOURS
ADD MACRO FROM FILE
Purpose
The ADD MACRO FROM FILE action adds macro lines from a specified file into the currently running macro. This is useful for dynamically extending macro functionality during execution.
How It Works
- The action stops the current macro, adds all lines from the specified file to the end of the current macro, and then resumes execution from the next line after the
ADD MACRO FROM FILEaction. - It is essential to ensure that the macro lines in the file being added are correctly ordered.
- Use the
Relist Rowsfeature from the right-click menu to sort line numbers before starting the macro.
Parameters
- File Path: The full path to the
.mmmacrofile to be added.
Examples
Example: Add a Macro If File Exists
* | Start of macro: Check if a supplementary macro file exists and add it dynamically.

* | Step 1: Check for the existence of a macro file.
1 | IF | FILE | C:\Macros\SupplementaryMacro.mmmacro | EXIST | THEN
    * | If the file exists, add its contents to the current macro.
    2 | RUN ACTION | ADD MACRO FROM FILE | C:\Macros\SupplementaryMacro.mmmacro
    3 | RUN ACTION | MESSAGE PROMPT | Supplementary macro added successfully.\nContinuing execution...::Macro Added::0::Information
4 | IF | ELSE
    * | If the file does not exist, notify the user.
    5 | RUN ACTION | MESSAGE PROMPT | Supplementary macro file not found.\nExecution will continue without it.::File Not Found::0::Exclamation
    6 | RUN ACTION | EXIT
7 | IF | END IF
Explanation - Add a Macro If File Exists
- Line 1: Checks if the file
C:\Macros\SupplementaryMacro.mmmacroexists. - Line 2: If the file exists, appends all macro lines from
SupplementaryMacro.mmmacroto the current macro. - Line 3: Displays an information-style message box confirming that the supplementary macro has been added.
- Line 4: Begins the
ELSEblock for when the file does not exist. - Line 5: Displays an exclamation-style message box notifying the user that the supplementary macro file was not found.
- Line 6: Exits the macro execution.
- Line 7: Ends the
IFblock.
ADD MACRO FROM URL
Purpose
The ADD MACRO FROM URL action appends macro lines from a specified URL into the currently running macro. This is useful for dynamically extending macro functionality from online sources.
How It Works
- The action fetches macro lines from the specified URL and appends them to the end of the current macro.
- After appending, the macro resumes execution from the next line after the
ADD MACRO FROM URLaction. - The URL must start with
http://orhttps://.
Add Macro from File and Add Macro from URL.
Parameters
- URL: The full URL of the macro file to be appended. This can include raw text URLs or
.mmmacrofile URLs.
Examples
Example: Add a Macro from a File URL
1 | RUN ACTION | ADD MACRO FROM URL | https://minimousemacro.com/macro/test_macro.mmmacro
Example: Add a Macro from Raw Text URL
1 | RUN ACTION | ADD MACRO FROM URL | https://pastebin.com/raw/Qii5ZbVa
Explanation - Example Text
- File URL Example: Loads and appends the macro lines from the file at
https://minimousemacro.com/macro/test_macro.mmmacro. - Raw Text Example: Loads and appends the macro lines from raw text data at
https://pastebin.com/raw/Qii5ZbVa.
CLEAR
Purpose
The CLEAR action is used for macro flow control, allowing users to immediately stop and clear the current macro. This action is critical for scenarios where an abrupt termination of operations is required.
How It Works
- The
CLEARaction halts all macro operations and clears the currently running macro. - It can be triggered directly or conditionally, depending on the macro’s flow.
- After execution, no further lines in the macro are processed.
Parameters
- None: This action does not require additional parameters.
Examples
Example: Clear a Macro Based on a File Condition
1 | IF | FILE | C:\MMM\StopSignal.txt | EXIST | CLEAR
Explanation - Example Text
- Line 1: Checks if the file
C:\MMM\StopSignal.txtexists.- If the file exists, the macro is cleared and stops execution.
- If the file does not exist, the macro continues without interruption.
Example: Clear Immediately
1 | RUN ACTION | CLEAR
Explanation - Example Text
- Line 1: Immediately clears and stops the current macro without evaluating any conditions.
Example: Conditional Macro Control
* | Start of macro: Monitor server status and take actions based on critical conditions.

* | Step 1: Check if a stop signal file exists.
1 | IF | FILE | C:\Server\StopSignal.txt | EXIST | THEN
    * | If the stop signal file exists, clear the macro and halt execution immediately.
    2 | RUN ACTION | MESSAGE PROMPT | Emergency stop triggered by StopSignal.txt.\nHalting all operations.::Critical Error::0::Critical
    3 | RUN ACTION | CLEAR
4 | IF | END IF

* | Step 2: Monitor server health by pinging its IP address.
5 | IF | NETWORK HOST PING REPLY | 192.168.1.100 | UNSUCCESSFUL | THEN
    * | If the server is unreachable, log the failure and clear the macro.
    6 | RUN ACTION | OUTPUT TO FILE | C:\Logs\ServerStatus.txt::APPEND_NEWLINE::Server unreachable at %TIME% on %DATE%.
    7 | RUN ACTION | MESSAGE PROMPT | Server at 192.168.1.100 is unreachable.\nHalting operations.::Server Error::0::Critical
    8 | RUN ACTION | CLEAR
9 | IF | END IF

* | End of macro.
Explanation - Example Text
- Line 1: Checks if the file
C:\Server\StopSignal.txtexists. - Line 2: Displays a critical-style message box indicating an emergency stop was triggered.
- Line 3: Clears the macro immediately, halting all operations.
Line 4: Ends the block for checking the stop signal file.
- Line 5: Checks if the server with IP address
192.168.1.100is unreachable by evaluating the ping response. - Line 6: Logs the server failure to
ServerStatus.txtif the ping response is unsuccessful. - Line 7: Displays a critical-style message box notifying the user of the server failure.
- Line 8: Clears the macro, halting all further operations.
- Line 9: Ends the block for monitoring server health.
COMPRESS
Purpose
The COMPRESS action is used to compress files and folders into a specified archive format. This action is ideal for automating tasks involving file backups, packaging, or data archiving.
How It Works
- The
COMPRESSaction takes a source file or folder and creates an archive file in a specified destination. - Supported formats typically include
.zipor.7z, depending on system capabilities and plugins. - Additional parameters allow customization, such as compression level or overwriting existing archives.
Parameters
- Source: The file or folder to compress.
- Destination: The path and name of the output archive file.
- Options (Optional): Additional flags such as compression level or overwrite behavior.
Examples
Example: Compress a Folder into a ZIP Archive
1 | RUN ACTION | COMPRESS | C:\Documents\Project | C:\Backups\ProjectBackup.zip
Explanation - Example Text
- Line 1: Compresses the folder
C:\Documents\Projectinto a ZIP archive namedProjectBackup.ziplocated inC:\Backups.
Example: Compress with Overwrite Option
1 | RUN ACTION | COMPRESS | C:\Logs | C:\Archives\LogsArchive.zip::OVERWRITE
Explanation - Example Text
- Line 1: Compresses the folder
C:\LogsintoLogsArchive.ziplocated inC:\Archives.- If an archive with the same name already exists, it will be overwritten.
Example: Compress Multiple Files
* | Start of macro: Archive and compress log files dynamically.

* | Step 1: Define the log directory and archive file path.
1 | RUN ACTION | DEFINE STRING VARIABLE | %LOG_DIR%::C:\Logs
2 | RUN ACTION | DEFINE STRING VARIABLE | %ARCHIVE_PATH%::C:\Archives\Logs_%DATE_YEAR%-%DATE_MM%-%DATE_DD%.zip

* | Step 2: Check if the log directory exists.
3 | IF | FILE | %LOG_DIR% | EXIST | THEN
    * | If the log directory exists, compress its contents into the archive file.
    4 | RUN ACTION | COMPRESS | %LOG_DIR%::%ARCHIVE_PATH%::CREATE
    5 | RUN ACTION | MESSAGE PROMPT | Log files have been compressed to %ARCHIVE_PATH%.\nOperation completed successfully.::Compression Success::0::Information
6 | IF | ELSE
    * | If the log directory does not exist, notify the user.
    7 | RUN ACTION | MESSAGE PROMPT | Log directory %LOG_DIR% not found.\nNo action was performed.::Directory Not Found::0::Exclamation
8 | IF | END IF

* | End of macro.
Explanation - Example Text
- Line 1: Defines the string variable
%LOG_DIR%with the path to the log directory (C:\Logs). - Line 2: Defines the string variable
%ARCHIVE_PATH%with the path and name of the archive file, dynamically including the current date. - Line 3: Checks if the log directory exists.
- Line 4: Compresses the contents of
%LOG_DIR%into the archive file at%ARCHIVE_PATH%if the directory exists. - Line 5: Displays an information-style message box confirming successful compression.
- Line 6: Begins the
ELSEblock for when the log directory does not exist. - Line 7: Displays an exclamation-style message box notifying the user that the log directory was not found.
- Line 8: Ends the block for checking the log directory’s existence.
CONTINUE
Purpose
The CONTINUE action is used for macro flow control. It allows the macro to proceed to the next line once a specified condition is met. This is useful for pausing execution until a condition is satisfied.
How It Works
- Evaluates a condition in a loop or one-time execution.
- Proceeds to the next macro line only when the condition evaluates as true.
- Can work with various object conditions such as files, pixel colors, or strings.
Parameters
- None: This action does not require additional parameters.
Examples
Example: Continue Based on File Existence
1 | IF | FILE | C:\rescue.log | EXIST | CONTINUE
Explanation - Example Text
- Line 1: Checks if the file
C:\rescue.logexists.- If the file exists, the macro continues execution.
- If the file does not exist, the macro waits until the condition is met.
Example: Continue Based on Pixel Change
1 | IF | PIXEL COLOR | At Location [X:2768 Y:602] | CHANGES::2::0::200 | CONTINUE
Explanation - Example Text
- Line 1: Monitors the pixel color at location
X=2768, Y=602.- Continues the macro if the pixel changes twice, with no timeout and a delay of 200 milliseconds between changes.
Example: Continue Based on File Content
1 | IF | FILE | C:\rescue.log | FILE CONTAINS STRING | Hello | CONTINUE
Explanation - Example Text
- Line 1: Checks if the file
C:\rescue.logcontains the stringHello.- The macro continues execution only when the string
Hellois found within the file.
- The macro continues execution only when the string
COPY TO CLIPBOARD
Purpose
The COPY TO CLIPBOARD action allows text or variable content to be copied to the system clipboard. This is useful for automating data transfer or preparing content for pasting into other applications.
How It Works
- The specified text or variable value is copied to the clipboard.
- Can be used with other actions to dynamically generate or manipulate content before copying.
- Enables seamless integration with external applications or workflows requiring clipboard input.
Parameters
- Text/Variable: The content to be copied to the clipboard. This can be static text or a variable reference.
Examples
Example: Copy Static Text to Clipboard
1 | RUN ACTION | COPY TO CLIPBOARD | "Hello, world!"
Explanation - Example Text
- Line 1: Copies the static text
Hello, world!to the clipboard.
Example: Copy a Variable to Clipboard
1 | RUN ACTION | DEFINE STRING VARIABLE | %MESSAGE%::Hello from MMM
2 | RUN ACTION | COPY TO CLIPBOARD | %MESSAGE%
Explanation - Example Text
- Line 1: Defines a string variable
%MESSAGE%with the valueHello from MMM. - Line 2: Copies the value of
%MESSAGE%to the clipboard.
Example: Embed Clipboard Automation in a Macro
* | Start of macro: Copy text to clipboard and paste into a selected window.

* | Step 1: Define the text to copy.
1 | RUN ACTION | DEFINE STRING VARIABLE | %TEXT_TO_COPY%::Hello, this is a test message!

* | Step 2: Select the Notepad window by its title.
2 | RUN ACTION | SELECT WINDOW BY NAME | Untitled - Notepad

* | Step 3: Copy the text to the clipboard.
3 | RUN ACTION | COPY TO CLIPBOARD | %TEXT_TO_COPY%

* | Step 4: Paste the text into the selected window.
4 | RUN ACTION | PASTE FROM CLIPBOARD

* | End of macro.
Explanation - Example Text
- Line 1: Defines a string variable
%TEXT_TO_COPY%with the text “Hello, this is a test message!”. - Line 2: Selects the Notepad window titled “Untitled - Notepad” to make it the active window.
- Line 3: Copies the value of
%TEXT_TO_COPY%to the clipboard using the COPY TO CLIPBOARD action. - Line 4: Pastes the content of the clipboard into the active Notepad window using the PASTE FROM CLIPBOARD action.
This example demonstrates a macro that selects an open Notepad document, copies its content to a variable, surrounds the text with backticks, and pastes the updated text back into Notepad after clearing it.
DEBUG
Purpose
The DEBUG action in Mini Mouse Macro (MMM) serves as a powerful toolkit for controlling and modifying various aspects of macro behavior, both during the execution of a macro and in preparation for recording. It offers a comprehensive suite of tools that empower users to fine-tune macro settings, manage variables, customize playback options, manipulate logging behavior, and enhance the visual aspects of macro execution.
The DEBUG action is essential for debugging, optimizing, and customizing macros to meet specific requirements.
How It Works
- Provides a mechanism to interact with and modify a wide array of settings within Mini Mouse Macro.
- Enables granular control over macro execution, playback, logging, visualization, and variable management.
- Offers options to enable/disable features, adjust parameters, set colors, manage variables, control timing, and customize the user interface.
- Enhances the debugging process by providing detailed event logging, visual cues like paint paths, and step-by-step execution.
- Facilitates troubleshooting and optimization through precise control over macro behavior and the ability to inspect variables and internal states.
Here’s the available
DEBUGoptions:
Event Log On/Off
Purpose
This feature allows you to toggle the Mini Mouse Macro (MMM) event log on or off. The event log is a crucial tool for understanding macro execution, as it records a detailed history of actions performed during a macro’s run. By selectively enabling and disabling the event log, you can focus on capturing specific sections of a macro’s activity, reducing clutter and making it easier to identify issues or areas of interest.
Parameters
- ON: Activates the event log, causing MMM to record all subsequent macro actions.
- OFF: Deactivates the event log, preventing further recording of macro events.
Example
1 | RUN ACTION | DEBUG | EVENT LOG ON
2 | RUN ACTION | ENCRYPT FOLDER (AES) | D:\Macro::[PROMPT_AT_RUNTIME]::SINGLE_DIR::KEEP_ORIGINAL
3 | RUN ACTION | DEBUG | EVENT LOG OFF
Explanation
- Line 1:
DEBUG | EVENT LOG ON: This command initiates the event logging process. From this point onward, all actions executed by the macro will be meticulously documented in the MMM event log. - Line 2:
ENCRYPT FOLDER (AES) | D:\Macro::[PROMPT_AT_RUNTIME]::SINGLE_DIR::KEEP_ORIGINAL: This line performs a folder encryption operation. The parameters specify the encryption algorithm (AES), the target folder (D:\Macro), and other options, including prompting the user for input at runtime ([PROMPT_AT_RUNTIME]), encrypting only the specified directory (SINGLE_DIR), and preserving the original files (KEEP_ORIGINAL). - Line 3:
DEBUG | EVENT LOG OFF: This command halts the event logging process. Subsequent actions will not be recorded in the event log until it is re-enabled.
Global Loop Start/Stop
Purpose
The GLOBAL LOOP START/STOP feature provides control over the global looping behavior of a macro. Global looping, when enabled, causes the entire macro to repeat indefinitely until manually stopped or until a GLOBAL LOOP STOP command is encountered within the macro itself. This is useful for creating macros that need to run continuously or for a specific number of iterations determined by other conditions within the macro.
Parameters
- START: Enables global looping for the macro.
- STOP: Disables global looping, causing the macro to terminate after the current iteration completes.
Example
1 | RUN ACTION | DEBUG | GLOBAL LOOP START
2 | IF | INTEGER VARIABLE | %INTEGER% | > | 5 | DEFINE INTEGER VARIABLE | %INTEGER%::0
3 | IF | INTEGER VARIABLE | %INTEGER% | = | 5 | DEBUG | GLOBAL LOOP STOP
Explanation
- Line 1:
DEBUG | GLOBAL LOOP START: This line initiates a global loop, meaning the entire macro will repeat its sequence of actions indefinitely. - Line 2:
IF | INTEGER VARIABLE | %INTEGER% | > | 5 | DEFINE INTEGER VARIABLE | %INTEGER%::0: This line checks if the integer variable%INTEGER%is greater than 5. If it is, the variable is reset to 0. - Line 3:
IF | INTEGER VARIABLE | %INTEGER% | = | 5 | DEBUG | GLOBAL LOOP STOP: This line checks if the integer variable%INTEGER%is equal to 5. If it is, theGLOBAL LOOP STOPcommand is executed, terminating the global loop.
Illustrates the `GLOBAL LOOP STOP` feature in a running loop based on conditional checks.
Playback Options
Purpose
The PLAYBACK OPTIONS allow you to selectively enable or disable specific aspects of macro playback, such as keypresses, mouse clicks, and mouse movements. This fine-grained control over playback behavior is invaluable for debugging, testing, and customizing macro execution. You can isolate specific actions, slow down or speed up playback, and tailor the macro’s behavior to suit your needs.
Parameters
- PLAYBACK KEYPRESS ON/OFF: Enables or disables the playback of recorded keypress actions.
- PLAYBACK MOUSE MOVEMENT ON/OFF: Enables or disables the playback of recorded mouse movements.
- PLAYBACK ACTION ON/OFF: Turns all actions on or off during playback.
- PLAYBACK LEFT CLICK ON/OFF: Enables or disables the playback of left mouse clicks.
- PLAYBACK RIGHT CLICK ON/OFF: Enables or disables the playback of right mouse clicks.
- PLAYBACK MIDDLE CLICK ON/OFF: Enables or disables the playback of middle mouse clicks.
- PLAYBACK IF ON/OFF: Enables or disables the evaluation of IF conditions during playback.
- PLAYBACK IF NOT ON/OFF: Enables or disables the evaluation of IF NOT conditions during playback.
- PLAYBACK FOR ON/OFF: Enables or disables the execution of FOR loops during playback.
- SPEED X: Adjusts the playback speed.
Xcan be a negative value (slowing down playback) or a positive value (speeding up playback). For example,-5slows down playback five times, and10speeds it up ten times.
Example
1 | RUN ACTION | DEBUG | PLAYBACK KEYPRESS ON
2 | RUN ACTION | DEBUG | PLAYBACK LEFT CLICK OFF
3 | RUN ACTION | DEBUG | PLAYBACK MOUSE MOVEMENT ON
Explanation
- Line 1:
DEBUG | PLAYBACK KEYPRESS ON: This command ensures that all recorded keypress actions will be executed during playback. - Line 2:
DEBUG | PLAYBACK LEFT CLICK OFF: This command disables the playback of left mouse clicks. Any recorded left clicks will be ignored during macro execution. - Line 3:
DEBUG | PLAYBACK MOUSE MOVEMENT ON: This command enables the playback of recorded mouse movements.
Paint Path Options
Purpose
The PAINT PATH OPTIONS provide a visual debugging tool by drawing the path of mouse movements and actions on the screen during macro playback. This allows you to see exactly where the mouse is moving and what actions are being performed, making it easier to identify errors or unexpected behavior. The paint path can be customized in terms of color, shape, fill, and duration.
Parameters
- COLOR [value]: Sets the color and thickness of the paint path. Standard color names are accepted (e.g.,
BLACK,RED,BLUE). The thickness can range from 1 to 10, with 10 being the thickest. Example:COLOR [BLACK 3]sets a black path with a thickness of 3. - FILL [YES/NO]: Determines whether the shape drawn by the paint path will be filled with the specified color (
YES) or just outlined (NO). - TIME [duration refresh]: Specifies how long the paint path remains visible on the screen. The
durationis in seconds, and therefreshis in milliseconds. Example:TIME [1 50]sets the path to stay visible for 1 second, refreshing every 50 milliseconds. - SHAPE [CIRCLE/RECTANGLE]: Sets the shape that is drawn at each point along the paint path. It can be either a
CIRCLEor aRECTANGLE.
Example
1 | RUN ACTION | DEBUG | PAINT PATH::COLOR [BLACK 3]
2 | RUN ACTION | DEBUG | PAINT PATH::CIRCLE
Explanation
- Line 1:
DEBUG | PAINT PATH::COLOR [BLACK 3]: This command sets the paint path color to black and its thickness to 3. - Line 2:
DEBUG | PAINT PATH::CIRCLE: This command sets the shape of the paint path to a circle.
Highlights paint path options with colors representing different debug states.
Logger
Purpose
The LOGGER provides a way to send custom messages directly to the MMM event log. This is useful for inserting specific information, warnings, or error messages into the log to track the progress of a macro, mark important events, or document any issues encountered during execution.
Parameters
- TYPE: Specifies the severity level of the log message. It can be one of the following:
INFO: For general informational messages.WARNING: For indicating potential issues or unexpected situations.ERROR: For reporting errors that occurred during macro execution.
- VERBOSE: An optional parameter that, when included, marks the log message as verbose. Verbose messages are typically more detailed and are useful for in-depth debugging.
- COMMENT: The actual text message that will be written to the event log.
Example
1 | RUN ACTION | DEBUG | LOGGER::INFO::verbose::Macro started successfully.
2 | RUN ACTION | DEBUG | LOGGER::ERROR::An error occurred.
Explanation
- Line 1:
DEBUG | LOGGER::INFO::verbose::Macro started successfully.: This command logs an informational message indicating that the macro started successfully. Theverboseparameter suggests that this message is part of a more detailed logging scheme. - Line 2:
DEBUG | LOGGER::ERROR::An error occurred.: This command logs an error message, indicating that something went wrong during the macro’s execution.
Background/Foreground Colors
Purpose
This feature allows you to customize the appearance of the Mini Mouse Macro window by changing its background and foreground colors. This can be helpful for improving visibility, personalizing the interface, or creating visual cues to indicate different states or modes of operation.
Parameters
- BACKGROUND COLOR [value]: Sets the background color of the macro window. You can use standard color names (e.g.,
Black,White,Red,Blue,LightSeaGreen). - FOREGROUND COLOR [value]: Sets the foreground color, which affects the text and other elements within the macro window. Similar to background color, standard color names are accepted.
- For a list of standard color names, refer to the W3Schools Color Names page.
Example
1 | RUN ACTION | DEBUG | BACKGROUND COLOR::Black
2 | RUN ACTION | DEBUG | FOREGROUND COLOR::LightSeaGreen
Explanation
- Line 1:
DEBUG | BACKGROUND COLOR::Black: This command changes the background color of the Mini Mouse Macro window to black. - Line 2:
DEBUG | FOREGROUND COLOR::LightSeaGreen: This command changes the foreground color to light sea green, which will affect the text and other elements displayed within the window.
Demonstrates dynamic background color changes using the `DEBUG | BACKGROUND COLOR` action.
Variable Management
Purpose
These commands provide tools for managing custom variables within Mini Mouse Macro. You can display the current values of variables, clear their values, or reset internal arrays. This is essential for debugging and understanding the state of your macro during execution.
Parameters
- SHOW CUSTOM VARIABLES: This command outputs the names and current values of all defined custom variables to the MMM event log. This is helpful for inspecting the state of your variables at a specific point in the macro’s execution.
- CLEAR CUSTOM VARIABLES: This command removes the values from all custom variables, effectively resetting them.
- CLEAR ALL ARRAYS: This command resets all internal arrays and variables within Mini Mouse Macro. This includes custom variables, array variables, and the internal event log. Use this command with caution, as it clears a significant amount of data.
Example
1 | RUN ACTION | DEBUG | SHOW CUSTOM VARIABLES
2 | RUN ACTION | DEBUG | CLEAR CUSTOM VARIABLES
Explanation
- Line 1:
DEBUG | SHOW CUSTOM VARIABLES: This command will display all currently defined custom variables and their values in the event log. - Line 2:
DEBUG | CLEAR CUSTOM VARIABLES: This command will clear the values of all custom variables, effectively resetting them to an undefined state.
Strict Time Values
Purpose
The STRICT TIME VALUE options allow you to define fixed recording times for mouse movements, mouse clicks, and keyboard presses. This ensures consistent timing during macro playback, regardless of any variations in system performance or other factors. By setting strict time values, you can create more reliable and predictable macros.
Parameters
- SET::STRICT TIME VALUE [value]: Sets a global recording time (in milliseconds) for all actions: mouse movements, mouse clicks, and keyboard presses.
- SET::STRICT TIME VALUE MOUSE [value]: Sets a specific recording time (in milliseconds) for mouse movements only.
- SET::STRICT TIME VALUE CLICKS [value]: Sets a specific recording time (in milliseconds) for mouse clicks only.
- SET::STRICT TIME VALUE KEYS [value]: Sets a specific recording time (in milliseconds) for keyboard presses only.
Example
1 | RUN ACTION | DEBUG | SET::STRICT TIME VALUE::250
2 | RUN ACTION | DEBUG | SET::STRICT TIME VALUE MOUSE::50
Explanation
- Line 1:
DEBUG | SET::STRICT TIME VALUE::250: This command sets a global strict time value of 250 milliseconds for all actions (mouse movements, clicks, and keys). - Line 2:
DEBUG | SET::STRICT TIME VALUE MOUSE::50: This command sets a strict time value of 50 milliseconds specifically for mouse movements, overriding the global setting for this particular action type.
Step Playback
Purpose
STEP PLAYBACK enables a debugging mode where the macro execution pauses after each line is executed. This allows you to step through the macro one line at a time, carefully inspecting the state of the system and variables at each step. It’s an invaluable tool for pinpointing errors and understanding the flow of execution in detail.
Parameters
- STEP PLAYBACK: Toggles the step playback mode on or off.
Example
1 | RUN ACTION | DEBUG | STEP PLAYBACK
Explanation
- Line 1:
DEBUG | STEP PLAYBACK: This command activates step playback mode. After each line of the macro is executed, the macro will pause, allowing you to examine the current state before proceeding to the next line. You will need to manually resume playback (e.g., by pressing the play button) to execute the next line.
Record Numpad
Purpose
The RECORD NUMBERPAD option controls how Mini Mouse Macro interprets and records input from the numeric keypad (numpad). It toggles between recording numpad keys as their corresponding numbers (0-9) or as their alternative functions (e.g., Home, End, PgUp, PgDn) when Num Lock is on.
Parameters
- RECORD NUMBERPAD: Toggles the interpretive numpad recording behavior.
Example
1 | RUN ACTION | DEBUG | RECORD NUMBERPAD
Explanation
- Line 1:
DEBUG | RECORD NUMBERPAD: This command toggles the numpad recording mode. When enabled, pressing numpad keys with Num Lock off will record the numbers 0-9. When disabled (and Num Lock is on), pressing numpad keys will record their alternative functions (Home, End, etc.).
DECRYPT FILE (AES)
Purpose
The DECRYPT FILE (AES) action in Mini Mouse Macro decrypts a file that has been previously encrypted using AES 256-bit encryption. It restores the file to its original, unencrypted state, making it accessible again.
How It Works
- Decrypts a specified file that has a
.aesextension, indicating it was encrypted with AES. - Requires the correct decryption key to successfully decrypt the file.
- Offers options to prompt for the decryption key at runtime or use a predefined key.
- Can delete the original, encrypted
.aesfile after decryption or keep it.
Parameters
- File Path: The full path to the encrypted file (including the
.aesextension). - Decryption Key: The secret key used for decryption. Options include:
[PROMPT_AT_RUNTIME]: Prompts the user to enter the key during macro execution.- A literal string: The decryption key entered directly (e.g.,
MySecretPassword). - A variable: A variable containing the decryption key (e.g.,
%MY_KEY%).
- Original File Handling: Determines what happens to the encrypted file after decryption:
DELETE_ORIGINAL: Deletes the original, encrypted.aesfile after successful decryption.KEEP_ORIGINAL: Keeps the encrypted.aesfile alongside the decrypted version.
Examples
Example 1: Decrypting a File with a Variable Key and Deleting the Encrypted File
1 | RUN ACTION | DECRYPT FILE (AES) | D:\Macro\PersonalMacro.txt.aes::%string1%::DELETE_ORIGINAL
Explanation - Example 1
- This macro decrypts the file
D:\Macro\PersonalMacro.txt.aes. - It uses the value stored in the variable
%string1%as the decryption key. DELETE_ORIGINALspecifies that the original, encrypted file (PersonalMacro.txt.aes) will be deleted after successful decryption.- The decrypted file will be saved as
D:\Macro\PersonalMacro.txt.
Example 2: Decrypting a File with a Runtime Prompt for the Key
1 | RUN ACTION | DECRYPT FILE (AES) | D:\Macro\PersonalMacro.txt.aes::[PROMPT_AT_RUNTIME]::KEEP_ORIGINAL
Explanation - Example 2
- This macro decrypts the file
D:\Macro\PersonalMacro.txt.aes. [PROMPT_AT_RUNTIME]causes a dialog box to appear during macro execution, prompting the user to enter the decryption key.KEEP_ORIGINALensures that the original, encrypted file (PersonalMacro.txt.aes) is not deleted and remains in the same location.- The decrypted file will be saved as
D:\Macro\PersonalMacro.txt.
DECRYPT FOLDER (AES)
Purpose
The DECRYPT FOLDER (AES) action in Mini Mouse Macro decrypts all files within a specified folder that have been previously encrypted using AES 256-bit encryption. It also offers the option to recursively decrypt files in all subfolders within the selected directory.
How It Works
- Decrypts all files within a specified folder that have a
.aesextension. - Provides an option to recursively decrypt files in all subfolders.
- Requires the correct decryption key to successfully decrypt the files.
- Offers options to prompt for the decryption key at runtime or use a predefined key.
- Can delete the original, encrypted
.aesfiles after decryption or keep them.
Parameters
- Folder Path: The full path to the folder containing the encrypted files.
- Decryption Key: The secret key used for decryption. Options include:
[PROMPT_AT_RUNTIME]: Prompts the user to enter the key during macro execution.- A literal string: The decryption key entered directly (e.g.,
MySecretPassword). - A variable: A variable containing the decryption key (e.g.,
%MY_KEY%).
- Directory Mode: Specifies whether to decrypt only the files in the root folder or to include subfolders:
SINGLE_DIR: Decrypts only the files in the specified root folder.RECURSIVE_DIR: Decrypts all files in the specified folder and all its subfolders.
- Original File Handling: Determines what happens to the encrypted files after decryption:
DELETE_ORIGINAL: Deletes the original, encrypted.aesfiles.KEEP_ORIGINAL: Keeps the encrypted.aesfiles alongside the decrypted versions.
Examples
Example 1: Decrypting a Folder’s Root Files with a Variable Key
1 | RUN ACTION | DECRYPT FOLDER (AES) | D:\Macro::%string%::SINGLE_DIR::KEEP_ORIGINAL
Explanation - Example 1
- This macro decrypts all files with a
.aesextension within theD:\Macrofolder. - It uses the value stored in the variable
%string%as the decryption key. SINGLE_DIRspecifies that only files in the rootD:\Macrofolder will be decrypted, not files in any subfolders.KEEP_ORIGINALensures that the original, encrypted.aesfiles are not deleted.
Example 2: Recursively Decrypting a Folder with a Predefined Key and Deleting Originals
1 | RUN ACTION | DECRYPT FOLDER (AES) | D:\Macro::MyDecryptionKeyPassword::RECURSIVE_DIR::DELETE_ORIGINAL
Explanation - Example 2
- This macro decrypts all files with a
.aesextension within theD:\Macrofolder and all its subfolders. - It uses the predefined decryption key
MyDecryptionKeyPassword. RECURSIVE_DIRensures that all encrypted files in the directory tree underD:\Macroare decrypted.DELETE_ORIGINALspecifies that the original, encrypted.aesfiles will be deleted after successful decryption.
DEFINE ARRAY VARIABLE
Purpose
The DEFINE ARRAY VARIABLE action in Mini Mouse Macro creates an array variable, which is a collection of related data items stored under a single variable name. Arrays are useful for managing lists, sequences, or sets of values that share a common purpose or relationship. This action initializes an array variable with a specified number of elements and optional initial values.
For detailed information on Array Variables, see Array Variables.
How It Works
- Array variables can store multiple values under a single variable name.
- Each element in the array can hold a different value, such as numbers, strings, or other data types.
- Arrays can be used to store lists, sequences, or collections of related data.
Parameters
- Variable Name: The name of the array variable (e.g.,
%ARRAY%). - Optionals:
reverse- Reverse the order of the array.sort- Sort the array in ascending order.clear- Clear the array.
- Values: The value or values to assign to the array elements.
Examples
Example: Define and Use an Array Variable
1 | RUN ACTION | DEFINE ARRAY VARIABLE | %Fruits%::apple
2 | RUN ACTION | DEFINE ARRAY VARIABLE | %Fruits%::banana
3 | RUN ACTION | DEFINE ARRAY VARIABLE | %Fruits%::cherry
Explanation
- Line 1: Defines
%Fruits%as an array variable with one element (apple). - Line 2: Adds
bananato the%Fruits%array. - Line 3: Adds
cherryto the%Fruits%array.
For detailed information on working with array’s within please see Array Variables.
DEFINE BOOLEAN VARIABLE
Purpose
The DEFINE BOOLEAN VARIABLE action defines Boolean type variables for use within Mini Mouse Macro. Booleans are used to represent logical states, such as TRUE/FALSE, ON/OFF, or 1/0. They are essential for conditional branching and decision-making within macros.
For detailed information on Boolean Variables, see Boolean Variables.
How It Works
- Boolean variables can represent states like
TRUE/FALSE,ON/OFF, or1/0. - Variables default to
FALSEuntil explicitly declared otherwise. - Boolean variables are primarily used for logical evaluations within conditions and actions.
Parameters
- Variable Name: The name of the Boolean variable (e.g.,
%BOOLEAN%). - Value: The value to assign (
TRUE,FALSE,ON,OFF, etc.).
Examples
Example: Define and Use a Boolean Variable
1 | RUN ACTION | DEFINE BOOLEAN VARIABLE | %BOOLEAN%::TRUE
2 | IF | BOOLEAN VARIABLE | %BOOLEAN% | IS FALSE | DEFINE BOOLEAN VARIABLE | %BOOLEAN%::TRUE
Explanation
- Line 1: Defines
%BOOLEAN%asTRUE. - Line 2: Checks if
%BOOLEAN%isFALSE. If true, sets it toTRUE.
For more information, see Boolean Variables.
DEFINE DECIMAL VARIABLE
Purpose
The DEFINE DECIMAL VARIABLE action defines Decimal type variables for use within Mini Mouse Macro. Decimals are used for storing floating-point numbers with fractional parts, allowing for precise numerical calculations and operations.
For detailed information on Decimal Variables, see Decimal Variables.
How It Works
- Decimal variables default to
0until explicitly declared. - Math operations such as addition, subtraction, multiplication, and division are supported.
Parameters
- Variable Name: The name of the decimal variable (e.g.,
%DECIMAL%). - Value: The value to assign or the operation to perform (e.g.,
10.55,+1.55,*2.0).
Examples
Example: Define and Perform Operations on a Decimal Variable
1 | RUN ACTION | DEFINE DECIMAL VARIABLE | %DECIMAL%::10.55
2 | RUN ACTION | DEFINE DECIMAL VARIABLE | %DECIMAL%::+1.45
3 | RUN ACTION | DEFINE DECIMAL VARIABLE | %DECIMAL%::*2.0
Explanation
- Line 1: Defines
%DECIMAL%as10.55. - Line 2: Adds
1.45to%DECIMAL%. - Line 3: Multiplies
%DECIMAL%by2.0.
For more information, see Decimal Variables.
DEFINE INTEGER VARIABLE
Purpose
The DEFINE INTEGER VARIABLE action defines Integer type variables for use within Mini Mouse Macro. Integers are whole numbers that can be positive, negative, or zero. They are commonly used for counting, indexing, and performing arithmetic operations.
For detailed information on Integer Variables, see Integer Variables.
How It Works
- Integer variables default to
0until explicitly declared. - Supports complex mathematical operations like addition, subtraction, multiplication, division, modulus, and more.
Parameters
- Variable Name: The name of the integer variable (e.g.,
%INTEGER%). - Value: The value to assign or the operation to perform (e.g.,
100,+50,%2).
Examples
Example: Define and Perform Operations on an Integer Variable
1 | RUN ACTION | DEFINE INTEGER VARIABLE | %INTEGER%::100
2 | RUN ACTION | DEFINE INTEGER VARIABLE | %INTEGER%::+50
3 | RUN ACTION | DEFINE INTEGER VARIABLE | %INTEGER%::%2
Explanation
- Line 1: Defines
%INTEGER%as100. - Line 2: Adds
50to%INTEGER%. - Line 3: Sets
%INTEGER%to the modulus of2.
For more information, see Integer Variables.
DEFINE PIXEL RANGE VARIABLE
Purpose
The DEFINE PIXEL RANGE VARIABLE action defines Pixel Range type variables for use within Mini Mouse Macro. Pixel Range variables represent a range of pixels within a specified area on the screen. They are used for capturing and comparing pixel colors, detecting patterns, and performing image recognition tasks.
For detailed information on Pixel based variables, see Pixel Variables.
How It Works
- Pixel Range variables store a range of pixels within a specified area.
- They can be used to capture pixel colors, compare pixel values, and perform image recognition tasks.
Parameters
- Variable from Screen:
- Variable Name: The name of the pixel range variable (e.g.,
%PIXEL_RANGE%). - Location: The location of the pixel range on the screen in the format
[X: x-coordinate Y: y-coordinate W: width H: height]. - Optional comment: An optional comment to add to the macro line.
- Variable Name: The name of the pixel range variable (e.g.,
- Variable from Image:
- Variable Name: The name of the pixel range variable (e.g.,
%PLAYER_ICON%). - From Image: The path to the image file from which to load the pixel range.
- Optional comment: An optional comment to add to the macro line.
- Variable Name: The name of the pixel range variable (e.g.,
Examples
Example: Define a Pixel Range Variable from the Screen
1 | RUN ACTION | DEFINE PIXEL RANGE VARIABLE | %PIXEL_RANGE%::[X: 100 Y: 100 W: 50 H: 50]
Explanation - Define a Pixel Range Variable from the Screen
- Line 1: Defines
%PIXEL_RANGE%as a pixel range variable capturing a 50x50 pixel area starting at coordinates (100, 100).
Example: Define a Pixel Range Variable from an Image
1 | RUN ACTION | DEFINE PIXEL RANGE VARIABLE | %PLAYER_ICON%::C:\Images\player_icon.png::This is the player icon.
Explanation - Define a Pixel Range Variable from an Image
- Line 1: Defines
%PLAYER_ICON%as a pixel range variable loaded from the image fileC:\Images\player_icon.png. An optional comment is included.
For more information, see Pixel Variables.
DEFINE STRING VARIABLE
Purpose
The DEFINE STRING VARIABLE action defines String type variables for use within Mini Mouse Macro. Strings are used to store text values, such as words, sentences, or alphanumeric characters. They are essential for dynamic text generation, concatenation, and condition evaluation. For detailed information on String Variables, see String Variables.
How It Works
- String variables can store any text value.
- They are used for operations like concatenation, dynamic text generation, and condition evaluation.
Parameters
- Variable Name: The name of the string variable (e.g.,
%STRING%). - Value: The text value to assign (e.g.,
"Hello","Macro Process").
Examples
Example: Define and Use a String Variable
1 | RUN ACTION | DEFINE STRING VARIABLE | %STRING%::"Hello"
2 | IF | STRING VARIABLE | %STRING% | IS | "Hello" | DEFINE STRING VARIABLE | %STRING%::"World"
Explanation
- Line 1: Defines
%STRING%as"Hello". - Line 2: Checks if
%STRING%is"Hello"and redefines it as"World"if true.
For more information, see String Variables.
DRAW
Purpose
The DRAW action in Mini Mouse Macro allows you to create temporary graphics and text directly on the screen. This is useful for providing visual cues, highlighting areas of interest, displaying information during macro execution, or creating simple graphical overlays. The supported graphic types are:
TEXT: Draws a text string.PICTURE: Draws an image from a file.CIRCLE: Draws a circle or ellipse.RECTANGLE: Draws a rectangle.LINE: Draws a line.
How It Works
- Temporary Graphics: The graphics drawn by the
DRAWaction are temporary and will disappear when the screen is refreshed or when the specified display time expires. - Layered on Top: The graphics are drawn on top of all other windows and applications.
- Customizable: You can customize the appearance of the graphics, including color, size, font (for text), fill (for shapes), and line thickness.
- Timed Display: You can specify how long the graphics should remain visible using the
TIMEparameter. - Waiting: The
WAIT YESparameter can be used to pause the macro until the graphic expires, based on itsTIMEparameter. TheWAIT NOparameter allows the macro to continue immediately.
 The `Add Action - DRAW` dialog from the `Add Condition` page |  The resulting condition after the `Add Action - DRAW` dialog is accepted |
Parameters
The parameters for the DRAW action vary depending on the type of graphic being drawn. Here’s a breakdown of the common parameters:
- Graphic Type: Specifies the type of graphic to draw:
TEXTPICTURECIRCLERECTANGLELINE
TEXT Parameters
- AT LOCATION [X Y]: The X and Y coordinates of the top-left corner of the text.
- COLOR [Color Value]: The color of the text. Standard color names are accepted along with a line size of 1 to 10 (10 being largest)(e.g.,
Black 1,Red 4,Green 10). - STRING [Text String]: The text string to display. You can include variables here (e.g.,
The time is %time%). - FONT [Font Name, Size, Style]: The font to use for the text.
- Font Name (e.g.,
Arial,Times New Roman,Courier New) - Size (e.g.,
10,12,20) - Style:
Regular,Bold,Italic,Underline,Strikeout - Example:
FONT [Arial, 20, Bold]
- Font Name (e.g.,
PICTURE Parameters
- AT LOCATION [X Y]: The X and Y coordinates of the top-left corner where the picture will be displayed.
- FILE [File Path]: The full path to the image file.
- Example:
FILE [D:\Macro\OUTPUT\Turnssoft Logo.jpg]
CIRCLE Parameters
- AT LOCATION [X Y Width Height]: Defines the location and size of the circle.
- X, Y: Coordinates of the top-left corner of the bounding rectangle.
- Width, Height: Dimensions of the bounding rectangle. For a perfect circle, Width and Height should be equal.
- COLOR [Color Value]: The color of the circle.
- FILL [YES/NO]: Whether to fill the circle with the specified color (
YES) or just draw the outline (NO). - Example:
CIRCLE::AT LOCATION [776 103 25 25]::COLOR [Green 1]::FILL [YES]
RECTANGLE Parameters
- AT LOCATION [X Y Width Height]: Defines the location and size of the rectangle.
- X, Y: Coordinates of the top-left corner.
- Width, Height: Dimensions of the rectangle.
- COLOR [Color Value]: The color of the rectangle.
- FILL [YES/NO]: Whether to fill the rectangle with the specified color (
YES) or just draw the outline (NO). - Example:
RECTANGLE::AT LOCATION [736 103 25 25]::COLOR [RED 4]::FILL [NO]
LINE Parameters
- AT LOCATION [X1 Y1 X2 Y2]: Defines the start and end points of the line.
- X1, Y1: Coordinates of the starting point.
- X2, Y2: Coordinates of the ending point.
- COLOR [Color Value]: The color and thickness of the line.
- Example:
LINE::AT LOCATION [95 243 752 243]::COLOR [RED 10]
Common Parameters
- TIME [Seconds Milliseconds]: Specifies how long the graphic should be displayed, in seconds and milliseconds.
- WAIT [YES/NO]
YES: The macro will pause until the graphic’s display time expires.NO: The macro will continue execution immediately without waiting for the graphic to disappear.
Examples
Example 1: Drawing Multiple Graphics
1 | RUN ACTION | DRAW | TEXT::AT LOCATION [100 200]::COLOR [Black 1]::STRING [The time is %time%]::FONT [Arial, 20, Regular]::TIME [2 50]::WAIT YES
2 | RUN ACTION | DRAW | PICTURE::AT LOCATION [717 178]::FILE [D:\Macro\OUTPUT\Turnssoft Logo.jpg]::TIME [1 50]::WAIT NO
3 | RUN ACTION | DRAW | CIRCLE::AT LOCATION [776 103 25 25]::COLOR [Green 1]::FILL [YES]::TIME [1 50]::WAIT NO
4 | RUN ACTION | DRAW | RECTANGLE::AT LOCATION [736 103 25 25]::COLOR [RED 4]::FILL [NO]::TIME [1 50]::WAIT NO
5 | RUN ACTION | DRAW | LINE::AT LOCATION [95 243 752 243]::COLOR [RED 10]::TIME [1 50]::WAIT YES
Illustrates the `DRAW` action in Mini Mouse Macro.
Explanation - Example 1
- Line 1:
DRAW | TEXT::AT LOCATION [100 200]::COLOR [Black 1]::STRING [The time is %time%]::FONT [Arial, 20, Regular]::TIME [2 50]::WAIT YES- Draws the text “The time is “ followed by the current time at coordinates X=100, Y=200.
- Text color is black with a line thickness of 1.
- Font is Arial, size 20, Regular style.
- The text will be displayed for 2 seconds and 50 milliseconds.
WAIT YESmeans the macro will pause until the text disappears.
- Line 2: -
DRAW | PICTURE::AT LOCATION [717 178]::FILE [D:\Macro\OUTPUT\Turnssoft Logo.jpg]::TIME [1 50]::WAIT NO- Draws the image
Turnssoft Logo.jpgat coordinates X=717, Y=178. - The image will be displayed for 1 second and 50 milliseconds.
WAIT NOmeans the macro will continue immediately without waiting.
- Draws the image
- Line 3:
DRAW | CIRCLE::AT LOCATION [776 103 25 25]::COLOR [Green 1]::FILL [YES]::TIME [1 50]::WAIT NO- Draws a filled green circle with a line thickness of 1. The circle is defined by a bounding rectangle with its top-left corner at X=776, Y=103, and a width and height of 25 pixels.
- The circle will be displayed for 1 second and 50 milliseconds.
WAIT NOmeans the macro will continue immediately.
- Line 4:
DRAW | RECTANGLE::AT LOCATION [736 103 25 25]::COLOR [RED 4]::FILL [NO]::TIME [1 50]::WAIT NO- Draws a red rectangle outline with a line thickness of 4. The rectangle’s top-left corner is at X=736, Y=103, and it has a width and height of 25 pixels.
- The rectangle will be displayed for 1 second and 50 milliseconds.
WAIT NOmeans the macro will continue immediately.
- Line 5:
DRAW | LINE::AT LOCATION [95 243 752 243]::COLOR [RED 10]::TIME [1 50]::WAIT YES- Draws a red line with a line thickness of 10 from coordinates X=95, Y=243 to X=752, Y=243.
- The line will be displayed for 1 second and 50 milliseconds.
WAIT YESmeans the macro will pause until the line disappears.
Example 2: Highlighting a Button with a Rectangle
1 | RUN ACTION | RUN PROGRAM | C:\MyApplication\MyApp.exe
2 | IF | WINDOW TITLE | My Application | EXIST | CONTINUE
3 | RUN ACTION | DRAW | RECTANGLE::AT LOCATION [300 250 100 50]::COLOR [Blue 3]::FILL [NO]::TIME [5 0]::WAIT NO
Explanation - Example 2
- Line 1: Launches the application
MyApp.exe. - Line 2: Waits for the window titled “My Application” to appear.
- Line 3:
DRAW | RECTANGLE::AT LOCATION [300 250 100 50]::COLOR [Blue 3]::FILL [NO]::TIME [5 0]::WAIT NO- Draws a blue rectangle outline with a line thickness of 3. The rectangle’s top-left corner is at X=300, Y=250, with a width of 100 pixels and a height of 50 pixels (presumably the location of a button).
- The rectangle will be displayed for 5 seconds.
- The macro continues execution immediately without waiting.
Important Notes
- Temporality: The graphics are temporary and will disappear when the screen is refreshed or redrawn.
- Screen Resolution: Coordinates are relative to the screen resolution.
- Performance: Drawing many complex graphics can impact performance. Use this action judiciously.
- Z-Order: The graphics are drawn on top of other windows, but they do not interact with the underlying applications. They are purely visual overlays.
- Colors: The listed colors and thickness are:
Black [1-10]Blue [1-10]Red [1-10]Green [1-10]Yellow [1-10]Pink [1-10]Grey [1-10]Purple [1-10]Brown [1-10]Orange [1-10]
DOWNLOAD FROM URI
Purpose
The DOWNLOAD FROM URI action downloads a program or file from a specified URI location to a designated folder. This action is ideal for automating file retrieval processes.
How It Works
- The action specifies a destination folder, a source URI, and optionally a file name to save the downloaded file.
- The
WAITorNO_WAIToption controls whether the macro pauses until the download completes. - Ensures formatting with parameters separated by two colons (
::).
Parameters
- Destination Folder: The local folder where the file will be saved.
- Source URI: The URI from which the file will be downloaded.
- Save File Name (Optional): The name to save the file as. If not provided, the file retains its original name.
- Wait Option: Specifies whether to wait for the download to complete.
- WAIT: Pauses the macro until the file is fully downloaded.
- NO_WAIT: Continues the macro execution without waiting for the download to complete.
Examples
Example: Download File with Default Name
1 | RUN ACTION | DOWNLOAD FROM URI | C:\MMM::http://myuploadedmacros/macro4.mmmacro::WAIT
Explanation - Download File with Default Name
- Line 1: Downloads the file
macro4.mmmacrofromhttp://myuploadedmacros/macro4.mmmacroto the folderC:\MMM. - WAIT ensures the macro pauses until the download is complete.
Example: Download File with Custom Name
1 | RUN ACTION | DOWNLOAD FROM URI | C:\MMM::https://minimousemacro.com/downloads/MiniMouseMacro.exe::MMM.exe::NO_WAIT
Explanation - Download File with Custom Name
- Line 1: Downloads the file from
https://minimousemacro.com/downloads/MiniMouseMacro.exetoC:\MMMand saves it asMMM.exe. - NO_WAIT allows the macro to continue without waiting for the download to finish.
Example: Download Dynamically
* | Start of macro: Download necessary files for a task dynamically.

* | Step 1: Download a critical update and wait for completion.
1 | RUN ACTION | DOWNLOAD FROM URI | C:\Updates::https://example.com/files/CriticalUpdate.exe::CriticalUpdate.exe::WAIT
2 | RUN ACTION | MESSAGE PROMPT | Critical Update downloaded successfully to C:\Updates.\nProceeding to install.::Download Complete::0::Information

* | Step 2: Download supplementary documentation without waiting.
3 | RUN ACTION | DOWNLOAD FROM URI | C:\Documents::https://example.com/docs/Guide.pdf::Guide.pdf::NO_WAIT
4 | RUN ACTION | MESSAGE PROMPT | Supplementary documentation is being downloaded in the background.\nYou can access it later in C:\Documents.::Download Background::0::Information

* | End of macro.
Explanation - Download Dynamically
- Line 1: Downloads a file named
CriticalUpdate.exefrom the URLhttps://example.com/files/CriticalUpdate.exeand saves it toC:\Updates. TheWAIToption ensures the macro waits for the download to complete before proceeding. - Line 2: Displays an information-style message box confirming the successful download of the critical update.
- Line 3: Downloads a file named
Guide.pdffrom the URLhttps://example.com/docs/Guide.pdfand saves it toC:\Documents. TheNO_WAIToption allows the macro to continue executing without waiting for the download to finish. - Line 4: Displays an information-style message box notifying the user that the supplementary document is being downloaded in the background.
ENCRYPT FILE (AES)
Purpose
The ENCRYPT FILE (AES) action in Mini Mouse Macro provides a robust way to secure individual files using Advanced Encryption Standard (AES) with a 256-bit key. This action is essential for protecting sensitive data by rendering files unreadable without the correct decryption key.
How It Works
- Encrypts a specified file using AES 256-bit encryption.
- Appends a
.aesextension to the encrypted file, indicating its encrypted status. - Offers options to prompt for the encryption key at runtime or use a predefined key.
- Can delete the original, unencrypted file after encryption or keep it alongside the encrypted version.
Parameters
- File Path: The full path to the file you want to encrypt.
- Encryption Key: The secret key used for encryption. This can be:
[PROMPT_AT_RUNTIME]: Prompts the user to enter the key when the macro runs.- A literal string: The actual encryption key entered directly into the macro (e.g.,
MySecretPassword). - A variable: A variable that holds the encryption key (e.g.,
%MY_KEY%).
- Original File Handling: Determines what happens to the original file after encryption:
DELETE_ORIGINAL: Deletes the original, unencrypted file after successful encryption.KEEP_ORIGINAL: Keeps the original file alongside the encrypted version.
Examples
Example 1: Encrypting a File with Runtime Prompt for Key and Deleting Original
1 | IF | FILE | D:\Macro\PersonalMacro.txt | EXIST | ENCRYPT FILE (AES) | D:\Macro\PersonalMacro.txt::[PROMPT_AT_RUNTIME]::DELETE_ORIGINAL
Explanation - Example 1
- This macro checks if the file
D:\Macro\PersonalMacro.txtexists. - If it exists, the macro encrypts the file using AES 256-bit encryption.
[PROMPT_AT_RUNTIME]causes a dialog box to appear during macro execution, prompting the user to enter the encryption key.DELETE_ORIGINALspecifies that the original, unencrypted file will be deleted after successful encryption.- The encrypted file will be saved as
D:\Macro\PersonalMacro.txt.aes.
Example 2: Encrypting a File with a Predefined Key and Keeping the Original
1 | IF | FILE | D:\Macro\PersonalMacro.txt | EXIST | ENCRYPT FILE (AES) | D:\Macro\PersonalMacro.txt::MyEncryptionPassword::KEEP_ORIGINAL
Explanation - Example 2
- This macro checks if the file
D:\Macro\PersonalMacro.txtexists. - If it exists, the macro encrypts the file using the predefined encryption key
MyEncryptionPassword. KEEP_ORIGINALensures that the original, unencrypted file is not deleted and remains in the same location.- The encrypted file will be saved as
D:\Macro\PersonalMacro.txt.aes.
Example 3: Encrypting a File Using a Variable for the Key
1 | RUN ACTION | ENCRYPT FILE (AES) | D:\Macro\PersonalMacro.mmmacro::%STRING%::DELETE_ORIGINAL
Explanation - Example 3
- This macro encrypts the file
D:\Macro\PersonalMacro.mmmacrousing the value stored in the variable%STRING%as the encryption key. DELETE_ORIGINALspecifies that the original, unencrypted file will be deleted after successful encryption.- The encrypted file will be saved as
D:\Macro\PersonalMacro.mmmacro.aes.
ENCRYPT FOLDER (AES)
Purpose
The ENCRYPT FOLDER (AES) action in Mini Mouse Macro allows you to encrypt all files within a specified folder using AES 256-bit encryption. It also offers the option to recursively encrypt files in all subfolders within the selected directory. This action is essential for securing entire directories of sensitive data.
How It Works
- Encrypts all files within a specified folder using AES 256-bit encryption.
- Provides an option to recursively encrypt files in all subfolders.
- Appends a
.aesextension to each encrypted file. - Offers options to prompt for the encryption key at runtime or use a predefined key.
- Can delete the original, unencrypted files after encryption or keep them.
Parameters
- Folder Path: The full path to the folder containing the files you want to encrypt.
- Encryption Key: The secret key used for encryption. Options include:
[PROMPT_AT_RUNTIME]: Prompts the user to enter the key during macro execution.- A literal string: The encryption key entered directly (e.g.,
MySecretPassword). - A variable: A variable containing the encryption key (e.g.,
%MY_KEY%).
- Directory Mode: Specifies whether to encrypt only the files in the root folder or to include subfolders:
SINGLE_DIR: Encrypts only the files in the specified root folder.RECURSIVE_DIR: Encrypts all files in the specified folder and all its subfolders.
- Original File Handling: Determines what happens to the original files after encryption:
DELETE_ORIGINAL: Deletes the original, unencrypted files.KEEP_ORIGINAL: Keeps the original files alongside the encrypted versions.
Examples
Example 1: Encrypting a Folder’s Root Files with Runtime Prompt for Key
1 | RUN ACTION | ENCRYPT FOLDER (AES) | D:\Macro::[PROMPT_AT_RUNTIME]::SINGLE_DIR::KEEP_ORIGINAL
Explanation - Example 1
- This macro encrypts all files within the
D:\Macrofolder using AES 256-bit encryption. [PROMPT_AT_RUNTIME]prompts the user to enter the encryption key when the macro runs.SINGLE_DIRspecifies that only files in the rootD:\Macrofolder will be encrypted, not files in any subfolders.KEEP_ORIGINALensures that the original, unencrypted files are not deleted.- Each encrypted file will have a
.aesextension added (e.g.,MyFile.txtbecomesMyFile.txt.aes).
Example 2: Recursively Encrypting a Folder with a Predefined Key and Deleting Originals
1 | RUN ACTION | ENCRYPT FOLDER (AES) | D:\Macro::MyFolderEncryptionKey::RECURSIVE_DIR::DELETE_ORIGINAL
Explanation - Example 2
- This macro encrypts all files within the
D:\Macrofolder and all its subfolders using the predefined encryption keyMyFolderEncryptionKey. RECURSIVE_DIRensures that all files in the directory tree underD:\Macroare encrypted.DELETE_ORIGINALspecifies that the original, unencrypted files will be deleted after successful encryption.- Each encrypted file will have a
.aesextension added.
EXIT
Purpose
The EXIT action terminates the currently running macro immediately. This action is useful for halting execution based on specific conditions or as part of macro flow control.
How It Works
- Once triggered, the
EXITaction stops all further macro operations. - It can be used conditionally or unconditionally within a macro.
Parameters
- None: The
EXITaction does not require any additional parameters.
Examples
Example: Conditional Exit Based on a File Check
1 | IF | FILE | C:\MMM\ExitSignal.txt | EXIST | EXIT
Explanation - Conditional Exit Based on a File Check
- Line 1: Checks if the file
C:\MMM\ExitSignal.txtexists.- If the file exists, the macro terminates immediately.
- If the file does not exist, the macro continues execution.
Example: Unconditional Macro Exit
1 | RUN ACTION | EXIT
Explanation - Unconditional Macro Exit
- Line 1: Terminates the macro immediately without any condition.
Example: Graceful Macro Termination
* | Start of macro: Check for a termination condition and exit if necessary.

* | Step 1: Define a termination signal file path.
1 | RUN ACTION | DEFINE STRING VARIABLE | %STOP_SIGNAL%::C:\Signals\StopMacro.txt

* | Step 2: Check if the termination signal file exists.
2 | IF | FILE | %STOP_SIGNAL% | EXIST | THEN
    * | If the termination signal exists, notify the user and exit the macro.
    3 | RUN ACTION | MESSAGE PROMPT | Termination signal detected at %TIME%.\nExiting macro execution.::Macro Stopped::0::Critical
    4 | RUN ACTION | EXIT
5 | IF | END IF

* | Step 3: Continue normal operations if no termination signal exists.
6 | RUN ACTION | MESSAGE PROMPT | No termination signal found.\nContinuing macro execution.::Macro Continues::0::Information

* | End of macro.
Explanation - Graceful Macro Termination
- Line 1: Defines the string variable
%STOP_SIGNAL%with the file pathC:\Signals\StopMacro.txt. - Line 2: Checks if the termination signal file exists.
- Line 3: Displays a critical-style message box if the termination signal is detected, notifying the user of the macro exit.
- Line 4: Executes the EXIT action to terminate the macro immediately, stopping all further execution.
- Line 5: Ends the block for checking the termination signal file.
- Line 6: Displays an information-style message box notifying the user that no termination signal was found, allowing the macro to proceed.
FILE COPY
Purpose
The FILE COPY action performs file or folder copy operations. It supports copying single files, entire folders, or directory trees recursively.
How It Works
- Copies files or folders from a source to a destination.
- Can overwrite files, create destination directories, or use the Windows UI for user prompts.
- Parameters must be separated by two colons (
::).
Parameters
- OVERWRITE: Overwrites the destination file if it exists.
- RECURSIVE: Copies all files and folders within a directory tree.
- NOCREATE: Prevents creation of the destination folder if it does not exist.
- UI: Uses the Windows User Interface for copy operations.
Examples
Example: Copy a Directory
1 | RUN ACTION | FILE COPY | D:\Macro\Source\::D:\Macro\Dest\
Explanation - Example Text
- Line 1: Copies all files from
D:\Macro\Source\toD:\Macro\Dest\.
Example: Recursive Copy with Overwrite
1 | RUN ACTION | FILE COPY | D:\Macro\Source::D:\Macro\Dest::RECURSIVE::OVERWRITE
Explanation - Recursive Copy with Overwrite
- Line 1: Copies all files and subfolders from
D:\Macro\SourcetoD:\Macro\Dest, overwriting existing files.
Example: Copy a Single File
1 | RUN ACTION | FILE COPY | D:\Macro\Source\file1.txt::D:\Macro\Dest\::OVERWRITE::UI
Explanation - Copy a Single File
- Line 1: Copies
file1.txttoD:\Macro\Dest\using overwrite and UI options.
Example: Backup and Organize Files
* | Start of macro: Backup and organize files using FILE COPY.

* | Step 1: Copy a single file with overwrite and UI options.
1 | RUN ACTION | FILE COPY | C:\Data\ImportantFile.txt::C:\Backup\ImportantFile.txt::OVERWRITE::UI
2 | RUN ACTION | MESSAGE PROMPT | File 'ImportantFile.txt' has been successfully backed up to C:\Backup.\nThe existing file was overwritten.::Backup Complete::0::Information

* | Step 2: Recursively copy an entire directory for archiving.
3 | RUN ACTION | FILE COPY | C:\Data\Projects::C:\Backup\ProjectsBackup::RECURSIVE::OVERWRITE
4 | RUN ACTION | MESSAGE PROMPT | All files and directories under 'C:\Data\Projects' have been backed up to 'C:\Backup\ProjectsBackup'.::Recursive Backup Complete::0::Information

* | Step 3: Create a unique copy of a file with a random name for archival.
5 | RUN ACTION | FILE COPY | C:\Data\Logs\ErrorLog.txt::C:\Backup\Logs\ErrorLog_%RANDOM%.txt
6 | RUN ACTION | MESSAGE PROMPT | Log file 'ErrorLog.txt' has been archived with a unique name in C:\Backup\Logs.::Log Archival Complete::0::Information

* | End of macro.
Explanation - Backup and Organize Files
- Line 1: Copies the file
C:\Data\ImportantFile.txttoC:\Backup\ImportantFile.txtwith overwrite and UI options. If the destination file exists, it will be replaced, and the user will see a standard Windows copy dialog. - Line 2: Displays an information-style message box confirming that the file was backed up successfully.
- Line 3: Recursively copies the directory
C:\Data\Projectsand all its contents toC:\Backup\ProjectsBackup. Overwrites existing files in the destination if they exist. - Line 4: Displays an information-style message box confirming that the directory and its contents were backed up successfully.
- Line 5: Copies the file
C:\Data\Logs\ErrorLog.txttoC:\Backup\Logswith a random file name, ensuring uniqueness. - Line 6: Displays an information-style message box notifying the user that the log file has been archived with a unique name.
FILE CREATE
Purpose
The FILE CREATE action creates new text files or empty files of specified sizes.
How It Works
- Supports creating files in bytes, kilobytes, or megabytes.
- Can include text content or create empty files.
Parameters
- B: Size in bytes.
- K: Size in kilobytes.
- M: Size in megabytes.
- NOOVERWRITE: Prevents overwriting if the file exists.
- UI: Uses the Windows User Interface for operations.
Examples
Example: Create an Empty File
1 | RUN ACTION | FILE CREATE | D:\Macro\Bytes\file1.out::B::100
Explanation - Create an Empty File
- Line 1: Creates an empty file
file1.outof 100 bytes in size.
Example: Create a Text File
1 | RUN ACTION | FILE CREATE | D:\Macro\Text\example.txt::The FILE CREATE action can create text files as well as empty files.\n Files can be created of a determined byte, kilobyte, and megabyte size.\n The following additional params are supported:\n NOOVERWRITE, and\n UI.
Explanation - Create a Text File
- Line 1: Creates
example.txtcontaining the specified text with new line characters.
example.txt
The FILE CREATE action can create text files as well as empty files.
Files can be created of a determined byte, kilobyte, and megabyte size.
The following additional params are supported:
    NOOVERWRITE, and
    UI.
Example: Temporary File Creation and Cleanup
* | Start of macro: Create temporary files and clean them up after use.

* | Step 1: Create a temporary text file with content.
1 | RUN ACTION | FILE CREATE | C:\Temp\ExampleFile.txt::This is a temporary file created by Mini Mouse Macro.\nIt will be deleted after processing.::NOOVERWRITE
2 | RUN ACTION | MESSAGE PROMPT | File 'ExampleFile.txt' has been created with content in C:\Temp.\nProceeding to the next step.::File Created::0::Information

* | Step 2: Create an empty file of a specific size.
3 | RUN ACTION | FILE CREATE | C:\Temp\EmptyFile.bin::K::100
4 | RUN ACTION | MESSAGE PROMPT | Empty file 'EmptyFile.bin' of size 100KB has been created in C:\Temp.\nProceeding to clean up.::File Created::0::Information

* | Step 3: Delete the created files.
5 | RUN ACTION | FILE DELETE | C:\Temp\ExampleFile.txt
6 | RUN ACTION | MESSAGE PROMPT | File 'ExampleFile.txt' has been deleted.::File Deleted::0::Information
7 | RUN ACTION | FILE DELETE | C:\Temp\EmptyFile.bin::RECYCLE
8 | RUN ACTION | MESSAGE PROMPT | File 'EmptyFile.bin' has been moved to the recycle bin.::File Deleted::0::Information

* | End of macro.
Explanation - Temporary File Creation and Cleanup
- Line 1: Creates a text file
ExampleFile.txtinC:\Tempwith specific content. TheNOOVERWRITEparameter ensures that the file is not overwritten if it already exists. - Line 2: Displays an information-style message box confirming that the text file was created successfully.
- Line 3: Creates an empty binary file
EmptyFile.bininC:\Tempwith a size of 100KB. - Line 4: Displays an information-style message box confirming the creation of the empty file.
- Line 5: Deletes the file
ExampleFile.txtfromC:\Temppermanently. - Line 6: Displays an information-style message box confirming that the file was deleted.
- Line 7: Deletes the file
EmptyFile.binfromC:\Tempby moving it to the recycle bin using theRECYCLEparameter. - Line 8: Displays an information-style message box confirming that the file was moved to the recycle bin.
FILE DELETE
Purpose
The FILE DELETE action deletes files or folders. It can send files to the recycle bin or use the Windows UI for user confirmation.
How It Works
- Deletes single files, folders, or entire directory trees.
- Can interact with the user via the Windows UI.
Parameters
- RECYCLE: Sends deleted items to the recycle bin.
- UI: Uses the Windows User Interface for operations.
Examples
Example: Delete a Directory
1 | RUN ACTION | FILE DELETE | D:\Macro\Source\
Explanation - Delete a Directory
- Line 1: Deletes the directory
D:\Macro\Source\and all its contents.
Example: Delete a Single File
1 | RUN ACTION | FILE DELETE | D:\Macro\Source\file1.txt::UI
Explanation - Delete a Single File
- Line 1: Deletes
file1.txtwith user confirmation via the Windows UI.
Example - Basic File Deletion
* | Start of macro: Delete a specific file.

* | Step 1: Permanently delete a file.
1 | RUN ACTION | FILE DELETE | C:\Temp\OldFile.txt
2 | RUN ACTION | MESSAGE PROMPT | File 'OldFile.txt' has been permanently deleted.::File Deleted::0::Information

* | Step 2: Move a file to the recycle bin.
3 | RUN ACTION | FILE DELETE | C:\Temp\UnusedFile.log::RECYCLE
4 | RUN ACTION | MESSAGE PROMPT | File 'UnusedFile.log' has been moved to the recycle bin.::File Recycled::0::Information

# | Step 3: Delete a directory and its contents.
5 | RUN ACTION | FILE DELETE | C:\Temp\OldDirectory\::RECYCLE
6 | RUN ACTION | MESSAGE PROMPT | Directory 'OldDirectory' and its contents have been moved to the recycle bin.::Directory Recycled::0::Information

* | End of macro.
Explanation - Basic File Deletion
- Line 1: Deletes the file
OldFile.txtfromC:\Temppermanently. - Line 2: Displays an information-style message box confirming the file was deleted.
- Line 3: Deletes the file
UnusedFile.logfromC:\Tempby moving it to the recycle bin using theRECYCLEparameter. - Line 4: Displays an information-style message box confirming the file was moved to the recycle bin.
- Line 5: Deletes the directory
OldDirectoryand all its contents by moving them to the recycle bin. - Line 6: Displays an information-style message box confirming the directory and its contents were moved to the recycle bin.
FILE HASH
Purpose
The FILE HASH action computes the hash value of files or folders using various hashing algorithms. The hash value can be saved to a variable, written to a file, or appended to an existing file with specific options.
How It Works
- Computes hash values for files or directories using supported algorithms (e.g., MD5, SHA1, SHA256, SHA384, SHA512).
- Supports options for variable storage, file writing, appending, and user interface preferences.
- Recursively hashes directories when the
RECURSIVEoption is enabled. - The FILE HASH action is best added from the ‘File Hash - Options’ dialog launched from the Action menu within the ‘Add Condition’ tool.
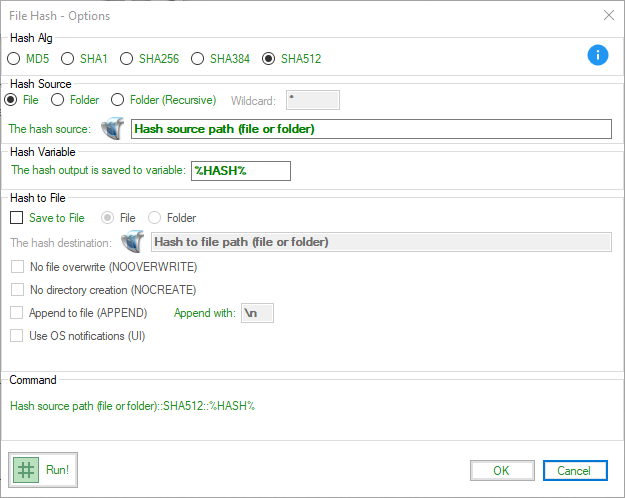
File Hash - Options dialog from the Add Condition tool.
Parameters
- SOURCE: The file or folder to hash.
- WILDCARD: Optional filter for file types (e.g.,
*.txt). - DESTINATION: Optional path to save the hash value.
- ALG: The hashing algorithm to use (e.g.,
MD5,SHA512). - VARIABLE: Optional string variable to store the hash value (default:
%HASH%). - NOOVERWRITE: Prevents overwriting existing destination files.
- NOCREATE: Prevents creating directories if they don’t exist.
- UI: Displays the Windows User Interface for file operations.
- APPEND: Appends the hash value to an existing file.
- APPEND WITH: Appends the hash value with specific strings (e.g.,
\nfor new line,ffor file name).
Examples
Example: Basic File Hashing
1 | RUN ACTION | FILE HASH | D:\Macro\File\test1.txt::MD5
2 | RUN ACTION | MESSAGE PROMPT | The MD5 hash of test1.txt is:\n%HASH%::File Hash::0::Information
Explanation
- Line 1: Computes the MD5 hash of
test1.txtand stores the result in the%HASH%variable. - Line 2: Displays the hash value stored in
%HASH%using an information-style message box.
Example: Save Hash to a Variable
1 | RUN ACTION | FILE HASH | D:\Macro\File\test1.txt::SHA512::%test1%
2 | RUN ACTION | MESSAGE PROMPT | The SHA512 hash of test1.txt is:\n%test1%::File Hash::0::Information
Explanation
- Line 1: Computes the SHA512 hash of
test1.txtand stores the result in%test1%. - Line 2: Displays the hash value stored in
%test1%using an information-style message box.
Example: Save Hash to a File
1 | RUN ACTION | FILE HASH | D:\Macro\File\test2.txt::sha512::D:\Hash\tests.sha512::APPEND::f\n
2 | RUN ACTION | MESSAGE PROMPT | The SHA512 hash of test2.txt has been saved.\n - Path: D:\Hash\tests.sha512\n - Value: %HASH%::File Hash::0::Information
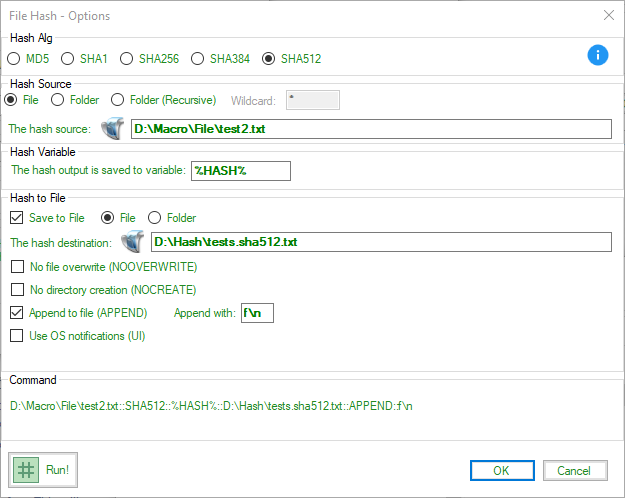
Hash file test2.txt, append the hash to file tests.512.txt, append with filename and a new line.
Explanation
- Line 1: Computes the SHA512 hash of
test2.txtand appends the result toD:\Hash\tests.sha512. Thef\nparameter appends the filename and a new line after the hash. - Line 2: Displays a message confirming the successful saving of the SHA512 hash to
D:\Hash\tests.sha512.
File Source - Folder or Folder (Recursive)
Example: Hash Files in a Folder
1 | RUN ACTION | FILE HASH | D:\Macro\::SHA512::D:\Hash\tests.sha512::APPEND::\n
Explanation
- Line 1: Computes the SHA512 hash of each file in
D:\Macro\and appends the results toD:\Hash\tests.sha512, with each hash on a new line.
Example: Hash Files with Wildcard Filter
1 | RUN ACTION | FILE HASH | D:\Macro\::SHA512::D:\Hash\tests.sha512::WILDCARD=*.txt::APPEND::\n
Explanation
- Line 1: Computes the SHA512 hash of all
.txtfiles inD:\Macro\and appends the results toD:\Hash\tests.sha512.
Hash and Log - File and Folder
Example: File Hashing and Logging
* | Start of macro: Hash files in a folder and log the results.

* | Step 1: Hash a single file and save the value to a variable.
1 | RUN ACTION | FILE HASH | C:\Data\ImportantFile.txt::SHA256::%HASH%
2 | RUN ACTION | MESSAGE PROMPT | The SHA256 hash of ImportantFile.txt is:\n%HASH%::File Hash::0::Information

* | Step 2: Hash all .txt files in a folder and log the results.
3 | RUN ACTION | FILE HASH | C:\Data\Documents\::SHA512::C:\Logs\Hashes.sha512::WILDCARD=*.txt::APPEND::f\n
4 | RUN ACTION | MESSAGE PROMPT | SHA512 hashes for all .txt files in C:\Data\Documents have been saved to C:\Logs\Hashes.sha512.::Folder Hash Complete::0::Information

* | Step 3: Hash files recursively in a directory tree.
5 | RUN ACTION | FILE HASH | C:\Projects\::MD5::C:\Logs\RecursiveHashes.md5::RECURSIVE::APPEND::f\n
6 | RUN ACTION | MESSAGE PROMPT | MD5 hashes for all files in the C:\Projects directory tree have been saved to C:\Logs\RecursiveHashes.md5.::Recursive Hash Complete::0::Information

* | End of macro.
Explanation - File Hashing and Logging
- Line 1: Hashes the file
ImportantFile.txtinC:\Datausing the SHA256 algorithm and saves the hash value to the%HASH%variable. - Line 2: Displays the hash value stored in
%HASH%using an information-style message box. - Line 3: Hashes all
.txtfiles in the folderC:\Data\Documentsusing the SHA512 algorithm. Appends the hash values to the fileHashes.sha512inC:\Logs, including the filenames and a newline (f\n). - Line 4: Displays a message notifying the user that all
.txtfiles in the folder have been hashed and logged. - Line 5: Hashes all files in the directory tree
C:\Projectsrecursively using the MD5 algorithm. Appends the hash values to the fileRecursiveHashes.md5inC:\Logs, including the filenames and a newline (f\n). - Line 6: Displays a message notifying the user that all files in the directory tree have been hashed and logged.
FILE MOVE
Purpose
The FILE MOVE action performs file or folder move operations. It supports moving single files, entire folders, or directory trees recursively.
How It Works
- Moves files or folders from a source to a destination.
- Can overwrite existing files, create destination directories, or use the Windows UI for user prompts.
- Parameters must be separated by two colons (
::).
Parameters
- OVERWRITE: Overwrites the destination file if it exists.
- RECURSIVE: Moves all files and folders within a directory tree.
- NOCREATE: Prevents creation of the destination folder if it does not exist.
- UI: Uses the Windows User Interface for operations.
Examples
Example: Move a Directory
1 | RUN ACTION | FILE MOVE | D:\Macro\Source\::D:\Macro\Dest\
Explanation
- Line 1: Moves all files from
D:\Macro\Source\toD:\Macro\Dest\.
Example: Recursive Move with Overwrite
1 | RUN ACTION | FILE MOVE | D:\Macro\Source::D:\Macro\Dest::RECURSIVE::OVERWRITE
Explanation
- Line 1: Moves all files and subfolders from
D:\Macro\SourcetoD:\Macro\Dest, overwriting existing files.
Example: Move a Single File
1 | RUN ACTION | FILE MOVE | D:\Macro\Source\file1.txt::D:\Macro\Dest\::OVERWRITE::UI
Explanation
- Line 1: Moves
file1.txttoD:\Macro\Dest\using overwrite and UI options.
Example: Move a File with Random Name
1 | RUN ACTION | FILE MOVE | D:\Macro\Source\file2.txt::D:\Macro\Dest\%random%.txt
Explanation
- Line 1: Moves
file2.txttoD:\Macro\Dest\, renaming it with a random name.
Example: Conditional File Move
* | Start of macro: Move files conditionally based on their existence.

* | Step 1: Check if the file exists before moving.
1 | IF | FILE | C:\Data\ToMove\File1.txt | EXIST | THEN
    * | If the file exists, move it to the destination folder with overwrite and UI options.
    2 | RUN ACTION | FILE MOVE | C:\Data\ToMove\File1.txt::C:\Data\Backup\::OVERWRITE::UI
    3 | RUN ACTION | MESSAGE PROMPT | File 'File1.txt' has been successfully moved to C:\Data\Backup with overwrite.::File Moved::0::Information
4 | IF | ELSE
    * | If the file does not exist, notify the user.
    5 | RUN ACTION | MESSAGE PROMPT | File 'File1.txt' does not exist in C:\Data\ToMove.\nNo action was performed.::File Not Found::0::Exclamation
6 | IF | END IF

* | Step 2: Recursively move an entire folder only if it exists.
7 | IF | FILE | C:\Data\Projects | EXIST | THEN
    * | If the folder exists, move all files and subfolders recursively.
    8 | RUN ACTION | FILE MOVE | C:\Data\Projects::C:\Data\Archive\ProjectsBackup::RECURSIVE::OVERWRITE
    9 | RUN ACTION | MESSAGE PROMPT | Folder 'Projects' and its contents have been moved to C:\Data\Archive\ProjectsBackup.::Folder Moved::0::Information
10 | IF | ELSE
    * | If the folder does not exist, notify the user.
    11 | RUN ACTION | MESSAGE PROMPT | Folder 'Projects' does not exist in C:\Data.\nNo action was performed.::Folder Not Found::0::Exclamation
12 | IF | END IF

* | End of macro.
Explanation - Conditional File Move
- Line 1: Checks if the file
C:\Data\ToMove\File1.txtexists. - Line 2: If the file exists, moves it to
C:\Data\Backupwith overwrite and UI options. - Line 3: Displays an information-style message box confirming that the file was successfully moved.
- Line 4: Begins the
ELSEblock for when the file does not exist. - Line 5: Displays an exclamation-style message box notifying the user that the file was not found.
- Line 6: Ends the block for checking the file’s existence.
- Line 7: Checks if the folder
C:\Data\Projectsexists. - Line 8: If the folder exists, recursively moves it and all its contents to
C:\Data\Archive\ProjectsBackup, overwriting existing files in the destination. - Line 9: Displays an information-style message box confirming that the folder was successfully moved.
- Line 10: Begins the
ELSEblock for when the folder does not exist. - Line 11: Displays an exclamation-style message box notifying the user that the folder was not found.
- Line 12: Ends the block for checking the folder’s existence.
GOTO MACRO LINE
Purpose
The GOTO MACRO LINE action provides a powerful mechanism for controlling the flow of execution within a Mini Mouse Macro script. It allows you to jump to a specific line number, a labeled remark header, or even a dynamically calculated line using variables, enabling the creation of complex and adaptable macros.
How It Works
- Direct Jumps: You can specify a direct line number to jump to, causing the macro execution to immediately continue from that line.
- Labeled Jumps (Headers): You can define remark headers within your macro using the
* | HeaderNamesyntax.GOTO MACRO LINEcan then target these headers, making your code more readable and maintainable. - Relative Jumps: Using the keywords
UPandDOWNfollowed by a number, you can jump a specified number of lines relative to the current line. - Dynamic Jumps:
GOTO MACRO LINEcan utilize variables, including the special%RETURN%variable, to calculate the target line dynamically. This allows for sophisticated flow control based on runtime conditions.%RETURN%: Contains the line number of the previously executed line.%RETURN%+n: Jumps forwardnlines from the last executed line.%RETURN%-n: Jumps backwardnlines from the last executed line.
- Conditional Jumps:
GOTO MACRO LINEis often used in conjunction withIFandELSEstatements to create conditional branching in your macros.
Parameters
The GOTO MACRO LINE action accepts a single parameter, which determines the destination of the jump. This parameter can take several forms:
- Line Number: A literal integer representing the absolute line number to jump to (e.g.,
10,55,1019). - Header Name: A label defined using the remark syntax
* | HeaderName(e.g.,* | Start,* | Main,* | End). - Variable: A variable containing a line number or a header name (e.g.,
%MY_LINE%,%HEADER_NAME%). - Relative Jump:
UP: Followed by a number to indicate how many lines to jump backward from the current line.UP(with no number): Jumps up 1 line.UP n(where n is a number): Jumps up n lines.
DOWN: Followed by a number to indicate how many lines to jump forward from the current line.DOWN(with no number): Jumps down 1 line.DOWN n(where n is a number): Jumps down n lines.
%RETURN%with Arithmetic: The%RETURN%variable combined with basic arithmetic operators (+,-,*,/) to calculate the target line dynamically.
Usage Examples
Example 1: Direct Line Jump
1 | IF | FILE | C:\running.log | FILE CONTAINS STRING | Started | GOTO MACRO LINE | 1019
Explanation:
- This line checks if the file
C:\running.logcontains the string “Started”. - If the condition is true, the macro immediately jumps to line number 1019 and continues execution from there.
- If the condition is false, the macro continues to the next line in sequence.
Example 2: Using Headers for Navigation
* | Start
1 | RUN ACTION | INPUT BOX | Enter a number greater than 3::Dynamic Variable Input::%USER_INPUT%
2 | IF | INTEGER VARIABLE | %USER_INPUT% | GREATER THAN | 3 | GOTO MACRO LINE | End
* | Invalid Input Loop
3 | RUN ACTION | GOTO MACRO LINE | Start
* | End
4 | RUN ACTION | MESSAGE PROMPT | Thank you! The entered number (%USER_INPUT%) is valid. Macro Complete::Info::0
Explanation:
* | Startand* | End: These are remark headers used as labels to define sections within the macro.- Line 1: Prompts the user with an
INPUT BOXasking them to enter a number greater than 3. The input is stored in the variable%USER_INPUT%. - Line 2: An
IFstatement checks if the value of%USER_INPUT%is greater than 3:- If true, the macro jumps to the line labeled
* | End, skipping the invalid input loop. - If false, the macro execution continues to the Invalid Input Loop section.
- If true, the macro jumps to the line labeled
- Line 3: Redirects the macro back to the
* | Startsection if the entered value is not valid. - Line 4: Displays a
MESSAGE PROMPTconfirming that the entered number is valid, completing the macro.
This flow ensures the user is prompted until a valid input (greater than 3) is entered, demonstrating a practical error-handling loop in Mini Mouse Macro.
Example 3: Relative Line Movement
* | Start
1 | RUN ACTION | DEFINE INTEGER VARIABLE | %RETRIES%::0
2 | RUN ACTION | MESSAGE PROMPT | Attempting Connection...::%RETURN%::1
3 | RUN ACTION | WAIT SECONDS | 2
4 | IF | NETWORK HOST PING REPLY | 192.168.1.1 | SUCCESSFUL | GOTO MACRO LINE | Success
5 | RUN ACTION | DEFINE INTEGER VARIABLE | %RETRIES%::+1
6 | IF | INTEGER VARIABLE | %RETRIES% | LESS THAN | 3 | GOTO MACRO LINE | Up 4
* | Success
7 | RUN ACTION | MESSAGE PROMPT | Connection Successful::%RETURN%::1
8 | GOTO MACRO LINE | End
* | End
9 | RUN ACTION | MESSAGE PROMPT | Connection Failed after %RETRIES% attempts::%RETURN%::1
Explanation:
- Line 1: Initializes
%RETRIES%to0to track connection attempts. - Line 2: Displays a message indicating an attempt to connect.
- Line 4: Checks if the network host
192.168.1.1is reachable. If successful, it jumps to theSuccessheader. - Line 5: Increments
%RETRIES%by 1 for each failed attempt. - Line 6: If
%RETRIES%is less than 3, it jumps back 4 lines to retry the connection. - Line 7: If successful, displays a message and exits to the
Endheader. - Line 9: If the maximum retries are reached, it displays a failure message.
This example illustrates how relative line movement can be used for retry logic in scenarios like network connectivity checks.
Example 4: Dynamic Jump with %RETURN%
1 | RUN ACTION | DEFINE INTEGER VARIABLE | %ATTEMPTS%::0
2 | RUN ACTION | MESSAGE PROMPT | Checking file existence...::%RETURN%::1
3 | IF | FILE | C:\data\important.txt | EXIST | GOTO MACRO LINE | FileFound
4 | RUN ACTION | DEFINE INTEGER VARIABLE | %ATTEMPTS%::+1
5 | IF | INTEGER VARIABLE | %ATTEMPTS% | < | 5 | GOTO MACRO LINE | %RETURN%-3
6 | RUN ACTION | MESSAGE PROMPT | File not found after %ATTEMPTS% attempts::%RETURN%::1
7 | GOTO MACRO LINE | End
* | FileFound
8 | RUN ACTION | MESSAGE PROMPT | File Found Successfully!::%RETURN%::1
* | End
Explanation:
- Line 1: Initializes the
%ATTEMPTS%variable to0to track the number of retries. - Line 2: Displays a message to indicate the start of file existence checking.
- Line 3: Checks if the file
C:\data\important.txtexists. If it does, jumps to theFileFoundheader. - Line 4: Increments
%ATTEMPTS%by 1 after each failed check. - Line 5: If
%ATTEMPTS%is less than 5, it dynamically jumps back 3 lines to retry the file check. - Line 6: If the maximum attempts are reached, displays a failure message and exits the loop.
- Line 8: If the file is found, displays a success message.
This scenario a use case for retrying file existence checks using %RETURN% for dynamic jumps.
Example 5: Using Variables to Control Jumps
* | Start
  * | Define the target header for navigation
1 | RUN ACTION | DEFINE STRING VARIABLE | %TARGET_HEADER%::ProcessFiles
  * | Jump to the target header dynamically
2 | RUN ACTION | GOTO MACRO LINE | %TARGET_HEADER%

* | ProcessFiles
  * | Initialize the file count variable
3 | RUN ACTION | DEFINE INTEGER VARIABLE | %FILE_COUNT%::0
  * | Begin iterating over all files in the Input folder
4 | FOR | EACH | FILE IN | C:\Data\Input | DO
  * | Display the name of the file being processed
    5 | RUN ACTION | MESSAGE PROMPT | Processing File: %FILE.NAME%
     * | Increment the file count
    6 | RUN ACTION | DEFINE INTEGER VARIABLE | %FILE_COUNT%::+1
  * | End the file iteration
7 | FOR | NEXT
  * | If files were processed, jump to the Complete header
8 | IF | INTEGER VARIABLE | %FILE_COUNT% | GREATER THAN | 0 | RUN ACTION | GOTO MACRO LINE | Complete
  * | Otherwise, jump to the NoFiles header
9 | RUN ACTION | GOTO MACRO LINE | NoFiles

* | NoFiles
  * | Display a message when no files are found
10 | RUN ACTION | MESSAGE PROMPT | No files to process in the Input folder.
  * | Jump to the End header
11 | RUN ACTION | GOTO MACRO LINE | End

* | Complete
  * | Display a success message with the total file count
12 | RUN ACTION | MESSAGE PROMPT | Processed %FILE_COUNT% files successfully.
  * | Jump to the End header
13 | RUN ACTION | GOTO MACRO LINE | End

* | End
  * | Finalize the macro execution
14 | RUN ACTION | MESSAGE PROMPT | Macro Complete.
Explanation:
- Line 1: Sets the string variable
%TARGET_HEADER%to the headerProcessFiles. - Line 2: Jumps to the
ProcessFilessection using the%TARGET_HEADER%variable. - Line 4: Iterates through all files in the
C:\Data\Inputdirectory. - Line 5: Displays the name of each file being processed.
- Line 6: Increments the
%FILE_COUNT%variable for each processed file. - Line 8-9: If files were processed, jumps to the
Completeheader; otherwise, jumps toNoFiles. - Line 10: Displays a message if no files are found.
- Line 12: Displays a message indicating the total number of files processed.
- Line 14: Finalizes the macro execution.
This example demonstrates a real-world scenario of dynamically navigating a macro workflow using variables and processing files in a directory.
Example 6: Common Mistake Leading to an Infinite Loop
* | Start
  * | Initialize a counter variable
1 | RUN ACTION | DEFINE INTEGER VARIABLE | %COUNTER%::0
  * | Increment the counter and jump back to this line
2 | RUN ACTION | DEFINE INTEGER VARIABLE | %COUNTER%::+1
3 | RUN ACTION | GOTO MACRO LINE | %RETURN%+1
  * | This section is never reached because of the infinite loop above
4 | RUN ACTION | MESSAGE PROMPT | This line will never execute.
Explanation:
- Line 1: Initializes
%COUNTER%to0. - Line 2: Increments the
%COUNTER%variable by1. - Line 3: The macro continually jumps back to itself using
GOTO MACRO LINE | %RETURN%+1. Since%RETURN%+1resolves to the current line, execution never proceeds to the next line. - Line 4: This line is unreachable due to the infinite loop.
Highlighting the Mistake: This example demonstrates how a user might unintentionally create an infinite loop when using GOTO MACRO LINE with %RETURN%+1. To prevent this:
- Include a conditional statement (
IF) to break the loop when a certain condition is met. - Avoid using
%RETURN%+1without a mechanism to alter the flow dynamically. - Use
%RETURN%judiciously to avoid infinite loops. - Debug using
GLOBAL LOOP STARTandGLOBAL LOOP END. See the DEBUG Action Global Loop Start/Stop for more information.
Example 7: Advanced Example - File Processing with GOTO MACRO LINE
* | Start
  * | Initialize variables for loop control and file processing
1 | RUN ACTION | DEFINE INTEGER VARIABLE | %FILE_COUNT%::0
2 | RUN ACTION | DEFINE STRING VARIABLE | %STATUS%::Pending
  * | Check if there are files to process
3 | FOR | EACH | FILE IN | C:\Data\Input | DO
    * | Process each file
  4 | RUN ACTION | MESSAGE PROMPT | Processing file: %FILE.NAME% (%FILE_COUNT%)
  5 | RUN ACTION | DEFINE STRING VARIABLE | %STATUS%::Processing
    * | Simulate file processing (e.g., move or compress file)
  6 | RUN ACTION | FILE MOVE | %FILE%::C:\Data\Processed
  7 | RUN ACTION | DEFINE STRING VARIABLE | %STATUS%::Completed
    * | Increment file count
  8 | RUN ACTION | DEFINE INTEGER VARIABLE | %FILE_COUNT%::+1
    * | Return to process the next file
9 | FOR | NEXT
  * | If no files remain, display completion message
10 | IF | INTEGER VARIABLE | %FILE_COUNT% | = | 0 | RUN ACTION | GOTO MACRO LINE | NoFiles
  * | Otherwise, go to End
11 | RUN ACTION | GOTO MACRO LINE | End

* | NoFiles
  * | Handle case where no files were found
12 | RUN ACTION | MESSAGE PROMPT | No files found in the Input folder.
13 | RUN ACTION | GOTO MACRO LINE | End

* | End
  * | Display final summary
14 | RUN ACTION | MESSAGE PROMPT | Processed %FILE_COUNT% files. Status: %STATUS%.
Explanation:
- Lines 1-2: Initialize the integer variable
%FILE_COUNT%for tracking processed files and the string variable%STATUS%for task status. - Line 3: Begins a
FOR EACH FILEloop to process all files in theC:\Data\Inputdirectory. - Lines 4-7: Simulates processing each file by displaying a prompt, updating the
%STATUS%, and moving the file to theC:\Data\Processeddirectory. - Line 8: Increments the
%FILE_COUNT%variable for each processed file. - Line 9: Ends the
FORloop, iterating to the next file if available. - Line 10: Checks if no files were processed and jumps to the
NoFilessection if true. - Lines 12-13: Handles the case where no files are found by displaying a message and jumping to the
Endheader. - Line 14: Displays a summary of the task, including the number of files processed and the final status.
This example demonstrates a practical scenario where GOTO MACRO LINE is used to dynamically navigate a macro for file processing tasks, integrating conditional logic, file operations, and loop structures.
Example 8: Relative Movement with Headers
* | Initialize
  * | Set up an integer variable for counting
1 | RUN ACTION | DEFINE INTEGER VARIABLE | %COUNTER%::0
  * | Display the initial message
2 | RUN ACTION | MESSAGE PROMPT | Starting the macro execution::%RETURN%::1

* | Processing
  * | Increment the counter
3 | RUN ACTION | DEFINE INTEGER VARIABLE | %COUNTER%::+1
  * | Check the counter value
4 | IF | INTEGER VARIABLE | %COUNTER% | LESS THAN | 5 | RUN ACTION | GOTO MACRO LINE | Repeat
  * | Exit if counter reaches 5
5 | RUN ACTION | GOTO MACRO LINE | Complete

* | Repeat
  * | Log the current counter value
6 | RUN ACTION | MESSAGE PROMPT | Counter is at %COUNTER%::%RETURN%::1
  * | Return to Processing
7 | RUN ACTION | GOTO MACRO LINE | Processing

* | Complete
  * | Display the completion message
8 | RUN ACTION | MESSAGE PROMPT | Macro completed. Final counter: %COUNTER%.
Explanation:
- Lines 1-2: Initialize the
%COUNTER%variable to track iterations and display a starting message. - Line 3: Increment the
%COUNTER%value in each iteration. - Line 4: Evaluate if
%COUNTER%is less than 5. If true, jump to theRepeatheader for further processing. - Line 5: Exit to the
Completesection when%COUNTER%reaches 5. - Lines 6-7: Log the current value of
%COUNTER%and return to theProcessingheader for the next iteration. - Line 8: Display a completion message when the loop ends.
This example demonstrates practical use of headers and relative movement (UP and DOWN) to structure a controlled iterative process with clear flow and logical checkpoints.
Important Notes
- Infinite Loops: Be cautious when using
%RETURN%inGOTOstatements, as it’s easy to create infinite loops unintentionally. Always ensure there’s a conditional exit point within any loop created using%RETURN%. - Header Uniqueness: Ensure that all remark headers (
* | HeaderName) within a macro are unique to avoid ambiguity when usingGOTO MACRO LINEwith headers. - Error Handling: While
GOTOprovides flexibility, excessive use can make code harder to read and debug. Consider using structured programming techniques (like loops and conditional statements) where possible to improve code clarity. - Conditional Logic Placement: Ensure that all conditions controlling flow are logically placed to prevent unintended jumps or skipped lines. Proper placement avoids issues such as bypassing necessary initialization or critical actions.
- Dynamic Jumps: When using variables for
GOTO MACRO LINE, ensure the variables are correctly initialized and evaluated to prevent undefined behavior or incorrect jumps. - Debugging Complexity: Test macros with detailed logging or prompts at key points to trace execution flow and identify any potential errors caused by
GOTOstatements.
INPUT BOX
Purpose
The INPUT BOX action in Mini Mouse Macro is a powerful tool for creating interactive macros that require user input during execution. It displays a dialog box prompting the user to enter text, which can then be stored in a variable for later use within the macro. This allows for dynamic and flexible macro behavior based on user-provided information.
How It Works
- Displays a Dialog Box: When the
INPUT BOXaction is executed, it presents a dialog box to the user with a customizable message and title. - Captures User Input: The user can type text into the input field of the dialog box.
- Stores Input in a Variable: The entered text is stored in either an
INTEGER,STRING, orBOOLEANvariable, as specified in the action’s parameters. - Enables Dynamic Macro Flow: The stored input can then be used in subsequent actions, such as
IFconditions orGOTO MACRO LINEcommands, to control the macro’s behavior based on the user’s input.
Adding the `INPUT BOX` action from the `Add Condition` dialog.
Parameters
- Prompt Message: The text displayed within the dialog box to instruct the user what to enter. (e.g., “Enter your name:”, “Please provide a value:”, “Run Macro 1 or Macro 2”).
- Title: The text displayed in the title bar of the dialog box. (e.g., “User Input Required”, “Macro Run Selection”, “Data Entry”).
- Variable Type: Specifies the type of variable where the user’s input will be stored:
INTEGER: Stores the input as an integer. If the user enters non-numeric text, the variable will likely be set to 0.STRING: Stores the input as a string of text, preserving any characters entered by the user.
Examples
Example 1: Basic Input Box with Integer Storage
1 | RUN ACTION | INPUT BOX | Run Macro 1 or Macro 2::Macro Run Selection::INTEGER
2 | IF | INTEGER VARIABLE | %INTEGER% | IS | 1 | GOTO MACRO LINE | 3 | ELSE | 2 | RUN ACTION | GOTO MACRO LINE | 200
Explanation - Example 1
- Line 1:
RUN ACTION | INPUT BOX | Run Macro 1 or Macro 2::Macro Run Selection::INTEGER- This line executes the
INPUT BOXaction. - Prompt Message: “Run Macro 1 or Macro 2” is displayed in the dialog box, instructing the user to enter a number.
- Title: “Macro Run Selection” is displayed in the title bar of the dialog box.
- Variable Type:
INTEGERspecifies that the user’s input will be stored as an integer in the variable%INTEGER%.
- This line executes the
- Line 2:
IF | INTEGER VARIABLE | %INTEGER% | IS | 1 | GOTO MACRO LINE | 3 | ELSE | 2 | RUN ACTION | GOTO MACRO LINE | 200- This line evaluates the value stored in the
%INTEGER%variable. - If the user entered
1, the macro jumps to line 3. - If the user entered any other value (including non-numeric text), the macro jumps to line 200.
- This line evaluates the value stored in the
Example 2: Input Box with String Storage and Prompt for File Path
1 | RUN ACTION | INPUT BOX | Enter the file path::File Path Input::STRING
2 | IF | FILE | %STRING% | EXIST | MESSAGE PROMPT | File exists! | ELSE | 2 | RUN ACTION | MESSAGE PROMPT | File does not exist.
Explanation - Example 2
- Line 1:
RUN ACTION | INPUT BOX | Enter the file path::File Path Input::STRING- This line executes the
INPUT BOXaction. - Prompt Message: “Enter the file path” is displayed in the dialog box.
- Title: “File Path Input” is displayed in the title bar.
- Variable Type:
STRINGspecifies that the user’s input will be stored as a string in the variable%STRING%.
- This line executes the
- Line 2:
IF | FILE | %STRING% | EXIST | MESSAGE PROMPT | File exists! | ELSE | 2 | RUN ACTION | MESSAGE PROMPT | File does not exist.- This line checks if the file path entered by the user (and stored in
%STRING%) exists. - If the file exists, a message box displays “File exists!”.
- If the file does not exist, a message box displays “File does not exist.”
- This line checks if the file path entered by the user (and stored in
Example 3: Input Box to Get a User’s Name
1 | RUN ACTION | INPUT BOX | Please enter your name::Name Input::STRING
2 | RUN ACTION | MESSAGE PROMPT | Hello, %STRING%!
Explanation - Example 3
- Line 1:
RUN ACTION | INPUT BOX | Please enter your name::Name Input::STRING- Prompts the user to enter their name with the message, “Please enter your name”.
- The title of the input box is set to “Name Input”.
- The entered name will be stored as a
STRINGin the variable%STRING%.
- Line 2:
RUN ACTION | MESSAGE PROMPT | Hello, %STRING%!- Displays a message prompt greeting the user by the name they entered. For example, if the user entered “John”, the message displayed will be “Hello, John!”.
INPUT FROM FILE
Purpose
The INPUT FROM FILE action in Mini Mouse Macro allows you to read data from a text file and assign that data to variables within your macro. This enables you to create dynamic macros that can adapt their behavior based on external data sources. You can read in individual variables or all variables defined in a specially formatted file, and you can choose to monitor the file for changes during macro execution.
How It Works
- Reads Data from a Text File: The
INPUT FROM FILEaction reads the contents of a specified text file. - Assigns Data to Variables: It parses the file content and assigns values to corresponding variables within the Mini Mouse Macro environment. The file can define values for integer variables (
%INTEGER%,%INTEGER1%, etc.), string variables (%STRING%,%STRING1%, etc.), or all variables if formatted correctly using theVARIABLESoption. - Supports File Monitoring: You can configure the action to monitor the input file for changes throughout the macro’s execution (
REFRESH) or to read the file only once (NO_REFRESH). IfREFRESHis enabled, any changes to the file will automatically update the corresponding variable values in real-time. - Handles Formatted Input: When using the
VARIABLESparameter, the input file must adhere to a specific format, where each line defines a variable and its value in the formatVARIABLE_TYPE::VALUE. An example of a correctly formatted file can be generated using theOUTPUT TO FILEaction with the%VARIABLES%parameter.
Parameters
- Variable: Specifies which variable(s) to read from the file:
INTEGER,INTEGER1,INTEGER2,INTEGER3,INTEGER4: Reads a single integer value into the corresponding integer variable. The input file should contain only a single integer value on a line for these options.STRING,STRING1,STRING2,STRING3,STRING4: Reads a string value into the corresponding string variable. The input file should contain the string on a single line.VARIABLES: Reads in all variables defined in the input file. The file must be formatted with each variable and its value on a new line, using the syntaxVARIABLE_TYPE::VALUE(e.g.,INTEGER::10,STRING::Hello).
- Refresh Mode: Determines whether to monitor the file for changes:
REFRESH: Continuously monitors the file for changes during macro execution. If the file is modified, the corresponding variables are automatically updated.NO_REFRESH: Reads the file only once at the beginning of the action. Subsequent changes to the file are ignored.
- File Path: The full path to the text file from which to read the variable data.
Examples
Example 1: Reading All Variables with Refresh
1 | RUN ACTION | INPUT FROM FILE | VARIABLES::REFRESH::D:\Macro\RX\INPUT.txt
2 | RUN ACTION | MESSAGE PROMPT | Value of STRING: %string%::String Value
Input File (D:\Macro\RX\INPUT.txt):
INTEGER::10
INTEGER1::20
INTEGER2::30
INTEGER3::40
INTEGER4::50
STRING::Ants
STRING1::Bee
STRING2::Cat
STRING3::Dog
STRING4::%CLIPBOARD%
Explanation - Example 1
- Line 1:
INPUT FROM FILE | VARIABLES::REFRESH::D:\Macro\RX\INPUT.txt- This line reads all variables defined in the file
D:\Macro\RX\INPUT.txt. VARIABLESindicates that the file contains multiple variable definitions.REFRESHmeans the macro will continuously monitor the file for changes. Any modifications to the file will automatically update the corresponding variable values within the macro.
- This line reads all variables defined in the file
- Line 2:
MESSAGE PROMPT | Value of STRING: %string%::String Value- This line displays a message prompt showing the value of the
%STRING%variable. Based on the input file, the message would display “Value of STRING: Ants”.
- This line displays a message prompt showing the value of the
Example 2: Reading a Single Integer Variable without Refresh
1 | RUN ACTION | INPUT FROM FILE | INTEGER::NO_REFRESH::D:\Macro\RX\INPUT.txt
2 | RUN ACTION | MESSAGE PROMPT | Value of INTEGER: %integer%::Integer Value
Input File (D:\Macro\RX\INPUT.txt):
1000
Explanation - Example 2
- Line 1:
INPUT FROM FILE | INTEGER::NO_REFRESH::D:\Macro\RX\INPUT.txt- This line reads a single integer value from the file
D:\Macro\RX\INPUT.txtand assigns it to the%INTEGER%variable. NO_REFRESHindicates that the file will be read only once, and subsequent changes to the file will not be reflected in the macro.
- This line reads a single integer value from the file
- Line 2:
MESSAGE PROMPT | Value of INTEGER: %integer%::Integer Value- This line displays a message prompt showing the value of the
%INTEGER%variable. Based on the input file, the message would display “Value of INTEGER: 1000”.
- This line displays a message prompt showing the value of the
Example 3: Reading a Single String Variable with Refresh
1 | RUN ACTION | INPUT FROM FILE | STRING3::REFRESH::D:\Macro\RX\INPUT.txt
2 | RUN ACTION | MESSAGE PROMPT | Value of STRING3: %STRING3%::String3 Value
Input File (D:\Macro\RX\INPUT.txt):
This is a test string.
Explanation - Example 3
- Line 1:
INPUT FROM FILE | STRING3::REFRESH::D:\Macro\RX\INPUT.txt- This line reads a single string value from the file
D:\Macro\RX\INPUT.txtand assigns it to the%STRING3%variable. REFRESHindicates that the file will be monitored for changes, updating the value of%STRING3%accordingly.
- This line reads a single string value from the file
- Line 2:
MESSAGE PROMPT | Value of STRING3: %STRING3%::String3 Value- This line displays a message prompt showing the value of the
%STRING3%variable. Based on the input file, the message would initially display “Value of STRING3: This is a test string.”. If the file is subsequently modified, the message prompt will update to reflect the changes due to theREFRESHparameter.
- This line displays a message prompt showing the value of the
KEYPRESS
Purpose
The KEYPRESS action in Mini Mouse Macro simulates keyboard input, allowing you to send keystrokes, text strings, and variable values to the currently active window. This is useful for automating text entry, filling out forms, and interacting with applications that respond to keyboard commands.
How It Works
- Sends Keystrokes to the Active Window: The
KEYPRESSaction directs simulated keystrokes to the window that currently has focus. - Supports Text and Variables: You can send literal text strings, special keys (like Enter or Tab), and the contents of variables.
- Processes Text Sequentially: The action processes the input string character by character, simulating each keystroke in order.
Parameters
- Text/Keystrokes/Variables: The sequence of characters, special keys, or variables to be sent as keyboard input.
- Literal text strings (e.g., “Hello”, “This is some text.”).
- Variables (e.g.,
%STRING%,%INTEGER%,%CLIPBOARD%).
Examples
Example 1: Sending Text and Variables
1 | RUN ACTION | KEYPRESS | The time is %time% and the date is %date%
Explanation - Example 1
- This line sends the text “The time is “ followed by the current time (value of the
%time%variable), then “ and the date is “ and finally the current date (value of the%date%variable) to the active window.
Example 2: Using Special Keys
1 | RUN ACTION | KEYPRESS | Username: Password
Example 2: Sending Clipboard contents.
1 | RUN ACTION | KEYPRESS | %CLIPBOARD%
Explanation - Example 2
- This line will send the current contents of the clipboard to the active window.
KEYPRESS FROM FILE
Purpose
The KEYPRESS FROM FILE action in Mini Mouse Macro sends the contents of a text file as simulated keyboard input to the currently active window. This is useful for automating the entry of large amounts of text or for sending pre-defined sequences of keystrokes stored in a file.
How It Works
- Reads Text from a File: The action reads the entire content of the specified text file.
- Sends Text as Keystrokes: It then sends the file’s contents as a sequence of simulated keystrokes to the active window, as if the user were typing the text.
- Processes File Content Sequentially: The action processes the file character by character, simulating each keystroke in the order it appears in the file.
Keypress and Keypress from File example
Parameters
- File Path: The full path to the text file containing the text to be sent as keyboard input.
Examples
Example 1: Sending the Contents of a File to Notepad
1 | RUN ACTION | RUN PROGRAM | Notepad.exe
2 | IF | WINDOW TITLE | Untitled - Notepad | EXIST | CONTINUE
3 | RUN ACTION | SELECT WINDOW BY NAME | Untitled - Notepad
4 | RUN ACTION | KEYPRESS FROM FILE | D:\Macro\TX\Output.txt
Explanation - Example 1
- Line 1:
RUN ACTION | RUN PROGRAM | Notepad.exeopens a new Notepad instance. - Line 2:
IF | WINDOW TITLE | Untitled - Notepad | EXIST | CONTINUEwaits until the new Notepad window exists.CONTINUEmakes the macro wait until theIFcondition is met, otherwise the macro will terminate. - Line 3:
RUN ACTION | SELECT WINDOW BY NAME | Untitled - Notepadmakes the newly opened Notepad window the active window. - Line 4:
KEYPRESS FROM FILE | D:\Macro\TX\Output.txtsends the entire contents of the fileD:\Macro\TX\Output.txtas keyboard input to the active Notepad window.
Example 2: Using KEYPRESS and KEYPRESS FROM FILE together
1 | RUN ACTION | INPUT FROM FILE | STRING::NO_REFRESH::D:\Macro\TX\output.txt
2 | RUN ACTION | MESSAGE PROMPT | %STRING%::Contents of output.txt::0
3 | RUN ACTION | RUN PROGRAM | Notepad.exe
4 | IF | WINDOW TITLE | Untitled - Notepad | EXIST | CONTINUE
5 | RUN ACTION | SELECT WINDOW BY NAME | Untitled - Notepad
6 | RUN ACTION | KEYPRESS FROM FILE | D:\Macro\TX\Output.txt
7 | RUN ACTION | KEYPRESS | The time is %time% and the date is %date%
Explanation - Example 2
- Line 1:
RUN ACTION | INPUT FROM FILE | STRING::NO_REFRESH::D:\Macro\TX\output.txtreads the contents ofD:\Macro\TX\output.txtinto the%STRING%variable. - Line 2:
RUN ACTION | MESSAGE PROMPT | %STRING%::Contents of output.txt::0displays the contents of the%STRING%variable (which now holds the file’s content) in a message prompt. - Line 3:
RUN ACTION | RUN PROGRAM | Notepad.exeopens a new Notepad instance. - Line 4:
IF | WINDOW TITLE | Untitled - Notepad | EXIST | CONTINUEmakes sure the macro waits for the Notepad window to open. - Line 5:
RUN ACTION | SELECT WINDOW BY NAME | Untitled - Notepadmakes the Notepad window active. - Line 6:
RUN ACTION | KEYPRESS FROM FILE | D:\Macro\TX\Output.txtsends the contents ofD:\Macro\TX\Output.txtas keystrokes to Notepad. - Line 7:
RUN ACTION | KEYPRESS | The time is %time% and the date is %date%sends the text “The time is “ followed by the current time and date to Notepad.
KILL PROCESS ID
Purpose
The KILL PROCESS ID action in Mini Mouse Macro allows you to terminate a running process on your system by specifying its unique process ID (PID). This is useful for stopping unresponsive applications, ending background tasks, or controlling processes as part of a larger automation workflow.
How It Works
- Identifies Process by PID: The action targets a specific process based on its process ID, a unique numerical identifier assigned by the operating system.
- Terminates the Process: It sends a termination signal to the specified process, causing it to shut down.
- Requires PID Input: You must provide the PID of the process you want to terminate.
Parameters
- Process ID (PID): The numerical identifier of the process to be terminated. You can find the PID of a running process using the Task Manager (in the “Details” tab) or through other system monitoring tools.
Examples
Example 1: Terminating a Process by its PID
1 | RUN ACTION | KILL PROCESS ID | 1234
Explanation - Example 1
- This line terminates the process with the PID
1234. You would replace1234with the actual PID of the process you want to kill.
Example 2: Conditionally Terminating a Process
1 | IF | PROCESS ID | 4567 | EXIST | KILL PROCESS ID | 4567
Explanation - Example 2
- This line checks if a process with PID
4567is currently running. - If the process exists, the
KILL PROCESS IDaction is executed, terminating the process.
KILL PROCESS NAME
Purpose
The KILL PROCESS NAME action in Mini Mouse Macro allows you to terminate a running process by specifying its name. This is a more user-friendly way to stop processes compared to using KILL PROCESS ID, as you don’t need to know the process ID.
How It Works
- Identifies Process by Name: The action targets processes based on their executable file names (e.g.,
notepad.exe,chrome.exe). - Terminates the Process: It sends a termination signal to all processes matching the specified name, causing them to shut down.
- Requires Process Name Input: You must provide the name of the process you want to terminate.
Parameters
- Process Name: The name of the process to be terminated (e.g.,
notepad.exe,chrome.exe).
Examples
Example 1: Terminating Notepad
1 | RUN ACTION | KILL PROCESS NAME | notepad.exe
Explanation - Example 1
- This line terminates all running instances of Notepad (processes with the name
notepad.exe).
Example 2: Conditionally Terminating a Process by its Name
1 | IF | PROCESS NAME | chrome.exe | EXIST | KILL PROCESS NAME | chrome.exe
Explanation - Example 2
- This line checks if any processes named
chrome.exeare currently running. - If any are found, the
KILL PROCESS NAMEaction is executed, terminating all processes with that name.
Example 3: Terminating a Process as Part of a Larger Macro
1 | RUN ACTION | RUN PROGRAM | D:\MyProgram\MyApplication.exe
2 | RUN ACTION | WAIT | 5
3 | RUN ACTION | KILL PROCESS NAME | MyApplication.exe
Explanation - Example 3
- Line 1: This line launches the program located at
D:\MyProgram\MyApplication.exe. - Line 2: This line introduces a 5-second delay using the
WAITaction, giving the program time to start. - Line 3: This line terminates the process named
MyApplication.exe.
Important Considerations
- Caution: Terminating processes can lead to data loss or system instability if not done carefully. Make sure you understand the purpose of a process before terminating it.
- Administrator Privileges: In some cases, you may need administrator privileges to terminate certain processes.
- Multiple Instances:
KILL PROCESS NAMEwill terminate all processes matching the specified name. Be aware of this when targeting common applications like web browsers, which may have multiple instances running. - .exe Extension: It’s a good practice to include the
.exeextension when specifying the process name, though some systems may allow you to omit it.
LOAD MACRO
Purpose
The LOAD MACRO action in Mini Mouse Macro allows you to load and execute another saved macro file (.mmmacro) from within the currently running macro. This enables you to chain macros together, creating modular and reusable automation sequences. It effectively stops the current macro and starts executing the loaded one.
How It Works
- Loads a
.mmmacroFile: The action loads a macro from a specified.mmmacrofile. - Stops the Current Macro: Once the new macro is loaded, the execution of the current macro is immediately halted.
- Starts the Loaded Macro: The newly loaded macro begins execution from its first line.
- Replaces Current Macro: The loaded macro effectively replaces the current macro in the Mini Mouse Macro interface.
Parameters
- File Path: The full path to the
.mmmacrofile that you want to load and execute.
Examples
Example 1: Loading a Macro from a File
1 | IF | FILE | C:\MMM\Macro4.mmmacro | EXIST | LOAD MACRO | C:\MMM\Macro4.mmmacro
Explanation - Example 1
- This line checks if the file
C:\MMM\Macro4.mmmacroexists. - If the file exists, the
LOAD MACROaction is executed:- The current macro stops running.
- The macro stored in
C:\MMM\Macro4.mmmacrois loaded into Mini Mouse Macro. - The loaded macro (
Macro4.mmmacro) starts executing.
Example 2: Loading a Macro from within a Larger Macro
1 | RUN ACTION | MESSAGE PROMPT | Starting Main Macro
2 | RUN ACTION | LOAD MACRO | D:\Macros\SubMacro.mmmacro
3 | RUN ACTION | MESSAGE PROMPT | This will not be reached
Explanation - Example 2
- Line 1: Displays a message indicating the start of the main macro.
- Line 2:
LOAD MACRO | D:\Macros\SubMacro.mmmacroloads and starts the macro stored inD:\Macros\SubMacro.mmmacro. The current macro is immediately stopped. - Line 3: This line will never be executed because the
LOAD MACROaction in Line 2 stops the current macro.
LOAD MACRO FROM URL
Purpose
The LOAD MACRO FROM URL action allows you to load and execute a macro directly from a URL. This enables you to store macros remotely and dynamically load them into Mini Mouse Macro, providing flexibility and centralized management of your automation scripts.
How It Works
- Fetches Macro from URL: The action retrieves the macro content from the specified URL. The URL must point to a valid
.mmmacrofile or a text file containing macro commands. - Stops the Current Macro: If a macro is currently running, it is immediately halted.
- Loads and Executes the Fetched Macro: The fetched macro is loaded into Mini Mouse Macro and starts executing.
Parameters
- URL: The full URL of the macro file (
.mmmacro) or the text file containing the macro commands. The URL must begin withhttp://orhttps://.
Examples
Example 1: Loading a .mmmacro File from a URL
1 | RUN ACTION | LOAD MACRO FROM URL | https://minimousemacro.com/macro/test_macro.mmmacro
Explanation - Example 1
- This line loads the macro from the URL
https://minimousemacro.com/macro/test_macro.mmmacro. - If a macro is currently running, it is stopped.
- The fetched macro
test_macro.mmmacrois loaded and begins execution.
Example 2: Loading Macro Commands from a Text File URL (e.g., Pastebin)
1 | RUN ACTION | LOAD MACRO FROM URL | https://pastebin.com/raw/Qii5ZbVa
Explanation - Example 2
- This line loads macro commands from the text file located at the Pastebin URL
https://pastebin.com/raw/Qii5ZbVa. The raw Pastebin URL typically provides plain text content. - The current macro (if any) is stopped.
- The fetched macro commands are loaded into Mini Mouse Macro and executed line by line.
Example 3: Loading a Macro from a URL within a Larger Macro
1 | RUN ACTION | MESSAGE PROMPT | Starting Main Macro
2 | RUN ACTION | LOAD MACRO FROM URL | https://example.com/mymacro.mmmacro
3 | RUN ACTION | MESSAGE PROMPT | This will not be reached
Explanation - Example 3
- Line 1: Displays a message indicating the start of the main macro.
- Line 2:
LOAD MACRO FROM URL | https://example.com/mymacro.mmmacroloads and starts the macro from the given URL. Any currently running macro is immediately stopped. - Line 3: This line will never be executed because the
LOAD MACRO FROM URLaction in Line 2 stops the current macro.
Important Notes
- Security: Be cautious when loading macros from external URLs. Ensure the source is trusted to avoid executing malicious code.
- File Format: The URL must point to a valid
.mmmacrofile or a text file containing properly formatted Mini Mouse Macro commands. - Internet Connection: An active internet connection is required to load macros from URLs.
- Error Handling: If the URL is invalid or the macro cannot be loaded, Mini Mouse Macro will flag the line as erronous.
LOG OFF COMPUTER
Purpose
The LOG OFF COMPUTER action in Mini Mouse Macro provides a way to programmatically log off the current user from the Windows operating system. This can be useful for automating system maintenance tasks, enforcing security policies, or preparing a computer for use by a different user.
How It Works
- Initiates Log Off Sequence: The action triggers the standard Windows log off process.
- Closes User Sessions: It closes all open applications and processes associated with the current user’s session.
- Returns to Login Screen: The system returns to the Windows login screen, prompting for user credentials.
- Immediate Action: The log off process begins immediately after the action is executed.
Parameters
- This action does not require any parameters.
Examples
Example 1: Logging Off the Computer
1 | RUN ACTION | LOG OFF COMPUTER
Explanation - Example 1
- This line immediately logs off the current user from the computer.
Example 2: Conditional Log Off
1 | IF | TIME | 2:00:00 PM | IS AFTER CURRENT TIME | LOG OFF COMPUTER
Explanation - Example 2
- This line checks if the current time is after 2:00 PM.
- If it is, the
LOG OFF COMPUTERaction is executed, logging off the user.
MESSAGE PROMPT
Purpose
The MESSAGE PROMPT action in Mini Mouse Macro displays a customizable message box to the user. This is useful for providing information, warnings, or confirmations during macro execution. It can also be used to pause the macro until the user acknowledges the message by clicking “OK”.
How It Works
- Displays a Modal Dialog: The action creates a modal dialog box that appears on top of other windows, requiring user interaction before the macro can continue.
- Customizable Content: You can specify the message text, title, style, and timeout duration of the message box.
- Supports Variables: The message text can include variables, allowing you to display dynamic information based on the macro’s state.
- Pauses Macro Execution: The macro execution pauses until the user clicks the “OK” button or the timeout period expires (if set).
- Multiple Styles: You can choose from different message box styles (OK Only, Information, Exclamation, Critical, Question) to visually indicate the nature of the message.
Adding a MESSAGE PROMPT action from the 'Add Condition' tool.
Parameters
- Message Text: The text to be displayed in the message box.
- Supports variables (e.g.,
%STRING%,%INTEGER%,%DATE%,%TIME%,%RANDOM%). - Use
\nfor line breaks within the message.
- Supports variables (e.g.,
- Title (Optional): The text to be displayed in the title bar of the message box. If omitted, the title bar may display a default value or remain blank.
- Timeout (Optional): The number of seconds after which the message box will automatically close as if the “OK” button were clicked. This parameter only applies to the “OK Only” style. If omitted or set to 0, the message box will remain open until the user clicks “OK”.
- Style (Optional): The visual style of the message box:
OK Only(Default): A simple message box with an “OK” button and no icon.Information: Displays a blue information icon (i).Exclamation: Displays a yellow exclamation icon (!).Critical: Displays a red cross icon (X).Question: Displays a blue question mark icon (?).
Examples
Example 1: Basic Message Prompt
1 | RUN ACTION | MESSAGE PROMPT | Hit OK to continue::Message Prompt
Explanation - Example 1
- This line displays a message box with the following:
- Message Text: “Hit OK to continue”
- Title: “Message Prompt”
- Style: “OK Only” (default)
- The macro execution pauses until the user clicks the “OK” button.
Example 2: Message Prompt with Variables
1 | RUN ACTION | MESSAGE PROMPT | String1 variable is %string1% and integer2 is %integer2%. The date is %DATE% and time is %TIME%. Don't forget %RANDOM%.
Explanation - Example 2
- This line displays a message box that includes the values of several variables:
%string1%: The value of the string variablestring1.%integer2%: The value of the integer variableinteger2.%DATE%: The current date.%TIME%: The current time.%RANDOM%: A random number.
- The title and style use default values.
Example 3: Message Prompt with Timeout
1 | RUN ACTION | MESSAGE PROMPT | This message prompt has a timeout value of 10 seconds::Message with a timeout::10
Explanation - Example 3
- This line displays a message box with:
- Message Text: “This message prompt has a timeout value of 10 seconds”
- Title: “Message with a timeout”
- Style: “OK Only” (default)
- Timeout: 10 seconds
- The message box will automatically close after 10 seconds as if the “OK” button were clicked.
Example 4: Message Prompt with Information Style and Line Breaks
1 | RUN ACTION | MESSAGE PROMPT | This is my message box.'\n'There are many like it, but this one is mine.::My Message Box::0::Information
Explanation - Example 4
- This line displays a message box with:
- Message Text: “This is my message box.\nThere are many like it, but this one is mine.” (The
\ncreates a line break.) - Title: “My Message Box”
- Style: “Information”
- Timeout: 0 (no timeout)
- Message Text: “This is my message box.\nThere are many like it, but this one is mine.” (The
- The message box displays a blue information icon.
Important Notes
- Modal Behavior: Message prompts are modal, meaning they block interaction with other parts of the application until they are closed.
- Timeout and OK Only: The timeout parameter only works with the “OK Only” style. Other styles will ignore the timeout value.
- Line Breaks: Use
\nto create line breaks in the message text.
MOUSE CLICK
Purpose
The MOUSE CLICK action in Mini Mouse Macro simulates mouse clicks at specified coordinates on the screen. This action is fundamental for automating interactions with graphical user interfaces, allowing you to click buttons, select menu items, interact with controls, and perform other mouse-related actions within applications.
How It Works
- Simulates Mouse Clicks: The action simulates left, right, or middle mouse clicks.
- Coordinate-Based: You specify the X and Y coordinates on the screen where the click should occur.
- Supports Multiple Clicks: You can perform a series of clicks at the same location with a specified delay between each click.
- Click Types:
Left ClickRight ClickMiddle Click
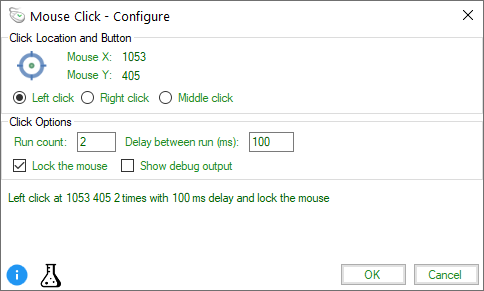
Mouse Click - configure from the 'Add Condition' tool.
Parameters
- Click Type: Specifies the type of mouse click to perform:
Left ClickRight ClickMiddle Click
- X Coordinate: The horizontal position on the screen where the click should occur, measured in pixels from the left edge.
- Y Coordinate: The vertical position on the screen where the click should occur, measured in pixels from the top edge.
- Number of Clicks (Optional): The number of times to repeat the click at the specified location. If omitted, defaults to 1.
- Delay (ms) (Optional): The delay in milliseconds between each click in a series of clicks. If omitted, defaults to a minimal delay.
Examples
Example 1: Basic Mouse Clicks
* | Basic Left, Right, and Middle button clicks
1 | RUN ACTION | MOUSE CLICK | Left Click at 900 470
2 | RUN ACTION | MOUSE CLICK | Right Click at 900 470
3 | RUN ACTION | MOUSE CLICK | Middle Click at 900 470
Explanation - Example 1
- Line 1:
MOUSE CLICK | Left Click at 900 470performs a single left click at screen coordinates X=900, Y=470. - Line 2:
MOUSE CLICK | Right Click at 900 470performs a single right click at the same coordinates. - Line 3:
MOUSE CLICK | Middle Click at 900 470performs a single middle click at the same coordinates.
Example 2: Multiple Clicks with Delay
* | Left click 100 times with a 50 ms delay
4 | RUN ACTION | MOUSE CLICK | Left Click at 900 470 100 times with 50 ms delay
Explanation - Example 2
- Line 4:
MOUSE CLICK | Left Click at 900 470 100 times with 50 ms delayperforms 100 left clicks at coordinates X=900, Y=470, with a 50-millisecond delay between each click.
Example 3: Clicking on a Button in an Application
1 | RUN ACTION | RUN PROGRAM | C:\MyApplication\MyApp.exe
2 | IF | WINDOW TITLE | My Application | EXIST | CONTINUE
3 | RUN ACTION | MOUSE CLICK | Left Click at 350 280
Explanation - Example 3
- Line 1: Launches the application
MyApp.exe. - Line 2: Waits for the window titled “My Application” to appear.
- Line 3:
MOUSE CLICK | Left Click at 350 280performs a left click at coordinates X=350, Y=280, which might correspond to the location of a button within the application’s window.
Important Notes
- Screen Resolution: Mouse click coordinates are relative to the screen resolution. If the screen resolution changes or if the target application’s window is moved or resized, the click may not occur at the intended location.
- Window State: Ensure the target application’s window is in the expected state (e.g., maximized, minimized, or restored) before performing mouse clicks based on coordinates.
- Timing: In some cases, you may need to add delays (using
WAITactions) before or after mouse clicks to ensure that the target application is ready to receive the input. - Dynamic Elements: If the element you are trying to click is dynamic (e.g., its position changes), you might need to use other techniques like
PIXEL CAPTUREorOCRto locate the element before clicking.
MOUSE MOVEMENT
Purpose
The MOUSE MOVEMENT action in Mini Mouse Macro allows you to programmatically move the mouse cursor to specified coordinates on the screen. This action is essential for automating interactions that require precise cursor positioning, such as drawing, selecting objects in graphics applications, or interacting with UI elements that don’t respond to direct clicks.
How It Works
- Moves the Mouse Cursor: The action directly manipulates the mouse cursor’s position on the screen.
- Coordinate-Based: You specify the target location using X and Y coordinates.
- Supports Multiple Movements: You can chain multiple coordinate pairs to move the mouse through a sequence of points.
- Optional Delays: You can introduce delays between each movement in the sequence.
- Variable Support: You can use variables for the X, Y coordinates, and the delay values, enabling dynamic mouse movements based on calculations or other macro logic.
- Smooth Movements: By breaking down movements into smaller steps with short delays, you can create smoother, more human-like mouse movements.
- UI: Best built from the ‘Add Condition’ tool using the ‘Add Action’ button. Building the action from the ‘Add Condition’ tool allows for the capture of mouse movements and generation of code.
Parameters
- Coordinate Pairs: A sequence of X-Y coordinate pairs, separated by commas, defining the points to which the mouse cursor should move. Each coordinate pair is specified as
X-Y. - Delay (Optional): A delay in milliseconds to introduce after each mouse movement. This is specified after each coordinate pair, separated by a colon (e.g.,
X-Y:Delay). If omitted, a minimal default delay is used.
Examples
Example 1: Simple Mouse Movement
1 | RUN ACTION | MOUSE MOVEMENT | 100-150:10
Explanation - Example 1
- This line moves the mouse cursor to the coordinates X=100, Y=150 with a 10-millisecond delay after the movement.
Example 2: Multiple Mouse Movements with Delays
2 | RUN ACTION | MOUSE MOVEMENT | 300-350:10, 375-400:10, 425-450:10,475-500:10,525-550:10,575-600:10,625-650:10,675-700:10,300-350:10, 375-400:10, 425-450:10,475-500:10,525-550:10,575-600:10,625-650:10,675-700:10
Explanation - Example 2
- This line moves the mouse cursor through a sequence of 16 coordinate pairs:
- (300, 350), (375, 400), (425, 450), (475, 500), (525, 550), (575, 600), (625, 650), (675, 700),
- (300, 350), (375, 400), (425, 450), (475, 500), (525, 550), (575, 600), (625, 650), (675, 700)
- Each movement has a 10-millisecond delay after it.
Example 3: Using Variables for Mouse Movement
3 | RUN ACTION | MOUSE MOVEMENT | %XPOS%-%YPOS%:%intDelay%
Explanation - Example 3
- This line demonstrates using variables for the coordinates and delay.
%XPOS%: Contains the X coordinate.%YPOS%: Contains the Y coordinate.%intDelay%: Contains the delay in milliseconds.
- The mouse cursor will move to the coordinates specified by
%XPOS%and%YPOS%, with a delay specified by%intDelay%after the movement.
Example 4: Drawing a Square with Mouse Movement
1 | RUN ACTION | DEFINE INTEGER VARIABLE | %XSTART%::100
2 | RUN ACTION | DEFINE INTEGER VARIABLE | %YSTART%::100
3 | RUN ACTION | DEFINE INTEGER VARIABLE | %SIZE%::50
4 | RUN ACTION | DEFINE INTEGER VARIABLE | %DELAY%::5
5 | RUN ACTION | MOUSE MOVEMENT | %XSTART%-%YSTART%:%DELAY%
6 | RUN ACTION | MOUSE MOVEMENT | %XSTART%+%SIZE%-%YSTART%:%DELAY%
7 | RUN ACTION | MOUSE MOVEMENT | %XSTART%+%SIZE%-%YSTART%+%SIZE%:%DELAY%
8 | RUN ACTION | MOUSE MOVEMENT | %XSTART%-%YSTART%+%SIZE%:%DELAY%
9 | RUN ACTION | MOUSE MOVEMENT | %XSTART%-%YSTART%:%DELAY%
Explanation - Example 4
- Lines 1-4: Define variables for the starting coordinates (
%XSTART%,%YSTART%), the size of the square (%SIZE%), and the delay (%DELAY%). - Line 5: Moves the mouse to the starting position.
- Lines 6-9: Move the mouse in a square pattern using the variables:
- Right:
%XSTART%+%SIZE%-%YSTART% - Down:
%XSTART%+%SIZE%-%YSTART%+%SIZE% - Left:
%XSTART%-%YSTART%+%SIZE% - Up:
%XSTART%-%YSTART%
- Right:
- Each movement has a delay defined by
%DELAY%.
Important Notes
- Screen Resolution: Mouse movement coordinates are relative to the screen resolution. Ensure that the target application and screen resolution are consistent when using absolute coordinates.
- Window State: If you’re interacting with a specific application, make sure its window is in the expected position and state (maximized, minimized, or restored).
- Timing: You may need to experiment with delays to achieve the desired results, especially when interacting with applications that may have response times or animations.
- Smoothness: For smoother, more human-like mouse movements, consider using multiple smaller movements with short delays instead of single large movements.
MOUSE TO IMAGE
Purpose
The MOUSE TO IMAGE action in Mini Mouse Macro searches for a specified image on the screen and, if found, optionally moves the mouse cursor to the detected image’s location. It can also store the coordinates of the found image in variables for later use. This action is particularly useful for automating interactions with applications that have graphical elements that are not easily accessible through traditional methods like window controls or keyboard shortcuts.
How It Works
- Image Detection: The action searches the screen (either the entire screen or a defined region) for a specified image. The image to be detected is provided as a bitmap (.bmp) file.
- Matching Algorithms: It offers two matching algorithms:
Match Quick: Performs a faster, partial pixel match. This is suitable when performance is critical or when slight variations in the image are expected.Match Full: Performs a slower, but more accurate, full pixel match. This ensures that the detected image matches the provided image file exactly.
- Mouse Movement: If the image is found and the
Move Mouse Yesoption is selected, the action moves the mouse cursor to the center of the detected image. - Coordinate Storage: The X and Y coordinates of the detected image can be stored in variables, allowing you to use these coordinates in subsequent actions.
- Offset: You can specify an offset to adjust the final mouse position relative to the center of the detected image.
- UI: Best built from the ‘Add Condition’ tool. Building the action from the ‘Add Condition’ ensures syntax.
- Note: The
DETECT IMAGEobject condition allows for conditional execution based on image detection. See DETECT IMAGE for more information.
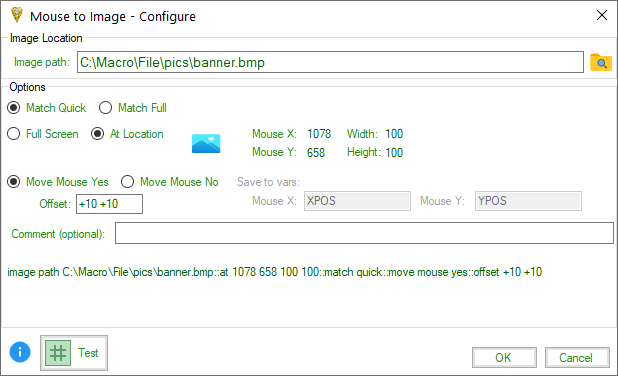
Mouse to Image action via the 'Add Condition' tool.
Parameters
- Image Path: The full path to the image file (
.bmpformat) that you want to detect on the screen. - Matching Options:
Match Quick: Performs a partial pixel match for faster detection.Match Full: Performs a full pixel match for higher accuracy.
- Search Area:
Full Screen: Searches the entire screen for the image.At Location: Searches within a specific region of the screen defined by:- Mouse X: The X coordinate of the top-left corner of the search region.
- Mouse Y: The Y coordinate of the top-left corner of the search region.
- Width: The width of the search region.
- Height: The height of the search region.
- Mouse Movement Options:
Move Mouse Yes: Moves the mouse cursor to the center of the detected image.- Offset: An optional offset (e.g.,
+10+10,-5-5) to adjust the final mouse position relative to the center of the image. The format is+X+Yor-X-Ywhere X and Y are the pixel variations for the horizontal and vertical offsets respectively.
- Offset: An optional offset (e.g.,
Move Mouse No: Does not move the mouse cursor. Use this option if you only want to detect the image and store its coordinates in variables.
- Save to Vars (Only when
Move Mouse Nois selected):- Mouse X: The variable name to store the X coordinate of the detected image’s top-left corner.
- Mouse Y: The variable name to store the Y coordinate of the detected image’s top-left corner.
- Comment (Optional): A comment to add to the macro line for documentation purposes.
Examples
Example 1: Moving the Mouse to a Detected Image
1 | RUN ACTION | MOUSE TO IMAGE | image path C:\Macro\File\pics\banner.bmp::match quick::move mouse yes
Explanation - Example 1
- This line searches the entire screen for the image
banner.bmplocated atC:\Macro\File\pics. match quickspecifies a fast, partial pixel match.move mouse yesindicates that the mouse cursor should be moved to the center of the detected image.
Example 2: Detecting an Image at a Specific Location and Storing Coordinates
1 | RUN ACTION | MOUSE TO IMAGE | image path C:\Macro\File\pics\icon.bmp::at 1078 658 100 100::match full::move mouse no::save to vars XPOS YPOS
Explanation - Example 2
- This line searches for the image
icon.bmpwithin a specific region of the screen defined by:- Top-left corner: X=1078, Y=658
- Width: 100 pixels
- Height: 100 pixels
match fullspecifies a full pixel match.move mouse noindicates that the mouse cursor should not be moved.save to vars xpos yposspecifies that the X coordinate of the detected image should be stored in the variable%XPOS%and the Y coordinate in%YPOS%.
Example 3: Moving the Mouse to an Image with an Offset
1 | RUN ACTION | MOUSE TO IMAGE | image path C:\Macro\File\pics\button.bmp::match quick::move mouse yes::offset +10+5
Explanation - Example 3
- This line searches the entire screen for the image
button.bmp. match quickspecifies a fast, partial pixel match.move mouse yesindicates that the mouse cursor should be moved to the detected image.offset +10+5specifies that the mouse cursor should be moved 10 pixels to the right and 5 pixels down from the center of the detected image.
Mouse to Image action via the 'Add Condition' tool.
Important Notes
- Image Format: The image file must be in
.bmp(bitmap) format. - Screen Resolution: The coordinates used in
At Locationare relative to the screen resolution. Changes in resolution may affect the accuracy of image detection. - Performance:
Match Fullis more accurate but slower thanMatch Quick. Choose the appropriate method based on your needs. In most cases,Match Quickis sufficient and is recommended for better performance. DETECT IMAGECondition: TheDETECT IMAGEcondition offers a more robust way to handle situations where the image may or may not be found on the screen, as it allows you to define actions to take in both cases (image found and image not found). See DETECT IMAGE for more information.- Visual Elements:
MOUSE TO IMAGEis particularly useful when interacting with applications that rely heavily on graphical elements that are not easily accessible through other automation methods.
MYSQL
Purpose
The MYSQL action in Mini Mouse Macro enables interaction with remote MySQL databases. It allows you to connect to a MySQL server, send SQL statements, and retrieve query results. This functionality is essential for integrating database operations into your automated workflows, enabling tasks like data extraction, updates, and other database-driven actions within your macros.
How It Works
- Plugin-Based Functionality: The
MYSQLaction relies on a plugin. Ensure that you have the MySQL plugin downloaded and installed, or manually install the MySQL connector version 8.0.23 from the official MySQL website. - Connection Setup: Before performing any database operations, you need to establish a connection to the MySQL server using the
CONNECTcommand. This involves providing the server address, database name (optional), username, and password. - Command Options: The
MYSQLaction offers three primary commands:CONNECT: Establishes a connection to the MySQL server.QUERY: Executes aSELECTquery and stores the result in the internal%MYSQL_RESULT%variable.SQL: Executes any other SQL statement (e.g.,INSERT,UPDATE,DELETE).
- Result Retrieval: The result of a
QUERYcommand is stored in the%MYSQL_RESULT%variable, which can then be accessed by other actions in your macro.
MySQL action via the 'Add Condition' tool.
Parameters
The parameters for the MYSQL action depend on the specific command being used (CONNECT, QUERY, or SQL).
CONNECT Parameters:
- Connection Method: Specifies how to provide the connection details:
Direct Input: Enter the connection details directly in the macro line, separated by::.- Format:
CONNECT::SERVER::DATABASE::USERNAME::PASSWORD
- Format:
File Input: Read the connection details from a text file.- Format:
CONNECT::[File Path] - The file should contain the following lines:
SERVER=[Server Address] DATABASE=[Database Name] USERNAME=[Username] PASSWORD=[Password]
- Format:
Prompt Input: Prompts the user to enter the connection details during macro execution.- Format:
CONNECT::PROMPT
- Format:
QUERY and SQL Parameters:
- Statement Input Method: Specifies how to provide the SQL statement:
Direct Input: Enter the SQL statement directly in the macro line, separated by::.- Format:
QUERY::[SQL Statement]orSQL::[SQL Statement]
- Format:
File Input: Read the SQL statement from a text file.- Format:
QUERY::[File Path]orSQL::[File Path] - The file should contain the SQL statement.
- Format:
Examples
Example 1: Connecting to a MySQL Server with Direct Input
1 | RUN ACTION | MYSQL | CONNECT::192.168.1.201::orders::myremoteuser::SecretPassword
Explanation - Example 1
- This line establishes a connection to a MySQL server with the following details:
- Server:
192.168.1.201 - Database:
orders - Username:
myremoteuser - Password:
SecretPassword
- Server:
MYSQL setup with direct input.
Example 2: Connecting to a MySQL Server with File Input
1 | RUN ACTION | MYSQL | CONNECT::C:\Users\steph\Dropbox\Macro\File\mysql_setup.mmmacro
File (mysql_setup.mmmacro):
SERVER=192.168.1.201
DATABASE=orders
USERNAME=ringo
PASSWORD=SecretPassword
Explanation - Example 2
- This line reads the connection details from the file
C:\Users\steph\Dropbox\Macro\File\mysql_setup.mmmacroand establishes a connection to the MySQL server.

MYSQL setup with from file.
Example 3: Connecting to a MySQL Server with Prompt Input
1 | RUN ACTION | MYSQL | CONNECT::PROMPT
Explanation - Example 3
- This line prompts the user to enter the connection details (server, database, username, and password) in a dialog box during macro execution.

MYSQL setup with prompt.
Example 4: Executing an SQL Statement with Direct Input
1 | RUN ACTION | MYSQL | SQL::INSERT into CUSTOMERS (id, order_date, order_name, order_email) values ( null, '2021-03-20', 'Johnathan Thurston', 'JT@cowboys.com' );
Explanation - Example 4
- This line executes an
INSERTstatement on the connected MySQL server. The statement inserts a new row into theCUSTOMERStable.
Example 5: Executing an SQL Query and Retrieving the Result
1 | RUN ACTION | MYSQL | CONNECT::192.168.1.100::mydatabase::user::password
2 | RUN ACTION | MYSQL | QUERY::SELECT * FROM users WHERE id = 1
3 | RUN ACTION | MESSAGE PROMPT | %MYSQL_RESULT%
Explanation - Example 5
- Line 1: Establishes a connection to the MySQL server.
- Line 2: Executes a
SELECTquery to retrieve data from theuserstable where theidis 1. The result of this query is stored in the%MYSQL_RESULT%variable. - Line 3: Displays the content of the
%MYSQL_RESULT%variable (the query result) in a message prompt.
Example 6: Executing an SQL Statement from a File
1 | RUN ACTION | MYSQL | SQL::C:\Users\steph\Dropbox\Macro\mysql\mysql_send.mmmacro
File (mysql_send.mmmacro):
SQL::INSERT into CUSTOMERS (id, order_date, order_name, order_email) values ( null, '2021-03-20', 'Johnathan Thurston', 'JT@cowboys.com' );
Explanation - Example 6
- This line reads the SQL statement from the file
C:\Users\steph\Dropbox\Macro\mysql\mysql_send.mmmacroand executes it on the connected MySQL server.
Important Notes
- Security: Be cautious about storing database credentials directly in macros or files. Consider using more secure methods like environment variables or dedicated credential management tools.
- Error Handling: The
MYSQLaction may generate errors if the connection fails or if there are issues with the SQL statements. You might need to add error handling to your macros to gracefully handle such situations. - Plugin/Connector: Ensure the MySQL plugin or connector is properly installed and configured for the
MYSQLaction to work correctly. - %MYSQL_RESULT%: The
%MYSQL_RESULT%variable is overwritten each time aQUERYis executed. If you need to preserve multiple query results, you’ll need to store the contents of%MYSQL_RESULT%in other variables before executing subsequent queries.
MYSQL connect, insert, and query.
OCR
Purpose
The OCR (Optical Character Recognition) action in Mini Mouse Macro allows you to extract text from images or specific regions of your screen. This capability is crucial for automating tasks that involve interacting with applications or documents where the text is not directly selectable or available through traditional methods like copy-paste.
How It Works
- Plugin-Based Functionality: The
OCRaction requires the OCR plugin to be enabled. The plugin downloads necessary OCR companion files fromhttps://minimousemacro.com. - Text Extraction: The action analyzes image data (either from a file or a screen region) to identify and extract text characters.
- Language Support: It utilizes language dictionaries (Tesseract language data) to recognize text in different languages. You can download additional language dictionaries and place them in the
tessdatadirectory. - Screen Region Selection: You can define a specific area of the screen to perform OCR on. This is done by clicking the “At Location” image in the
OCRcondition setup and then adjusting the selection rectangle on the screen. - Output to Variable: The extracted text can be stored in a variable (default is
%OCR%) for later use in your macro. - Conditional Evaluation: You can use the
OCRaction withinIFconditions to trigger actions based on the presence, absence, or specific content of the extracted text. - See the OCR Object entry for extensive details on OCR usage and examples OCR Object.
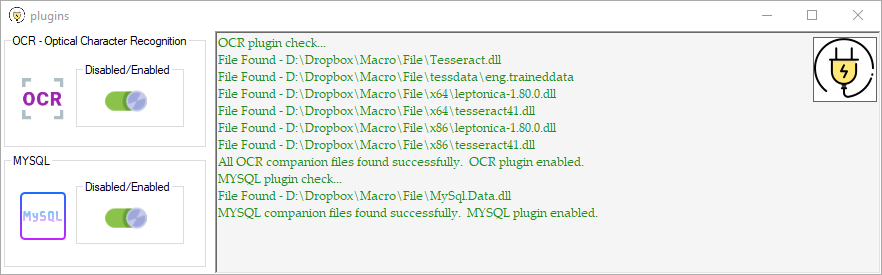
Plugin OCR enabled.
Parameters
- Source: Specifies the source of the image data:
From Image: Extracts text from a specified image file.- File Path: The full path to the image file.
From Folder of Images: Extracts text from all image files in a specified folder.- Folder Path: The full path to the folder containing the images.
At Location: Captures a region of the screen and extracts text from it.- Screen Coordinates: Defined by
X,Y(top-left corner),W(width), andH(height) of the rectangular region. You can visually select this region using the “At Location” option in theOCRcondition setup.
- Screen Coordinates: Defined by
- Language (
Lang): Specifies the language dictionary to use for text recognition.- Default is English (
eng). - Additional language dictionaries can be downloaded and added to the
tessdatadirectory. - Format:
Lang [language code] - [language name](e.g.,Lang eng - English,Lang spa - Spanish).
- Default is English (
- Output Options:
To String [Variable Name]: Stores the extracted text in a variable. The default variable is%OCR%.Remove CR LF: Removes carriage return and line feed characters (\r\n) from the extracted text, resulting in a single line of text.
- Debug Options:
Verbose: Outputs more detailed information to the MMM event log for debugging purposes.Very Verbose: Outputs even more detailed information to the event log.
- Error Handling:
Throw Error: Causes theOCRaction to return an error and a false/failed state if no text is found.
- Comment: An optional comment to add to the macro line for documentation purposes.
Examples
Example 1: Extracting Text from an Image and Checking for a Specific Value
1 | IF | OCR | from image D:\File\pics\ocr\days\monday.png::to string OCR | TEXT IS | Monday | MESSAGE PROMPT | The text is Monday
Explanation - Example 1
- This line performs OCR on the image file
D:\File\pics\ocr\days\monday.png. to string OCRstores the extracted text in the%OCR%variable.TEXT IS | Mondaychecks if the extracted text is exactly “Monday”.- If the condition is true, a message prompt displays “The text is Monday”.
Example 2: Detecting Changes in Text on the Screen
1 | IF | OCR | At location [X:701 Y:291 W:100 H:100]::to string OCR | CHANGES::amount 2::timeout 5::delay 1 | MESSAGE PROMPT | CHANGE DETECTED: %OCR%
Explanation - Example 2
- This line performs OCR on a screen region defined by the coordinates
X:701,Y:291,W:100,H:100. to string OCRstores the extracted text in the%OCR%variable.CHANGES::amount 2::timeout 5::delay 1checks if the extracted text changes at least 2 times within a 5-second period, with a 1-second delay between each check.- If the condition is true, a message prompt displays “CHANGE DETECTED:” followed by the current text extracted from the screen region (stored in
%OCR%).
Example 3: Checking for the Presence of Text and Outputting to a File
1 | IF | OCR | From image D:\File\pics\ocr\phrase\here comes the sun.PNG::Lang eng - English::To string OCR | TRUE | OUTPUT TO FILE | D:\File\ocr_text.txt::APPEND_NEWLINE::%OCR%
Explanation - Example 3
- This line performs OCR on the image file
D:\File\pics\ocr\phrase\here comes the sun.PNGusing the English language dictionary. To string OCRstores the extracted text in the%OCR%variable.TRUEchecks if any text was detected.- If text is detected, the
OUTPUT TO FILEaction appends the extracted text (%OCR%) to the fileD:\File\ocr_text.txt, adding a new line after the text.
Example 4: Using OCR in an Action to Extract and Display Text
1 | RUN ACTION | OCR | From image D:\File\pics\ocr\phrase\daysoftheweek.PNG::Lang eng - English::To string OCR
2 | RUN ACTION | MESSAGE PROMPT | %OCR%::::1::OK
Explanation - Example 4
- Line 1: This line performs OCR on the image file
D:\File\pics\ocr\phrase\daysoftheweek.PNGusing the English language dictionary and stores the extracted text in the%OCR%variable. - Line 2: This line displays a message prompt containing the extracted text (the value of
%OCR%).
Operators for OCR Conditions
- TRUE: The OCR condition has detected text within the target image or screen area
- FALSE: The OCR condition has not detected text within the target image or screen area
- SUCCESSFUL: The OCR condition completes successfully without error
- UNSUCCESSFUL: The OCR condition completes unsuccessfully. This is most likely due to a syntax error or the OCR plugin not being enabled
- TEXT IS: Evaluates that text captured within the target image or screen area matches a text value
- TEXT IS -C: Evaluates that text captured within the target image or
- OCR object and operator usage can be found in the OCR Object section.
OUTPUT TO FILE
Purpose
The OUTPUT TO FILE action in Mini Mouse Macro allows you to write text to a file. This is useful for logging, creating reports, storing data generated by your macros, or generating configuration files. You can choose to append to an existing file, add a new line after each append, or overwrite the file’s contents entirely.
How It Works
- Writes Text to a File: The action takes a text string (which can include variables) and writes it to a specified file.
- Creates File if Necessary: If the specified file does not exist, it will be created. However, the directory where the file is to be created must already exist.
- Handles Appending and Overwriting: You can choose to append text to the end of the file (with or without a new line) or overwrite the entire file content.
- Supports Variables: You can include variables in the output text, allowing you to write dynamic data to the file.
- Generates
VARIABLESFile: It can be used with the%VARIABLES%parameter to create a formatted file that lists all currently defined variables and their values. This file can then be used with theINPUT FROM FILEaction to read those variables back into a macro.
Parameters
- File Path: The full path to the file where you want to write the output.
- Write Mode: Specifies how to write to the file:
APPEND: Appends the output text to the end of the file without changing the existing content.APPEND_NEWLINE: Appends the output text to the end of the file, followed by a new line character (\r\n).OVERWRITE: Overwrites the entire content of the file with the output text.
- Output Text: The text string to write to the file. This can be a literal string, a combination of text and variables, or just variables.
Examples
Example 1: Appending to a File within a Loop
1 | FOR | EACH | FILE IN | E:\docs | DO
2 | RUN ACTION | OUTPUT TO FILE | %file%::APPEND::[%integer%]-[%time%-%date%] %string%
3 | FOR | NEXT
Explanation - Example 1
- This macro iterates through all files in the
E:\docsdirectory. - For each file:
- Line 2:
OUTPUT TO FILE | %file%::APPEND::[%integer%]-[%time%-%date%] %string%appends a line of text to the file specified by the%file%variable (which represents the current file in the loop). The appended text includes the values of the%integer%,%time%,%date%, and%string%variables.
- Line 2:
Example 2: Appending with New Lines and Opening the File
1 | FOR | I | = | 0 TO 10 | DO
2 | RUN ACTION | OUTPUT TO FILE | D:\Macro\OUTPUT\output.txt::APPEND_NEWLINE::%I%
3 | FOR | NEXT
4 | RUN ACTION | RUN PROGRAM | D:\Macro\OUTPUT\output.txt
Explanation - Example 2
- This macro loops 10 times.
- For each iteration:
- Line 2:
OUTPUT TO FILE | D:\Macro\OUTPUT\output.txt::APPEND_NEWLINE::%I%appends the value of the loop counter variable%I%to the fileD:\Macro\OUTPUT\output.txt, followed by a new line.
- Line 2:
- Line 4:
RUN PROGRAM | D:\Macro\OUTPUT\output.txtopens theoutput.txtfile after the loop has finished. The file will contain the numbers 0 through 9, each on a separate line.
Example 3: Overwriting a File Conditionally
5 | IF | FOLDER | E:\docs | EXIST | OUTPUT TO FILE | E:\docs\output-%integer%.txt::OVERWRITE::%string% - COMPLETE
Explanation - Example 3
- This line checks if the folder
E:\docsexists. - If the folder exists:
OUTPUT TO FILE | E:\docs\output-%integer%.txt::OVERWRITE::%string% - COMPLETEoverwrites the fileE:\docs\output-%integer%.txtwith the text “%string% - COMPLETE”. The%integer%variable will be part of the filename.
Example 4: Creating a VARIABLES File for INPUT FROM FILE
1 | RUN ACTION | OUTPUT TO FILE | D:\Macro\RX\INPUT.txt::OVERWRITE::%VARIABLES%
Explanation - Example 4
- This line creates or overwrites the file
D:\Macro\RX\INPUT.txtwith a list of all currently defined variables and their values. - The output file will be formatted in a way that can be used by the
INPUT FROM FILEaction to read the variables back into a macro. - For example, if you have an integer variable
%myInt%with a value of 5 and a string variable%myString%with a value of “Hello”, theINPUT.txtfile would contain:INTEGER::5 STRING::Hello
Important Notes
- Directory Existence: The directory where you want to create or modify a file must already exist.
OUTPUT TO FILEwill not create the directory structure. - File Locking: Be aware that if a file is open in another application,
OUTPUT TO FILEmay not be able to write to it. - Error Handling: Consider adding error handling to your macros to deal with situations where the file cannot be written to (e.g., insufficient permissions, disk full).
%VARIABLES%Format: When using%VARIABLES%, the output file follows a specific format (VARIABLE_TYPE::VALUE) that is compatible with theINPUT FROM FILEaction.
PASTE FROM CLIPBOARD
Purpose
The PASTE FROM CLIPBOARD action in Mini Mouse Macro simulates the pasting of text or data from the system clipboard into the currently active window or control. It’s equivalent to pressing Ctrl+V on the keyboard. This is a fundamental action for automating data transfer between applications and within a single application.
How It Works
- Simulates Ctrl+V: The action simulates the standard keyboard shortcut for pasting (Ctrl+V).
- Pastes Clipboard Contents: It pastes whatever content is currently stored on the system clipboard, whether it’s text, an image, or other data types that can be handled by the receiving application.
- Targets Active Window/Control: The paste operation is directed to the window or control that currently has focus.
Parameters
- This action does not require any parameters.
Examples
Example 1: Simple Paste
1 | RUN ACTION | PASTE FROM CLIPBOARD
Explanation - Example 1
- This line executes the
PASTE FROM CLIPBOARDaction. - The current contents of the clipboard will be pasted into the active window or control at the current cursor position.
Example 2: Copying Text, Opening Notepad, and Pasting
1 | RUN ACTION | COPY TO CLIPBOARD | Hello World!
2 | RUN ACTION | RUN PROGRAM | Notepad.exe
3 | IF | WINDOW TITLE | Untitled - Notepad | EXIST | CONTINUE
* | Small delay to ensure Notepad is ready
4 | RUN ACTION | WAIT SECONDS | 1
5 | RUN ACTION | SELECT WINDOW BY NAME | Untitled - Notepad
6 | RUN ACTION | PASTE FROM CLIPBOARD
Explanation - Example 2
- Line 1:
RUN ACTION | COPY TO CLIPBOARD | Hello World!copies the text “Hello World!” to the clipboard. - Line 2:
RUN ACTION | RUN PROGRAM | Notepad.exeopens a new Notepad instance. - Line 3:
IF | WINDOW TITLE | Untitled - Notepad | EXIST | CONTINUEwaits for the Notepad window to open. - Line 4:
RUN ACTION | WAIT SECONDS | 1adds a 1-second delay to ensure the Notepad window is ready. - Line 5:
RUN ACTION | SELECT WINDOW BY NAME | Untitled - Notepadmakes the Notepad window active. - Line 6:
RUN ACTION | PASTE FROM CLIPBOARDpastes the contents of the clipboard (“Hello World!”) into the Notepad window.
Important Notes
- Clipboard Content: The success of the paste operation depends on the receiving application’s ability to handle the type of data on the clipboard.
- Active Window: Ensure the correct window or control has focus before executing
PASTE FROM CLIPBOARD. - Timing: In some cases, you may need to add delays (using the
WAITaction) to ensure that the target application is ready to receive the pasted content.
PAUSE
Purpose
The PAUSE action in Mini Mouse Macro provides a way to temporarily halt the execution of a macro. This can be useful for creating breakpoints in your script, allowing you to observe the state of the system or intervene manually before the macro continues.
How It Works
- Halts Macro Execution: When the
PAUSEaction is encountered, the macro’s execution is paused indefinitely. - Requires Manual Resumption: The macro will remain paused until the user manually resumes it by pressing the designated “Play/Pause” button or hotkey within the Mini Mouse Macro interface.
- No Timeout: The
PAUSEaction does not have a timeout. The macro will remain paused until manually resumed.
Parameters
- This action does not require any parameters.
Examples
Example 1: Simple Pause
1 | RUN ACTION | PAUSE
Explanation - Example 1
- This line will immediately pause the macro execution.
Example 2: Conditional Pause Based on File Content
1 | IF | FILE | C:\runerrors.log | FILE CONTAINS STRING | error | PAUSE
Explanation - Example 2
- This line checks if the file
C:\runerrors.logcontains the string “error”. - If the string “error” is found in the file, the
PAUSEaction is executed, halting the macro. - If the string is not found, the macro continues to the next line without pausing.
Example 3: Pausing to Allow Manual Intervention
1 | RUN ACTION | RUN PROGRAM | Notepad.exe
2 | IF | WINDOW TITLE | Untitled - Notepad | EXIST | CONTINUE
3 | RUN ACTION | PAUSE
4 | RUN ACTION | KEYPRESS | Macro resumed!
Explanation - Example 3
- Line 1: Opens a new Notepad instance.
- Line 2: Waits for the Notepad window to become available.
- Line 3:
PAUSE- The macro pauses here, allowing the user to interact with the Notepad window (e.g., type text, make changes). - Line 4: After the user manually resumes the macro, this line sends the text “Macro resumed!” to the Notepad window using the
KEYPRESSaction.
Important Notes
- Manual Control:
PAUSEis different fromWAIT.PAUSErequires manual intervention to resume, whileWAITautomatically continues after a specified duration or when a condition is met. - Debugging:
PAUSEcan be a valuable debugging tool, allowing you to inspect the state of your system or application at a specific point in the macro’s execution.
PIXEL CAPTURE
Purpose
The PIXEL CAPTURE action in Mini Mouse Macro allows you to capture the color of a specific pixel on the screen. This capability is essential for creating macros that respond to visual cues, such as changes in application interfaces, the appearance of specific images, or the status of indicators. The captured pixel color can be stored in a variable or used in conditional statements to control the flow of your macro.
How It Works
- Captures Pixel Color: The action reads the RGB (Red, Green, Blue) color value of a single pixel at a specified location on the screen.
- Coordinate-Based: You define the pixel to capture by its X and Y coordinates on the screen.
- Stores Color in a Variable: The captured color value can be stored in a variable (default is
%PIXEL%) for later use in the macro. - Conditional Logic: The captured color can be used in
IFconditions (specifically withPIXEL COLOR) Pixel Color to trigger different actions based on the pixel’s color.
![]()
Adding a PIXEL CAPTURE action from the 'Add Condition' tool.
Parameters
- X Coordinate: The horizontal position of the pixel on the screen, measured in pixels from the left edge.
- Y Coordinate: The vertical position of the pixel on the screen, measured in pixels from the top edge.
- Variable Name (Optional): The name of the variable where the captured color value will be stored. If not specified, the default variable
%PIXEL%is used.
Examples
Example 1: Capturing a Pixel Color and Displaying It
1 | RUN ACTION | PIXEL CAPTURE | At Location [X:511 Y:200]::To variable PIXEL_COLOR
2 | RUN ACTION | MESSAGE PROMPT | Pixel color is: %PIXEL_COLOR%
Explanation - Example 1
- Line 1: Captures the color of the pixel located at coordinates X=511, Y=200 and stores the value in the variable
%PIXEL_COLOR%. - Line 2: Displays a message box showing the captured color value stored in
%PIXEL_COLOR%.
Example 2: Conditional Action Based on Pixel Color
1 | RUN ACTION | PIXEL CAPTURE | At Location [X:511 Y:200]::To variable PIXEL_COLOR
2 | RUN ACTION | WAIT SECONDS | 5
3 | IF | PIXEL COLOR | %PIXEL_COLOR%::At Location [X:511 Y:200] | IS THE SAME | CONTINUE
4 | RUN ACTION | MESSAGE PROMPT | Pixel color is the SAME!
Explanation - Example 2
- Line 1: Captures the color of the pixel at coordinates X=511, Y=200 and stores it in the
%PIXEL_COLOR%variable. - Line 2: Adds a 5-second delay to allow time for the pixel color to change.
- Line 3: Checks if the color of the pixel at X=511, Y=200 is the same as the color stored in
%PIXEL_COLOR.- If the value matches, the macro continues to the next line. If it doesn’t match, the macro waits indefinitely until the condition is true.
CONTINUEmeans the macro will wait indefinitely until the condition is true before proceeding to the next line. If the condition is false and you want the macro to simply continue immediately to the next line without waiting, you would replaceCONTINUEwithGOTO MACRO LINEwith a parameter specifying the line to jump to.
- If the value matches, the macro continues to the next line. If it doesn’t match, the macro waits indefinitely until the condition is true.
- Line 4: If the colors match, a message prompt displays “Pixel color is the SAME!”
Important Notes
- Screen Resolution: Pixel coordinates are relative to the screen resolution. If the screen resolution changes, the captured pixel location may no longer be accurate.
- Color Format: The captured color is typically stored as a RGB value (e.g.,
Color [R=145, G=228, B=247]). PIXEL COLORCondition: ThePIXEL CAPTUREaction is often used in conjunction with thePIXEL COLORcondition Pixel Color for more advanced visual-based automation.
PIXEL RANGE SAVE
Purpose
The PIXEL RANGE SAVE action in Mini Mouse Macro allows you to save a captured region of the screen (a “pixel range”) as a bitmap (.bmp) image file. This is often used in conjunction with PIXEL RANGE VARIABLE and PIXEL VARIABLE conditions to capture and store visual data for later analysis, debugging, or comparison.
How It Works
- Retrieves Pixel Range Data: The action retrieves pixel data from a previously defined
PIXEL RANGE VARIABLE. This variable holds a snapshot of a rectangular area of the screen. - Saves as Bitmap: It saves the captured pixel data as a
.bmpimage file to a specified location on your computer. - Used with
PIXEL VARIABLEandPIXEL RANGE VARIABLE: This action is typically used after you have captured a screen region usingDEFINE PIXEL RANGE VARIABLEor evaluated pixel ranges using thePIXEL VARIABLEcondition.
Parameters
- From Variable: The name of the
PIXEL RANGE VARIABLEthat contains the pixel data you want to save. - File Path: The full path, including the filename and
.bmpextension, where you want to save the captured image.
Examples
Example 1: Saving a Captured Pixel Range
1 | RUN ACTION | PIXEL RANGE SAVE | From Variable %PIXEL_RANGE%::C:\Macro\pixel_range.bmp
Explanation - Example 1
- This line saves the pixel data stored in the variable
%PIXEL_RANGE%to the fileC:\Macro\pixel_range.bmp. - It’s assumed that
%PIXEL_RANGE%was previously defined usingDEFINE PIXEL RANGE VARIABLEto capture a specific region of the screen.
Example 2: Saving a Pixel Range After Detecting a Change
1 | IF NOT | PIXEL VARIABLE | %PLAYER_ORIGINAL% | MATCHES | %PLAYER_NEW% | PIXEL RANGE SAVE | From Variable %PLAYER_NEW%::C:\Macro\player_change.bmp
Explanation - Example 2
- This line is part of a conditional statement that checks if two
PIXEL RANGE VARIABLES,%PLAYER_ORIGINAL%and%PLAYER_NEW%, are different (usingMATCHESwithIF NOT). - If the pixel ranges do not match (meaning a change has been detected), the action
PIXEL RANGE SAVEis executed. PIXEL RANGE SAVE | From Variable %PLAYER_NEW%::C:\Macro\player_change.bmpsaves the pixel data from%PLAYER_NEW%(the changed region) to the fileC:\Macro\player_change.bmp.
PLAY SYSTEM SOUND
Purpose
The PLAY SYSTEM SOUND action in Mini Mouse Macro allows you to play predefined system sounds or custom .wav audio files. This is useful for providing audible feedback during macro execution, alerting the user to specific events, or adding sound effects to your automation.
How It Works
- Plays Predefined Sounds: You can choose from a set of built-in system sounds (e.g., “Beep”).
- Plays Custom Sounds: You can specify a
.wavfile to play, either from a local path or a URL. - Synchronous/Asynchronous Playback: You can choose to play the sound synchronously (the macro waits for the sound to finish before continuing) or asynchronously (the macro continues execution while the sound plays in the background).
Parameters
- Sound Source: Specifies the sound to play:
- Predefined System Sound: Select from a list of built-in sounds (e.g.,
Beep,Asterisk,Exclamation). - Custom Sound File:
- Local File Path: The full path to a
.wavfile on your computer. - URL: A URL pointing to a
.wavfile on the internet.
- Local File Path: The full path to a
- Predefined System Sound: Select from a list of built-in sounds (e.g.,
- Playback Mode:
SYNC: Plays the sound synchronously. The macro pauses until the sound finishes playing.ASYNC: Plays the sound asynchronously. The macro continues execution immediately without waiting for the sound to finish.
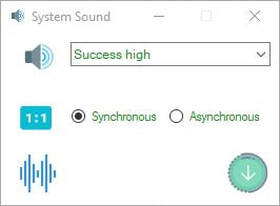
Play System Sound dialog.
Examples
Example 1: Playing a System Sound Asynchronously
1 | RUN ACTION | PLAY SYSTEM SOUND | Beep::ASYNC
Explanation - Example 1
- This line plays the predefined system sound “Beep” asynchronously. The macro will continue to the next line immediately without waiting for the beep to finish.
Example 2: Playing a Sound from a URL Synchronously
1 | RUN ACTION | PLAY SYSTEM SOUND | https://www.pacdv.com/sounds/voices/hello-1.wav::SYNC
Explanation - Example 2
- This line plays the
.wavsound file located at the specified URL synchronously. The macro will pause and wait for the sound to finish playing before continuing to the next line.
Example 3: Playing a Local Sound File
1 | RUN ACTION | PLAY SYSTEM SOUND | C:\Sounds\MySound.wav::SYNC
Explanation - Example 3
- This line plays the local
.wavfile located atC:\Sounds\MySound.wavsynchronously.
Important Notes
- File Format: Custom sounds must be in the
.wavfile format. - URL Accessibility: When playing sounds from URLs, ensure that the URL is accessible and points to a valid
.wavfile. - Volume: The volume of the played sound is controlled by the system’s sound settings.
- Synchronization: Use
SYNCmode carefully, as it can cause the macro to pause for extended periods if the sound file is long or if there are network issues when accessing a URL.
REMOTE
Purpose
The REMOTE action in Mini Mouse Macro enables communication and control between different instances of Mini Mouse Macro running on separate machines across a network. This allows you to create distributed automation workflows, where one instance of MMM can trigger actions, load macros, or send commands to other MMM instances.
See the Remote page for more detail information on the REMOTE action.
How It Works
- Client-Server Model: The
REMOTEaction operates on a client-server model. One instance of MMM acts as a client, sending commands, while another instance acts as a server, receiving and executing those commands. - Network Communication: Communication between MMM instances occurs over the network using TCP/IP sockets.
- Listening Port: The server instance must be configured to listen on a specific IP address and port for incoming commands. The default port is 41414.
- Remote Address: The client instance needs to know the IP address (or hostname) and port of the server instance to send commands.
- Command Types: The
REMOTEaction supports three primary commands:SEND: Sends a specific command to a remote MMM instance.SET: Configures local remote settings on the client instance, such as the remote IP and port.CLOSE: Closes the listening socket on the server instance, preventing it from receiving further commands.
- Security: The communication between MMM instances is not encrypted.
- It’s crucial to use this feature only on trusted networks and avoid exposing it to the wider internet.
- The connection whitelist feature can provide some level of security by restricting connections to specific IP addresses or hostnames.
- To secure the connection further, consider using a VPN or other secure traffic tunneling mechanisms.
- Must be Enabled: The
REMOTEfeature must be enabled in the Mini Mouse Macro settings for both the client and server instances. - Firewall Configuration: The server instance must be allowed through the local firewall to accept incoming connections.
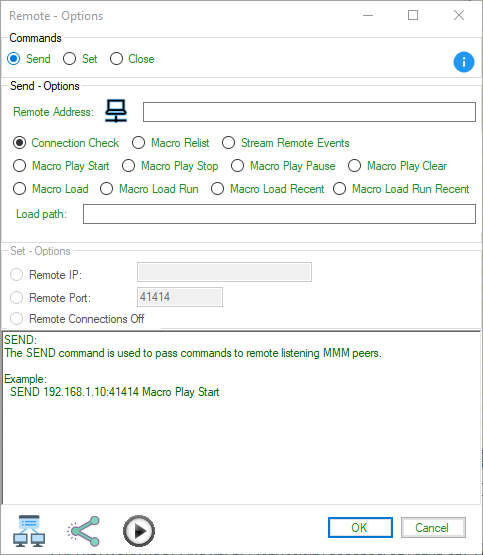
Adding a REMOTE action from the 'Add Condition' tool.
Enabling Remote Connections
To use the REMOTE action, you need to enable remote connections in the Mini Mouse Macro settings. Here’s how to do it:
- Server Instance:
- Open the Mini Mouse Macro application on the machine that will act as the server.
- Go to
Settings>Remote. - Check the box next to
Enable Remote Connections.- Optionally, configure to enable remore connections when Mini Mouse Macro starts.
- Configure the
Listening IPandListening Portsettings as needed.0.0.0.0listens on all available interfaces.- The default port is
41414. - Optionally, configure to enable receiving remote commands when Mini Mouse Macro starts.
- Check the box next to
Enable sending from this MMMto allow the server to send commands to other MMM instances.- Optionally, configure to enable sending remote commands when Mini Mouse Macro starts.
- Optionally, configure the
Connection Whitelistto restrict incoming connections to specific IP addresses or hostnames.- Add IP addresses or hostnames to the whitelist.
- Wildcards (
*) can be used to match multiple addresses. - This is recommended to prevent unauthorized connections.
- Note that whitelisting ip addresses is not a secure method of preventing unauthorized access due to the ease of IP spoofing.
- Click
Save Settings.
- Client Instance:
- Open the Mini Mouse Macro application on the machine that will act as the client.
- Go to
Settings>Remote. - Check the box next to
Enable Remote Connections. - Configure the
Listening IPandListening Portsettings as needed.- The default port is
41414.
- The default port is
- Optionally. configure to enable sending from this MMM.
- Optionally, configure the
Connection Whitelistto restrict outgoing connections to specific IP addresses or hostnames.- Add IP addresses or hostnames to the whitelist.
- Wildcards (
*) can be used to match multiple addresses. - This is recommended to prevent unauthorized connections.
- Note that whitelisting ip addresses is not a secure method of preventing unauthorized access due to the ease of IP spoofing.
- Click
Save Settings.
MMM REMOTE activation via the 'Settings' page.
Parameters
The parameters for the REMOTE action depend on the specific command being used (SEND, SET, or CLOSE).
SEND Parameters:
- Remote Address: The IP address (or hostname) and port of the remote MMM instance, separated by a colon (e.g.,
192.168.1.53:41414,WIN10_host2.local:41414). - Command: The command to send to the remote instance. Common commands include:
Macro Load [File Path]: Loads a macro file on the remote instance.Macro play start: Starts the currently loaded macro on the remote instance.Macro play stop: Stops the currently running macro on the remote instance.Macro play pause: Pauses the currently running macro on the remote instance.Macro play resume: Resumes a paused macro on the remote instance.
- SET Parameters:
- RemoteIP: Sets the IP address of a remote peer to connect to.
- Example:
SET RemoteIP 192.168.1.50orSET RemoteIP WIN10_host2.local
- Example:
- RemotePort: Sets the port to connect to on the remote peer.
- Example:
SET RemotePort 41414
- Example:
- CLOSE Parameters:
- The
CLOSEcommand does not take any parameters.
- The
Examples
Example 1: Sending Commands to a Remote Instance
1 | RUN ACTION | REMOTE | Send 192.168.1.53:41414 Macro Load D:\mmm\MyMacro.mmmacro
2 | RUN ACTION | REMOTE | Send 192.168.1.53:41414 Macro play start
3 | RUN ACTION | WAIT SECONDS | 60
4 | RUN ACTION | REMOTE | Send 192.168.1.53:41414 Macro play stop
Explanation - Example 1
- This macro sends commands to a remote MMM instance running at IP address
192.168.1.53and listening on port41414. - Line 1:
REMOTE | Send 192.168.1.53:41414 Macro Load D:\mmm\MyMacro.mmmacrosends a command to load the macro fileD:\mmm\MyMacro.mmmacroon the remote instance. - Line 2:
REMOTE | Send 192.168.1.53:41414 Macro play startsends a command to start the loaded macro on the remote instance. - Line 3:
WAIT SECONDS | 60pauses the local macro for 60 seconds, allowing the remote macro to run. - Line 4:
REMOTE | Send 192.168.1.53:41414 Macro play stopsends a command to stop the running macro on the remote instance.
Example 2: Using SET to Configure Remote Address and Port
1 | RUN ACTION | REMOTE | SET RemoteIP WIN10_host2.local
2 | RUN ACTION | REMOTE | SET RemotePort 41414
3 | RUN ACTION | REMOTE | SEND Macro play start
Explanation - Example 2
- This macro configures the remote address and port using the
SETcommand and then sends a command to the remote instance. - Line 1:
REMOTE | SET RemoteIP WIN10_host2.localsets the remote IP address toWIN10_host2.local(a hostname). - Line 2:
REMOTE | SET RemotePort 41414sets the remote port to41414. - Line 3:
REMOTE | SEND Macro play startsends the command “Macro play start” to the remote instance specified by the previously setRemoteIPandRemotePort.
Example 3: Closing the Remote Listener
1 | RUN ACTION | REMOTE | CLOSE
Explanation - Example 3
- This line closes the local listening socket, preventing the MMM instance from receiving any further remote commands until the listener is manually restarted from the “Settings - Remote” page.
Important Notes
- REMOTE Settings: The
REMOTEfeature must be enabled in the Mini Mouse Macro settings for both the client and server instances. - Enable Remote Connections: To send and receive remote commands, you must enable “Enable Remote Connections” in the “Remote Connections” settings of Mini Mouse Macro.
- Listening IP:PORT: Configure the server instance to listen on a specific IP address and port.
0.0.0.0listens on all available interfaces. - Security Risks: Remote communication is not encrypted. Use this feature only on trusted networks and never expose it to the public internet. Do so at your own risk.
- Connection Whitelist: The connection whitelist can provide a limited level of security by restricting connections to specific IP addresses or hostnames. However, it does not protect against IP spoofing.
- Firewall: Ensure that the server instance is allowed through the firewall to receive incoming connections on the specified port.
- Remote Tool: The Remote Tool within Mini Mouse Macro provides a graphical interface for sending commands and managing remote connections.
See the Remote page for more detail information on the REMOTE action.
RESTART COMPUTER
Purpose
The RESTART COMPUTER action in Mini Mouse Macro allows you to reboot the computer as part of an automated workflow. This is useful for tasks that require a system restart, such as installing updates or clearing system resources.
How It Works
- Initiates Restart Sequence: The action triggers the standard Windows restart process.
- Closes Processes and Restarts: It closes all open applications and processes, shuts down the operating system, and then reboots the computer.
- Immediate Action: The restart process begins immediately after the action is executed.
Parameters
- This action does not require any parameters.
Examples
Example 1: Restarting the Computer
1 | RUN ACTION | RESTART COMPUTER
Explanation - Example 1
- This line immediately initiates a system restart.
Example 2: Restarting After Receiving a UDP Packet
1 | IF | RECEIVE UDP PACKET STRING | ANY::41414::RESTART | STRING FOUND | SEARCH FOR STRING | RESTART COMPUTER
Explanation - Example 2
- This line listens for a UDP packet on port
41414from any IP address. - If a packet containing the string “RESTART” is received, the
RESTART COMPUTERaction is executed, rebooting the computer.
RUN MACRO INLINE
Purpose
The RUN MACRO INLINE action in Mini Mouse Macro allows you to execute another saved macro file (.mmmacro) directly within the flow of the current macro. This means that the actions of the called macro are performed as if they were part of the main macro itself, before continuing with subsequent lines in the main macro.
How It Works
- Executes a Sub-Macro: The action executes the specified
.mmmacrofile. - Inline Execution: The sub-macro runs within the context of the main macro, meaning it shares the same variables and execution flow, except for flow control statements like
FORloops andGOTO. - Continues Main Macro: After the sub-macro completes, the main macro resumes execution from the next line.
- Limited Flow Control in Sub-Macro:
FORloops andGOTOstatements within the inline macro are not supported and will not function as expected.
Parameters
- File Path: The full path to the
.mmmacrofile that you want to execute inline.
Examples
Example 1: Running a Macro Inline
1 | RUN ACTION | MESSAGE PROMPT | Start
2 | RUN ACTION | RUN MACRO INLINE | D:\Macro\Calculate.mmmacro
3 | RUN ACTION | MESSAGE PROMPT | End
Explanation - Example 1
- Line 1: Displays a message prompt with the text “Start”.
- Line 2:
RUN MACRO INLINE | D:\Macro\Calculate.mmmacroexecutes the macro stored inD:\Macro\Calculate.mmmacro. The actions inCalculate.mmmacroare performed sequentially as if they were part of the main macro. - Line 3: Displays a message prompt with the text “End”. This line is executed only after the
Calculate.mmmacrohas finished running.
Important Notes
- Shared Variables: The inline macro has access to all variables defined in the main macro. Changes made to variables within the inline macro will affect the main macro as well.
- Flow Control Limitations:
FORloops andGOTOstatements within the inline macro are not supported and may not work as intended. These limitations are due to the inline nature of the action. Consider usingLOAD MACROif you need full flow control within the sub-macro.
RUN PROGRAM
Purpose
The RUN PROGRAM action allows you to launch an executable program (.exe) from within your macro. You can also pass command-line arguments to the program.
How It Works
- Executes a Program: The action launches the specified executable file.
- Optional Arguments: You can provide command-line arguments to be passed to the program when it starts.
Parameters
- Program Path: The full path to the executable file (
.exe) that you want to run. - Arguments (Optional): Command-line arguments to pass to the program. Arguments are separated from the program path by
::.
Examples
Example 1: Running a Program
1 | IF | PROCESS ID | 6180 | NOT EXIST | RUN PROGRAM | C:\logs\logaudit.exe
Explanation - Example 1
- This line checks if a process with the ID
6180does not exist. - If the process does not exist, the
RUN PROGRAMaction is executed, launching the programlogaudit.exelocated atC:\logs.
Example 2: Running a Program with Arguments
1 | RUN ACTION | RUN PROGRAM | D:\Macro\MiniMouseMacro.exe::"D:\Macro\Launch.mmmacro" /e
Explanation - Example 2
- This line launches
MiniMouseMacro.exewith the following arguments:"D:\Macro\Launch.mmmacro": This is likely a path to a macro file to be loaded./e: This is likely a command-line switch specific to Mini Mouse Macro (refer to the application’s documentation for details on supported command-line arguments).
Important Notes
- File Paths: Ensure that the file paths provided to these actions are correct and accessible.
- Command-Line Arguments: Refer to the documentation of the specific programs or commands you are using to understand their supported command-line arguments.
- Error Handling: Consider adding error handling to your macros to deal with situations where a program fails to launch or a command returns an error.
- Permissions: The user running the Mini Mouse Macro script must have the necessary permissions to execute the specified programs or commands.
RUN VIA CMD /C
Purpose
The RUN VIA CMD /C action allows you to execute commands through the Windows Command Prompt (cmd.exe). The /C switch ensures that the command window closes automatically after the command finishes executing.
How It Works
- Executes Command in CMD: The action opens a new Command Prompt window and executes the specified command.
- Closes Command Window: The
/Cswitch tells the Command Prompt to terminate (close) after the command completes. - Returns Control to Macro: Once the command finishes and the Command Prompt window closes, the macro continues execution from the next line.
Parameters
- Command: The command to be executed in the Command Prompt. This can be any valid Windows command, including batch files (
.bat).
Examples
Example 1: Running a Batch File
1 | RUN ACTION | RUN VIA CMD /C | c:\batch\checklogs.bat
Explanation - Example 1
- This line executes the batch file
checklogs.batlocated atc:\batch. - A Command Prompt window will briefly appear while the batch file runs and then automatically close when the batch file finishes.
RUN VIA CMD /K
Purpose
The RUN VIA CMD /K action is similar to RUN VIA CMD /C, but instead of closing the Command Prompt window after execution, it keeps the window open and active. This is useful for commands that require further user interaction or for viewing the output of the command.
How It Works
- Executes Command in CMD: The action opens a new Command Prompt window and executes the specified command.
- Keeps Command Window Open: The
/Kswitch tells the Command Prompt to remain open after the command completes. - Gives Focus to Command Window: The Command Prompt window becomes the active window, allowing the user to interact with it.
Parameters
- Command: The command to be executed in the Command Prompt.
Examples
Example 1: Running a Traceroute and Keeping the Window Open
1 | IF | NETWORK HOST PING REPLY | 192.168.0.2 | UNSUCCESSFUL | RUN VIA CMD /K | tracert -d 192.168.0.2
Explanation - Example 1
- This line checks if the host
192.168.0.2does not respond to a ping. - If the ping is unsuccessful, the
RUN VIA CMD /Kaction is executed. tracert -d 192.168.0.2runs thetracertcommand in a Command Prompt window, tracing the route to the specified IP address without resolving hostnames.- The Command Prompt window remains open after the
tracertcommand finishes, allowing the user to view the results.
SELECT WINDOW BY NAME
Purpose
The SELECT WINDOW BY NAME action in Mini Mouse Macro activates a window based on its title. This is useful for bringing a specific application or document to the foreground, ensuring that subsequent actions, such as KEYPRESS or MOUSE CLICK, are directed to the correct window.
How It Works
- Matches Window Title: The action searches for an open window whose title exactly matches the provided string.
- Activates the Window: If a matching window is found, it is brought to the foreground and given focus, making it the active window.
- Case-Sensitive: The window title matching is case-sensitive.
- Skips if Not Found: If no window with the specified title is found, the action is skipped, and the macro continues to the next line.
Parameters
- Window Title: The exact title of the window you want to select.
Examples
Example 1: Selecting a Firefox Window
1 | RUN ACTION | SELECT WINDOW BY NAME | New Tab - Mozilla Firefox
Explanation - Example 1
- This line searches for an open window with the title “New Tab - Mozilla Firefox”.
- If such a window is found, it is brought to the foreground and made active.
- If no matching window is found, the action is skipped.
Example 2: Selecting a Notepad Window Conditionally
1 | IF | WINDOW TITLE | index.txt - Notepad | EXIST | THEN
  2 | RUN ACTION | SELECT WINDOW BY NAME | index.txt - Notepad
3 IF | ELSE
  4 | RUN ACTION | RUN PROGRAM | D:\Macro\index.txt
5 | IF | END IF
Explanation - Example 2
- Lines 1-2: This conditional block checks if a window with the title “index.txt - Notepad” exists. If it does, the window is selected.
- Lines 3-5: If the window does not exist, the macro opens the file
index.txtusing the default program associated with.txtfiles.
SELECT WINDOW BY PROCESS ID
Purpose
The SELECT WINDOW BY PROCESS ID action in Mini Mouse Macro brings a specific application window to the foreground and makes it the active window by identifying it through its process ID (PID). This is particularly useful when you need to interact with a program that might be running in the background or obscured by other windows.
How It Works
- Identifies Window by PID: The action locates the window associated with the specified process ID.
- Activates the Window: It brings the found window to the front and gives it focus, making it the active window for subsequent actions (e.g., mouse clicks, key presses).
- Requires Process ID: You need to provide the PID of the process whose window you want to select.
Parameters
- Process ID (PID): The unique numerical identifier of the process associated with the window you want to select. You can find the PID of a running process using the Windows Task Manager (in the “Details” tab) or through other system monitoring tools.
Examples
Example 1: Selecting a Window by its Process ID
1 | IF | PROCESS ID | 10780 | EXIST | SELECT WINDOW BY PROCESS ID | 10780
Explanation - Example 1
- This line checks if a process with the ID
10780is currently running. - If the process exists, the
SELECT WINDOW BY PROCESS IDaction is executed. SELECT WINDOW BY PROCESS ID | 10780brings the window associated with PID10780to the foreground and makes it the active window.
Example 2: Activating a Background Application
1 | RUN ACTION | RUN PROGRAM | C:\MyApplication\MyApp.exe
2 | RUN ACTION | WAIT SECONDS | 2
3 | RUN ACTION | DEFINE INTEGER VARIABLE | %MYAPP_PID%::%PROCESS_ID%
* | Do other things...
5 | RUN ACTION | SELECT WINDOW BY PROCESS ID | %MYAPP_PID%
Explanation - Example 2
- Line 1: Launches the application
MyApp.exe. - Line 2: Waits for 2 seconds to allow the application to start.
- Line 3:
DEFINE INTEGER VARIABLE | %MYAPP_PID%::%PROCESS_ID%captures the process ID of the last launched program (in this case,MyApp.exe) and stores it in the variable%MYAPP_PID%. This assumes thatMyApp.exewas the last program started by the macro before this line. - Line 4: A comment indicating that other actions might be performed here while
MyApp.exeis running in the background. - Line 5:
SELECT WINDOW BY PROCESS ID | %MYAPP_PID%brings the window ofMyApp.exeto the foreground, using the stored PID in%MYAPP_PID%.
Important Notes
- Process ID Uniqueness: Process IDs are unique at a given time, but they can be reused by the operating system after a process terminates. Make sure you’re capturing the correct PID.
- Window Existence: The
SELECT WINDOW BY PROCESS IDaction will only work if the process has a visible window. Some processes run in the background without any user interface. - Timing: You may need to use
WAITactions to ensure that the target application has fully launched and its window is available before attempting to select it by PID. - Error Handling: Consider adding error handling to your macros to deal with cases where the process with the specified PID is not found or does not have a window.
- Object Pairing: Consider Process ID and Process Name objects for conditional actions based on process information.
SEND EMAIL
Purpose
The SEND EMAIL action in Mini Mouse Macro allows you to send emails programmatically through an SMTP (Simple Mail Transfer Protocol) server. This is useful for automating email notifications, sending reports, or integrating email communication into your workflows.
How It Works
- SMTP Connection: The action establishes a connection to an SMTP server using the provided credentials.
- Secure Connection: It supports secure connections using SSL/TLS (recommended).
- Email Composition: You can define the email’s sender, recipient(s), subject, body, and whether to use HTML formatting.
- Multiple Recipients: You can send emails to multiple recipients by separating their email addresses with semicolons.
- File-Based Configuration: You can store the SMTP settings and email content in separate text files or combine them in a single file for easy management and reuse.
- Variable Support: You can use variables in the email subject and body to dynamically generate email content.
- Gmail Specifics: For Gmail, you may have to enable 2-step verification and create an app password.
Adding a SEND EMAIL action from the 'Add Condition' tool.
Parameters
The SEND EMAIL action uses different parameters depending on whether you are configuring the SETUP, SEND options, or using a combined configuration file.
SETUP Parameters:
- Connection Method:
Direct Input: Enter the SMTP settings directly into the macro line, separated by::.- Format:
SETUP::SMTP Server::Port::SSL::Username::Password
- Format:
File Input: Read the SMTP settings from a text file.- Format:
SETUP::[File Path] The file should contain the following lines:
SMTP=[SMTP Server Address]
PORT=[Port Number]
SSL=[True/False]
USERNAME=[Your Email Address or Username]
PASSWORD=[Your Email Password or App Password]
- Format:
Prompt Input: Prompts the user to enter the SMTP settings during macro execution.- Format:
SETUP::PROMPT
- Format:
Direct Input
File Input
Prompt Input
SEND Parameters:
- Content Input Method:
Direct Input: Enter the email content directly into the macro line, separated by::.- Format:
SEND::TO=[Recipient(s)]::FROM=[Sender]::SUBJECT=[Subject]::HTML=[True/False]::BODY=[Body]
- Format:
File Input: Read the email content from a text file.- Format:
SEND::[File Path] The file should contain the following lines:
TO=[Recipient Email(s)]
FROM=[Your Email]
SUBJECT=[Email Subject]
HTML=[True/False]
BODY=[Email Body (use '\n' for line breaks)]
- Format:
Combined SETUP and SEND Parameters (From File):
File Input: Read both the SMTP settings and email content from a single text file.- Format:
[File Path] The file should contain the following lines:
  SMTP=[SMTP Server Address]
  PORT=[Port Number]
  SSL=[True/False]
  USERNAME=[Your Email Address or Username]
  PASSWORD=[Your Email Password or App Password]
  TO=[Recipient Email(s)]
  FROM=[Your Email]
  SUBJECT=[Email Subject]
  HTML=[True/False]
  BODY=[Email Body (use '\n' for line breaks)]
Send Email - Full configuration and email from file- Format:
Examples
Example 1: Direct Input for SETUP and SEND
1 | RUN ACTION | SEND EMAIL | SETUP::smtp.gmail.com::587::SSL::myemail@gmail.com::SecretPassword
2 | RUN ACTION | SEND EMAIL | SEND::TO=Recipicant@gmail.com::FROM=MyEmail@gmail.com::SUBJECT=Email from Mini Mouse Macro at %time%::HTML=False::BODY=Hi,'\n'This is an email from MMM at %date% %time%.'\n'This is the third and last line of the email.
Explanation - Example 1
- Line 1:
SETUP::smtp.gmail.com::587::SSL::myemail@gmail.com::SecretPasswordconfigures the SMTP settings:smtp.gmail.com: Gmail’s SMTP server.587: The port for secure connection.SSL: Enables secure connection.myemail@gmail.com: Your Gmail address (username).SecretPassword: Your Gmail password or app password.
- Line 2:
SEND::TO=Recipicant@gmail.com::FROM=MyEmail@gmail.com::SUBJECT=Email from Mini Mouse Macro at %time%::HTML=False::BODY=Hi,'\n'This is an email from MMM at %date% %time%.'\n'This is the third and last line of the email.sends the email:TO=Recipicant@gmail.com: Sets the recipient’s email address.FROM=MyEmail@gmail.com: Sets the sender’s email address.SUBJECT=Email from Mini Mouse Macro at %time%: Sets the subject, including the current time.HTML=False: Indicates that the email body is plain text.BODY=Hi,'\n'This is an email from MMM at %date% %time%.'\n'This is the third and last line of the email.: Sets the email body with line breaks (\n).
Example 2: File Input for SETUP and SEND
1 | RUN ACTION | SEND EMAIL | SETUP::C:\Users\steph\Dropbox\Macro\File\email_setup.mmmacro
2 | RUN ACTION | SEND EMAIL | SEND::C:\Users\steph\Dropbox\Macro\email\email_thelongandwindingroad.mmmacro
File: email_setup.mmmacro
SMTP=smtp.gmail.com
PORT=587
SSL=True
USERNAME=myemail@gmail.com
PASSWORD=SecretPassword
File: email_thelongandwindingroad.mmmacro
TO=support@minimousemacro.com
FROM=MyEmail@gmail.com
SUBJECT=The Long and Winding Road
HTML=False
BODY=The long and winding road.

That leads to your door.
Will never disappear, i've seen that road before.
It always leads me here.   Lead me to your door....
 Send Email - Full direct input |  Send Email - Save and send from file |
Explanation - Example 2
- Line 1:
SETUP::C:\Users\steph\Dropbox\Macro\File\email_setup.mmmacroreads the SMTP settings from theemail_setup.mmmacrofile. - Line 2:
SEND::C:\Users\steph\Dropbox\Macro\email\email_thelongandwindingroad.mmmacroreads the email content from theemail_thelongandwindingroad.mmmacrofile and sends the email.
Example 3: Combined SETUP and SEND from a Single File
1 | RUN ACTION | SEND EMAIL | C:\Users\steph\Dropbox\Macro\email\email_full_whilemyguitargentlyweeps.mmmacro
File: email_full_whilemyguitargentlyweeps.mmmacro
SMTP=smtp.gmail.com
PORT=587
SSL=TRUE
USERNAME=support@minimousemacro.com
PASSWORD=passwordsecret
FROM=support@minimousemacro.com
TO=eleanorrigby@minimousemacro.com
HTML=FALSE
SUBJECT=My Guitar
BODY=I look at the world and i notice it's turning.
While my guitar gently weeps...
| Send Email - Full from file |
Explanation - Example 3
- This line reads both the SMTP settings and email content from the
email_full_whilemyguitargentlyweeps.mmmacrofile and sends the email.
Example 4: Using SETUP::PROMPT
1 | RUN ACTION | SEND EMAIL | SETUP::PROMPT
2 | RUN ACTION | SEND EMAIL | SEND::TO=test@example.com::FROM=your@email.com::SUBJECT=Test Email::HTML=False::BODY=This is a test email.
Explanation - Example 4
- Line 1:
SETUP::PROMPTdisplays a dialog box prompting the user to enter the SMTP server settings during macro execution. - Line 2: Sends an email using the settings provided through the prompt in Line 1.
Important Notes
- Security: Be very careful about storing email credentials in macros or files. It’s highly recommended to use more secure methods like environment variables or dedicated credential management tools if possible.
- Gmail: If you’re using Gmail, you may need to enable “Less Secure Apps” or, preferably, generate an “App Password” after enabling two-factor authentication.
- Error Handling: Consider adding error handling to your macros to gracefully manage situations like incorrect SMTP settings, network issues, or invalid email addresses.
- Rate Limiting: Email providers often have rate limits on sending emails. If you’re sending a large number of emails, you may need to introduce delays or use a dedicated email sending service.
SEND UDP PACKET STRING
Purpose
The SEND UDP PACKET STRING action in Mini Mouse Macro allows you to send a User Datagram Protocol (UDP) packet containing a text string to a specified IP address and port. This is useful for controlling or monitoring other instances of Mini Mouse Macro over a network, triggering actions on remote machines, or integrating with other applications that can receive UDP packets.
How It Works
- Sends UDP Packets: The action constructs and sends a UDP packet to the specified destination.
- String Payload: The packet contains a text string that you define.
- Network Communication: The packet is sent over the network to the target IP address and port.
- Firewall Considerations: Mini Mouse Macro must be allowed through your local firewall for UDP packets to be sent and received.
- Integration with
RECEIVE UDP PACKET STRING: This action is often used in conjunction with theRECEIVE UDP PACKET STRINGcondition to create two-way communication between Mini Mouse Macro instances. - MMM Controller Tool: The MMM Controller tool can also be used to send commands to and receive feedback from Mini Mouse Macro instances over a network using UDP.
Parameters
- IP Address: The IP address of the target machine where the UDP packet should be sent.
- Port: The UDP port number on the target machine to which the packet should be sent. The default port for Mini Mouse Macro remote communication is 41414.
- String: The text string to be sent within the UDP packet.
Examples
Example 1: Sending a UDP Packet to Trigger a Remote Action
1 | IF | NETWORK HOST PING REPLY | 192.168.0.2 | SUCCESSFUL | THEN
   2 | RUN ACTION | SEND UDP PACKET STRING | 192.168.0.2::41414::load_macro3
3 | IF | END IF
Explanation - Example 1
- This macro checks if the network host at IP address
192.168.0.2responds to a ping. - If the ping is successful, the
SEND UDP PACKET STRINGaction is executed. SEND UDP PACKET STRING | 192.168.0.2::41414::load_macro3sends a UDP packet to IP address192.168.0.2on port41414with the string “load_macro3”.- A remote instance of Mini Mouse Macro listening on that IP and port could then be configured to trigger an action (e.g., loading a macro) when it receives a UDP packet with the string “load_macro3”.
Example 2: Sending a UDP Packet with Variable Data
1 | RUN ACTION | DEFINE STRING VARIABLE | %MY_DATA%::SensorReading123
2 | RUN ACTION | SEND UDP PACKET STRING | 192.168.1.100::5000::%MY_DATA%
Explanation - Example 2
- Line 1: Defines a string variable
%MY_DATA%and sets its value to “SensorReading123”. - Line 2:
SEND UDP PACKET STRING | 192.168.1.100::5000::%MY_DATA%sends a UDP packet to IP address192.168.1.100on port5000. The content of the packet will be the value of the%MY_DATA%variable (“SensorReading123”).
Example 3: Triggering a Macro on Another Machine
Machine A (Sending):
1 | RUN ACTION | SEND UDP PACKET STRING | 192.168.1.50::41414::start_recording
Machine B (Receiving):
1 | IF | RECEIVE UDP PACKET STRING | ANY::41414::start_recording::20000 | STRING FOUND | THEN
   2 | RUN ACTION | LOAD MACRO | C:\MyMacros\RecordingMacro.mmmacro
3 | IF | END IF
Explanation - Example 3
- Machine A: Sends a UDP packet to
192.168.1.50(Machine B) on port41414with the string “start_recording”. - Machine B: Listens for UDP packets (20 seconds) on port
41414. When it receives a packet with the string “start_recording”, it loads and starts the macroRecordingMacro.mmmacro.
Important Notes
- Firewall: Ensure that your firewall allows Mini Mouse Macro to send and receive UDP packets on the specified port.
- Network Configuration: Both the sending and receiving machines must be on the same network or have a route between them for the UDP packets to be delivered.
- Port Number: The default port for Mini Mouse Macro remote communication is
41414, but you can use other ports if necessary. Make sure the port number is consistent between the sending and receiving instances. - UDP Reliability: UDP is a connectionless protocol, which means there’s no guarantee that packets will be delivered or that they will arrive in the correct order. If reliability is critical, you might need to implement additional logic to handle packet loss or out-of-order delivery.
- Security: UDP packets are not encrypted. Be cautious about sending sensitive data over untrusted networks.
- Integration: Consider using the
RECEIVE UDP PACKET STRINGcondition to handle incoming UDP packets and trigger actions based on the received data. - MMM Controller: For more advanced network communication, consider using the MMM Controller tool, which provides a graphical interface for sending and receiving UDP packets between Mini Mouse Macro instances.
SET TITLE
Purpose
The SET TITLE action in Mini Mouse Macro allows you to dynamically change the title of the main Mini Mouse Macro window during the execution of a macro. This is helpful for displaying status information, variable values, or other relevant data in the title bar, making it easier to monitor the macro’s progress and state at a glance.
How It Works
- Modifies Window Title: The action changes the text displayed in the title bar of the Mini Mouse Macro window.
- Supports Variables: You can include variables in the title text, allowing you to display dynamic information that changes during the macro’s execution.
- Immediate Effect: The title change takes effect immediately when the action is executed.
Parameters
- Title Text: The text string you want to set as the new window title. This can be a combination of literal text and variables.
Setting the title of the Mini Mouse Macro window.
Examples
Example 1: Setting a Static Title
1 | RUN ACTION | SET TITLE | My Macro is Running
Explanation - Example 1
- This line sets the title of the Mini Mouse Macro window to “My Macro is Running”.
Example 2: Setting a Dynamic Title with Date and Time
1 | RUN ACTION | SET TITLE | %date% %time% Macro Start
Explanation - Example 2
- This line sets the title to a dynamic string that includes the current date (
%date%), current time (%time%), and the text “Macro Start”. For example, the title might look like this: “2023-10-27 15:30:45 Macro Start”.
Example 3: Displaying Variable Values in the Title
1 | RUN ACTION | DEFINE INTEGER VARIABLE | %COUNTER%::0
2 | FOR | I | = | 1 TO 10 | DO
   3 | RUN ACTION | SET TITLE | Processing item %I% of 10 - Counter: %COUNTER%
   4 | RUN ACTION | DEFINE INTEGER VARIABLE | COUNTER::+1
   5 | RUN ACTION | WAIT SECONDS | 1
6 | FOR | NEXT
Explanation - Example 3
- Line 1: Initializes an integer variable
%COUNTER%to 0. - Line 2: Starts a
FORloop that iterates from 1 to 10. - Line 3:
SET TITLE | Processing item %I% of 10 - Counter: %COUNTER%updates the window title in each iteration, displaying the current loop iteration (%I%) and the value of%COUNTER%. - Line 4: Increments the
%COUNTER%variable. - Line 5: Pauses for 1 second.
- Line 6: Ends the loop.
Important Notes
- Visibility: The title bar might not always be visible, especially if the Mini Mouse Macro window is minimized or if another application is covering it.
- Length Limits: Operating systems have limitations on the maximum length of window titles. Very long titles might be truncated.
- Character Support: The title bar may not support all special characters or Unicode characters.
- Refresh Rate: While the title changes immediately, the visual update of the title bar might be subject to the operating system’s refresh rate.
SHUTDOWN COMPUTER
Purpose
The SHUTDOWN COMPUTER action in Mini Mouse Macro provides a way to shut down the computer as part of an automated sequence. This is useful for saving energy, performing scheduled maintenance, or ensuring a clean shutdown at the end of a task.
How It Works
- Initiates Shutdown Sequence: The action triggers the standard Windows shutdown process.
- Closes Processes and Powers Off: It closes all open applications and processes, shuts down the operating system, and then powers off the computer.
- Immediate Action: The shutdown process begins immediately after the action is executed.
Parameters
- This action does not require any parameters.
Examples
Example 1: Shutting Down the Computer
1 | RUN ACTION | SHUTDOWN COMPUTER
Explanation - Example 1
- This line immediately initiates a system shutdown.
Example 2: Shutting Down After a Specific Time
* | Define counter var
1 | RUN ACTION | DEFINE INTEGER VARIABLE | %COUNTER%::1

* | Start
* | Check if the current time is after 10:00 PM, if so shutdown the computer
1 | IF | TIME | 10:00:00 PM | IS AFTER CURRENT TIME | SHUTDOWN COMPUTER

* | Send the udp packet string, then wait for the reply, run actions based on reply
2 | RUN ACTION | SEND UDP PACKET STRING | 192.168.0.100::41414::ScanNetwork
3 | RUN ACTION | WAIT SECONDS | 10

* | Check if the reply is received
4 | IF | RECEIVE UDP PACKET STRING | 192.168.0.100::41415::SCAN_RESULTS_10_TARGETS::20000 | STRING FOUND | SEARCH FOR STRING | THEN
   * | If the reply is received, log the scan results
   5 | RUN ACTION | OUTPUT TO FILE | D:\scanlog\host_100.log::APPEND::[%time%-%date%]: Scan: %COUNTER%, Results: 10 Targets
6 | IF | ELSE
   * | If the reply is not received, log the scan as not received and send a Reload request
   7 | RUN ACTION | OUTPUT TO FILE | D:\scanlog\host_100.log::APPEND::[%time%-%date%]: Scan: %COUNTER%, Results: NOT RECEIVED
   8 | RUN ACTION | SEND UDP PACKET STRING | 192.168.0.100::41414::ReloadHostScan
9 | IF | END IF

* | Increment the counter and wait for 10 seconds before starting the next scan loop
10 | RUN ACTION | DEFINE INTEGER VARIABLE | COUNTER::%COUNTER%+1
11 | RUN ACTION | WAIT SECONDS | 10
12 | RUN ACTION | GOTO MACRO LINE | Start
Explanation - Example 2
- Line 1: This line defines an integer variable
%COUNTER%and initializes it to1. - Line 2: The macro checks if the current time is after 10:00 PM. If it is, the computer is shut down.
- Lines 2-11: The macro sends a UDP packet to a network device, waits for a reply, and processes the response. If the response is received, it logs the scan results; otherwise, it logs the scan as not received and sends a reload request.
- Lines 10-11: The counter is incremented, and the macro waits for 10 seconds before starting the next scan loop.
- Line 12: The macro loops back to the start.
Important Notes
- Data Loss: Ensure all important work is saved before executing
RESTARTorSHUTDOWNactions, as unsaved data may be lost. - Permissions: The user running the Mini Mouse Macro script must have the necessary permissions to restart or shut down the computer.
- Confirmation: These actions are typically immediate and do not prompt for confirmation. Use them cautiously.
STOP
Purpose
The STOP action in Mini Mouse Macro provides a way to halt the execution of a currently running macro. This is useful for terminating a macro based on specific conditions, preventing further actions from being executed, or ending a macro prematurely.
How It Works
- Terminates Macro Execution: When the
STOPaction is encountered, the macro immediately stops running. - No Further Actions Executed: Any lines or actions following the
STOPaction in the macro will not be executed. - Conditional Termination: The
STOPaction is often used withinIFconditions to stop the macro only if certain criteria are met.
Parameters
- This action does not require any parameters.
Examples
Example 1: Stopping a Macro Based on a Condition
1 | IF | PROCESS ID | 2352 | NOT EXIST | STOP
Explanation - Example 1
- This line checks if a process with the ID
2352does not exist. - If the process does not exist, the
STOPaction is executed, immediately terminating the macro. - If the process does exist, the macro continues to the next line.
Example 2: Stopping a Macro Based on User Input
1 | RUN ACTION | INPUT BOX | Do you want to continue? (Yes/No)::User Input::STRING
2 | IF | STRING VARIABLE | %STRING% | = | No | STOP
3 | RUN ACTION | MESSAGE PROMPT | Continuing the macro...
Explanation - Example 2
- Line 1: Prompts the user with the message “Do you want to continue? (Yes/No)” and stores their input in the
STRINGvariable. - Line 2:
IF | STRING VARIABLE | %STRING% | = | No | STOPchecks if the user entered “No”. If they did, theSTOPaction is executed, terminating the macro. - Line 3: If the user entered anything other than “No”, this line displays a message prompt saying “Continuing the macro…”. This line will only be reached if the
STOPaction was not executed.
Example 3: Stopping a Macro if a File is Not Found
1 | IF | FILE | C:\Data\myfile.txt | NOT EXIST | STOP
2 | RUN ACTION | RUN PROGRAM | C:\MyProgram\MyApp.exe
Explanation - Example 3
- Line 1:
IF | FILE | C:\Data\myfile.txt | NOT EXIST | STOPchecks if the fileC:\Data\myfile.txtdoes not exist. If it does not exist, the macro is stopped. - Line 2: If the file exists, this line will be executed, launching the program
MyApp.exe.
Important Notes
- Immediate Termination: The
STOPaction halts the macro immediately. No further lines or actions in the macro will be processed. - Conditional Logic:
STOPis most effectively used within conditional statements (IF,ELSE) to control when a macro should terminate based on specific conditions. - Error Handling: You can use
STOPto terminate a macro if an error condition is detected, preventing further actions that might be undesirable or harmful if the error were to persist.
TEXT TO SPEECH
Purpose
The TEXT TO SPEECH action converts text to speech at playback. It provides audible feedback during macro execution and can guide users with spoken directions.
How It Works
- Converts Text to Speech: The action speaks the provided text using the system’s text-to-speech engine.
- Voice Options: You can select a male, female, or neutral voice.
- Speed Control: Speech speed can be adjusted from -10 (slowest) to 10 (fastest).
- Sync Mode: Choose synchronous (wait for speech to end before continuing) or asynchronous (continue execution while speech plays in the background).
- Custom Pitch (optional): With the required language packages installed, you can use custom sound pitch (ADULT, TEEN, SENIOR, CHILD). By default, the language packs required for custom pitch are not installed.
Parameters
Parameters are passed as a ::-separated string:
- Text: The text to speak. May include string variables (e.g.,
%STRING%). - Voice:
MALE,FEMALE, orNEUTRAL. - Speed: Integer from -10 (slowest) to 10 (fastest).
- Sync:
syncorasync— whether to wait for speech to finish before continuing. - Pitch (optional, requires language packs):
ADULT,TEEN,SENIOR, orCHILD. When used, the format becomestext::voice::pitch::speed::sync.
Examples
Example 1: Basic Text to Speech
1 | RUN ACTION | TEXT TO SPEECH | Hello World::MALE::5::sync
2 | RUN ACTION | TEXT TO SPEECH | %STRING%::FEMALE::0::async
3 | RUN ACTION | TEXT TO SPEECH | The End at line 3::NEUTRAL::-10::async
Explanation - Example 1
- Line 1: Speaks “Hello World” with a male voice at speed 5, waiting for speech to finish before continuing.
- Line 2: Speaks the contents of
%STRING%with a female voice at normal speed, continuing without waiting. - Line 3: Speaks “The End at line 3” with a neutral voice at the slowest speed (-10), asynchronously.
Example 2: Custom Sound Pitch (Requires Language Packs)
Custom sound pitch can be used only if the required language packages are installed. By default, they are not installed.
1 | RUN ACTION | TEXT TO SPEECH | Hello World.::MALE::ADULT::5::async
2 | RUN ACTION | TEXT TO SPEECH | Hello World.::MALE::TEEN::2::async
3 | RUN ACTION | TEXT TO SPEECH | Hello World.::FEMALE::SENIOR::-5::async
4 | RUN ACTION | TEXT TO SPEECH | Hello World.::FEMALE::CHILD::0::async
Explanation - Example 2
- Line 1: Speaks with male voice, adult pitch, speed 5, async.
- Line 2: Speaks with male voice, teen pitch, speed 2, async.
- Line 3: Speaks with female voice, senior pitch, speed -5, async.
- Line 4: Speaks with female voice, child pitch, normal speed, async.
Example 3: Mouse Position Guide (YouTube Demo)
The YouTube example video demonstrates a macro that guides the user within ±50 pixels of the target coordinates (978, 390) using spoken directions.
1 | IF | MOUSE POSITION NEAR | {X=978,Y=390}::50::50 | IS | GOTO MACRO LINE | 11
2 | IF | INTEGER VARIABLE | %MOUSE_X% | < | 950 | TEXT TO SPEECH | Right.::MALE::5::ASYNC
3 | RUN ACTION | WAIT MILLISECONDS | 100
4 | IF | INTEGER VARIABLE | %MOUSE_X% | > | 1020 | TEXT TO SPEECH | Left.::MALE::5::ASYNC
5 | RUN ACTION | WAIT MILLISECONDS | 100
6 | IF | INTEGER VARIABLE | %MOUSE_Y% | > | 420 | TEXT TO SPEECH | Up.::FEMALE::3::ASYNC
7 | RUN ACTION | WAIT MILLISECONDS | 100
8 | IF | INTEGER VARIABLE | %MOUSE_Y% | < | 350 | TEXT TO SPEECH | Down::FEMALE::3::ASYNC
9 | RUN ACTION | WAIT MILLISECONDS | 100
10 | RUN ACTION | GOTO MACRO LINE | 1
11 | RUN ACTION | TEXT TO SPEECH | You are on the mark!::NEUTRAL::3::ASYNC
Explanation - Example 3
- Line 1: If the mouse is within 50 pixels of (978, 390), jump to line 11 and announce success.
- Lines 2–9: Otherwise, check mouse position and speak “Right”, “Left”, “Up”, or “Down” to guide the user toward the target, then loop back to line 1.
- Line 11: When the target is reached, speaks “You are on the mark!” asynchronously.
Important Notes
- Language Packs: Custom sound pitch (ADULT, TEEN, SENIOR, CHILD) requires additional language packages that are not installed by default.
- Sync vs Async: Use
syncwhen the next action depends on the user hearing the speech first. Useasyncto keep the macro moving while speech plays in the background. - Conditional Use:
TEXT TO SPEECHcan be used as the action in anIFcondition (see Example 3).
WAIT MILLISECONDS
Purpose
The WAIT MILLISECONDS action in Mini Mouse Macro pauses the macro’s execution for a specified number of milliseconds. This is useful for introducing very short delays, synchronizing with fast-paced events, or fine-tuning the timing of actions.
How It Works
- Pauses Execution: The action halts the macro’s execution for the specified duration.
- Millisecond Precision: The delay is specified in milliseconds (1/1000th of a second).
- Resumes After Delay: After the specified number of milliseconds has elapsed, the macro resumes execution from the next line.
Parameters
- Milliseconds: The number of milliseconds to pause the macro.
Examples
Example 1: Introducing a Short Delay
1 | RUN ACTION | WAIT MILLISECONDS | 500
Explanation - Example 1
- Line 2:
WAIT MILLISECONDS | 500pauses the macro for 500 milliseconds (half a second).
Example 2: Fine-Tuning Timing in a Loop
1 | FOR | I | = | 1 TO 100 | DO
   2 | RUN ACTION | KEYPRESS | RIGHT
   3 | RUN ACTION | WAIT MILLISECONDS | 20
4 | FOR | NEXT
Explanation - Example 2
- Line 1: The macro starts a loop that will repeat 100 times.
- Line 2: Sends a right arrow key press.
- Line 3:
WAIT MILLISECONDS | 20pauses the macro for 20 milliseconds. This creates a very short delay between each key press, which might be necessary for certain applications to process the input correctly.
- Line 4: The loop completes after 100 iterations. At line 4 the macro continues the FOR loop until the loop is complete.
WAIT SECONDS
Purpose
The WAIT SECONDS action in Mini Mouse Macro pauses the macro’s execution for a specified number of seconds. This is a fundamental action for controlling the timing of your macros, allowing you to synchronize with events, wait for processes to complete, or simply introduce delays between actions.
How It Works
- Pauses Execution: The action halts the macro’s execution for the specified duration.
- Second Precision: The delay is specified in seconds.
- Resumes After Delay: After the specified number of seconds has elapsed, the macro resumes execution from the next line.
Parameters
- Seconds: The number of seconds to pause the macro.
Examples
Example 1: Waiting for a Program to Load
1 | RUN ACTION | RUN PROGRAM | C:\MyProgram\MyApplication.exe
2 | RUN ACTION | WAIT SECONDS | 10
3 | RUN ACTION | KEYPRESS | Hello World!
Explanation - Example 1
- Line 1: Launches the program
MyApplication.exe. - Line 2:
WAIT SECONDS | 10pauses the macro for 10 seconds, giving the program time to load. - Line 3: Sends the text “Hello World!” to the active window (presumably
MyApplication.exe).
Example 2: Using WAIT SECONDS in a Conditional Statement
1 | IF NOT | PROCESS ID | 12116 | EXIST | WAIT SECONDS | 5
Explanation - Example 2
- This line checks if a process with the ID
12116does not exist. - If the process does not exist, the
WAIT SECONDS | 5action is executed, pausing the macro for 5 seconds. - If the process does exist, the macro continues to the next line without waiting.
Example 3: Simple 20 Second Wait
1 | RUN ACTION | WAIT SECONDS | 20
Explanation - Example 3
- This line pauses the macro for 20 seconds.
WAIT MINUTES
Purpose
The WAIT MINUTES action in Mini Mouse Macro pauses the macro’s execution for a specified number of minutes. This is useful for introducing longer delays into your macros, such as waiting for lengthy operations to complete or scheduling actions at specific intervals.
How It Works
- Pauses Execution: The action halts the macro’s execution for the specified duration.
- Minute Precision: The delay is specified in minutes.
- Resumes After Delay: After the specified number of minutes has elapsed, the macro resumes execution from the next line.
Parameters
- Minutes: The number of minutes to pause the macro.
Examples
Example 1: Waiting for 5 Minutes
1 | IF NOT | PROCESS ID | 12116 | EXIST | WAIT MINUTES | 5
Explanation - Example 1
- This line checks if a process with the ID
12116does not exist. - If the process does not exist, the
WAIT MINUTES | 5action is executed, pausing the macro for 5 minutes. - If the process does exist, the macro continues to the next line without waiting.
Example 2: Server communication with Response Handling
* | Initialize
  * | Display a message to indicate the start of server communication
1 | RUN ACTION | MESSAGE PROMPT | Connecting to server... Please wait.
  * | Simulate server connection with a delay
2 | RUN ACTION | WAIT SECONDS | 2
  * | Send a UDP packet to the server requesting data
3 | RUN ACTION | SEND UDP PACKET STRING | 192.168.1.100::8080::REQUEST_DATA
  * | Wait for and process the server's response
4 | IF | RECEIVE UDP PACKET STRING | 192.168.1.100::8080::SUCCESS::5000 | STRING FOUND | GOTO MACRO LINE | Success
  * | Handle no response or failure
5 | RUN ACTION | MESSAGE PROMPT | No response from server. Please try again later.
6 | RUN ACTION | GOTO MACRO LINE | End

* | Success
  * | Process the successful response from the server
7 | RUN ACTION | MESSAGE PROMPT | Server responded with: SUCCESS.
  * | Finalize the communication process
8 | RUN ACTION | MESSAGE PROMPT | Server communication complete.

* | End
  * | End of the macro
9 | RUN ACTION | MESSAGE PROMPT | Macro finished.
Explanation - Example 1
- Line 1: Displays a message indicating the start of server communication.
- Line 2: Introduces a 2-second delay to simulate establishing a connection to the server.
- Line 3: Sends a UDP packet to the server at
192.168.1.100on port8080with the messageREQUEST_DATA. - Line 4: Waits for a specific UDP response (
SUCCESS) from the server within a 5-second timeout. If the response is received, it jumps to theSuccessheader. - Line 5: Displays an error message if no response is received within the timeout period.
- Line 6: Redirects to the
Endheader to finalize. - Line 7: Processes the successful response and displays a confirmation message.
- Line 8: Displays a final message indicating successful communication.
- Line 9: Marks the end of the macro.
WAIT HOURS
Purpose
The WAIT HOURS action in Mini Mouse Macro pauses the macro’s execution for a specified number of hours. This is useful for creating macros that run at specific times or for introducing very long delays, such as waiting for a daily or overnight task to complete.
How It Works
- Pauses Execution: The action halts the macro’s execution for the specified duration.
- Hour Precision: The delay is specified in hours.
- Resumes After Delay: After the specified number of hours has elapsed, the macro resumes execution from the next line.
Parameters
- Hours: The number of hours to pause the macro.
Examples
Example 1: Waiting for 2 Hours
1 | RUN ACTION | MESSAGE PROMPT | Starting wait...
2 | RUN ACTION | WAIT HOURS | 2
3 | RUN ACTION | MESSAGE PROMPT | 2 hours have passed!
Explanation - Example 1
- Line 1: Displays a message indicating the start of the wait period.
- Line 2:
WAIT HOURS | 2pauses the macro for 2 hours. - Line 3: Displays a message indicating that 2 hours have elapsed.
Example 2: Running a Macro Once a Day
1 | RUN ACTION | MESSAGE PROMPT | Running daily task...
2 | RUN ACTION | WAIT HOURS | 24
3 | RUN ACTION | GOTO MACRO LINE | 1
Explanation - Example 2
- Line 1: Displays a message indicating the start of the daily task.
- Line 2:
WAIT HOURS | 24pauses the macro for 24 hours. - Line 3:
GOTO MACRO LINE | 1jumps back to the first line, creating a loop that effectively runs the macro once every 24 hours.
Important Notes
- System Clock: The
WAITactions rely on the system clock. Ensure your computer’s clock is set correctly for accurate timing. - Power Management: Be aware that if your computer enters sleep or hibernation mode during a
WAITperiod, the macro’s execution may be affected. You might need to adjust your power settings to prevent this. - Long Waits: For very long waits (e.g., multiple days), consider using the operating system’s task scheduler in conjunction with Mini Mouse Macro for more robust scheduling.